
![]()
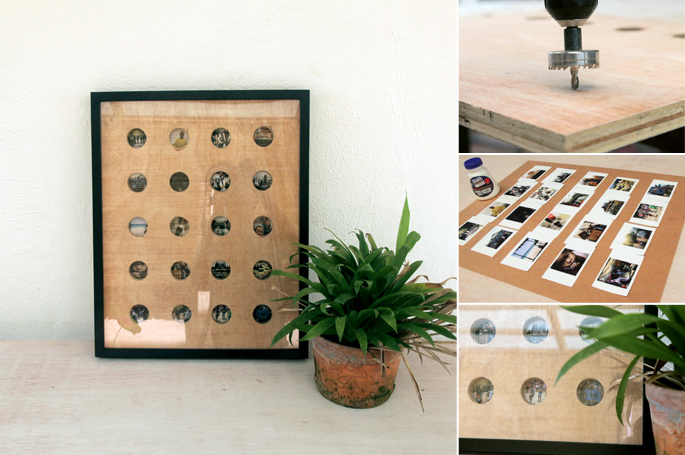
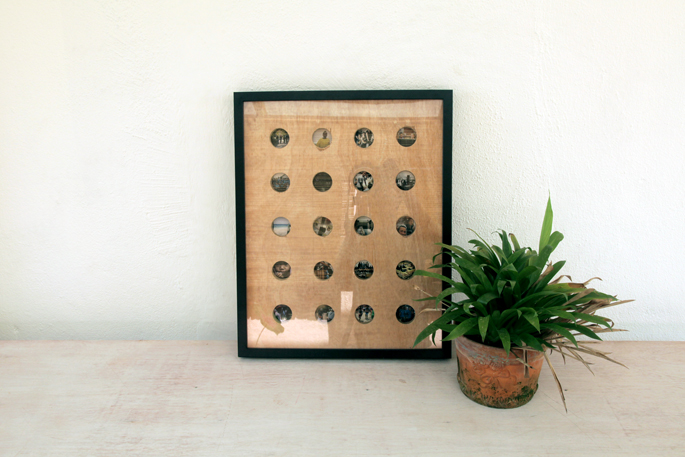
Here is a way to display a group of your travel photos in one frame.

TOOLS
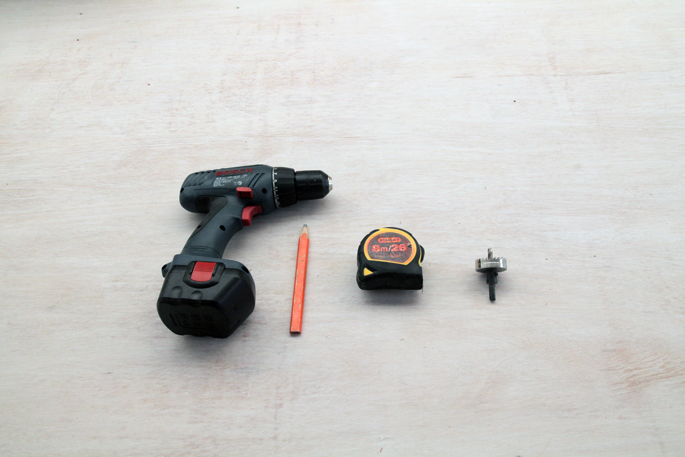
- Corded Drill
It can be done with a battery drill, but only with thinner plywood
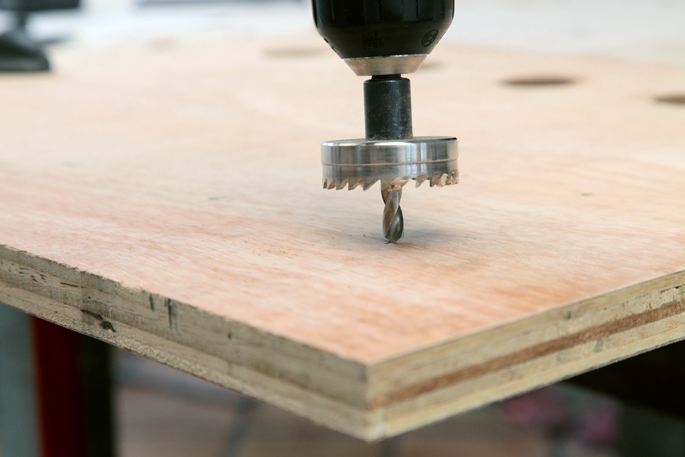
- Saw Drill Bit
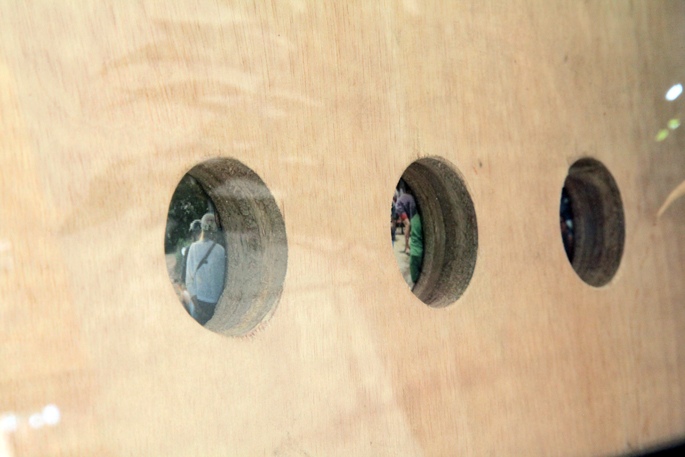
Choose a drill bit the size you want your photos to be. Mine was 3cm wide.
MATERIALS AND SUPPLIES
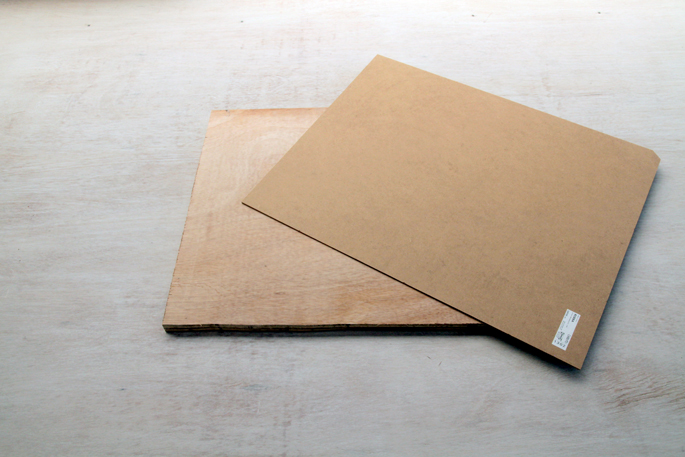
- Plywood
The plywood I used was 1 inch thick. I would recommend going for a thinner one – 1/2 an inch. I used a jigsaw to cut it, but you can have it cut when buying it at your local Home Depot.
- Tape Measure and Pencil
Needed these to create the grid for the holes
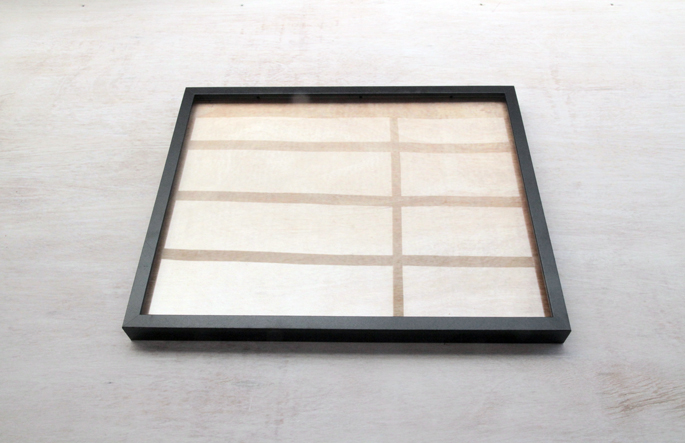
- IKEA RIBBA Frame
The 40 x 50cm one works well since it is deep enough to hold the plywood.
- Small Screws
I used these to hold the plywood in the frame
- Fine Grit Sandpaper
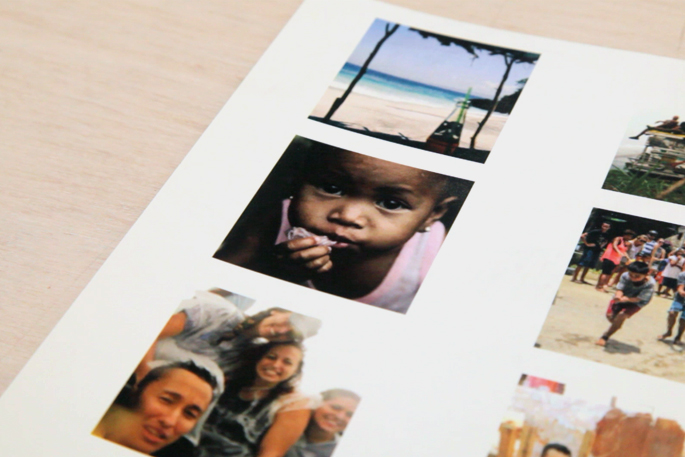
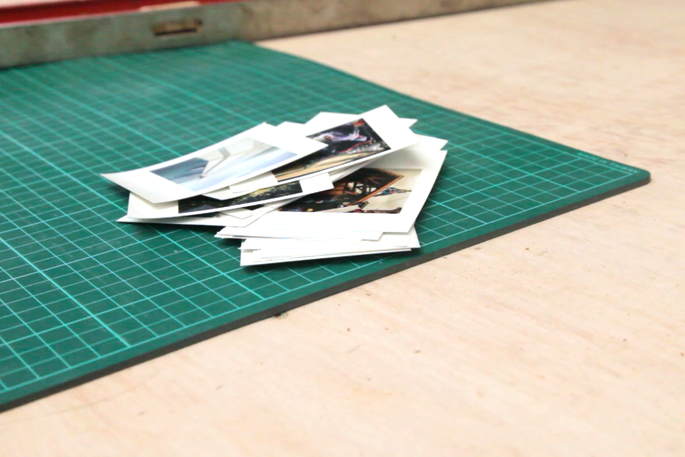
- A3 Sheet of Printed Photos
Since my holes would be 3cm wide, I had 20 5cm square photos printed at the printers on a single A3 sheet.
INSTRUCTIONS
STEP 1: The right size plywood
We need a sheet of plywood that fits into the frame. I took the backboard out of the frame, measured it, and cut the plywood to the same dimensions.

STEP 2: Cut scraps of paper
Next, cut sheets of paper to the size of the photos you will be using. This is to create the general layout of the grid. I have a 3cm hole cutter. So I cut out 5cm sheets of paper.
I played around with the layout to see what looked best, and how many I could fit.
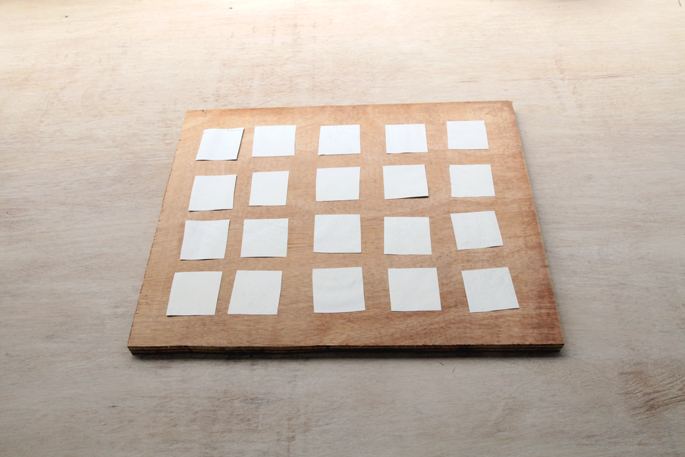
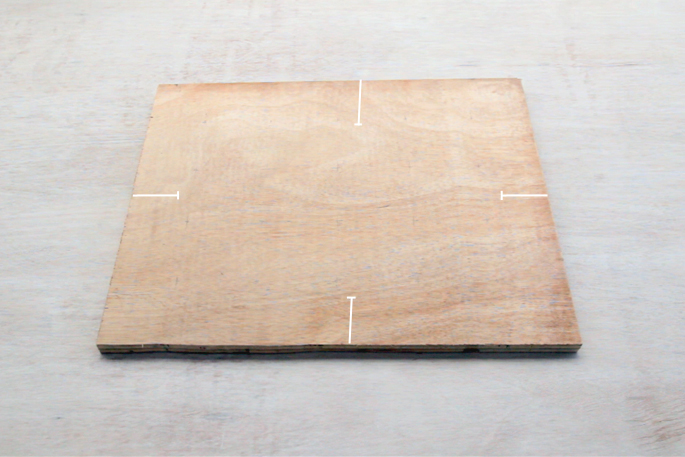
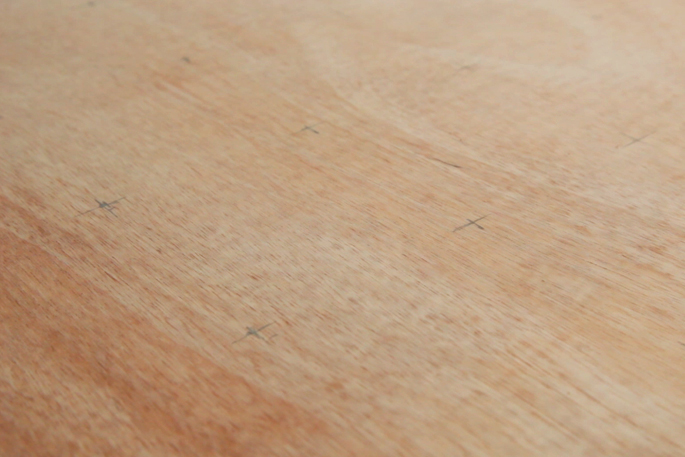
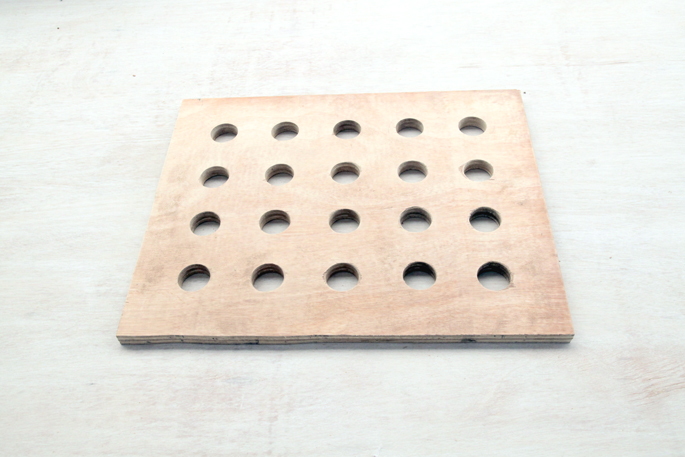
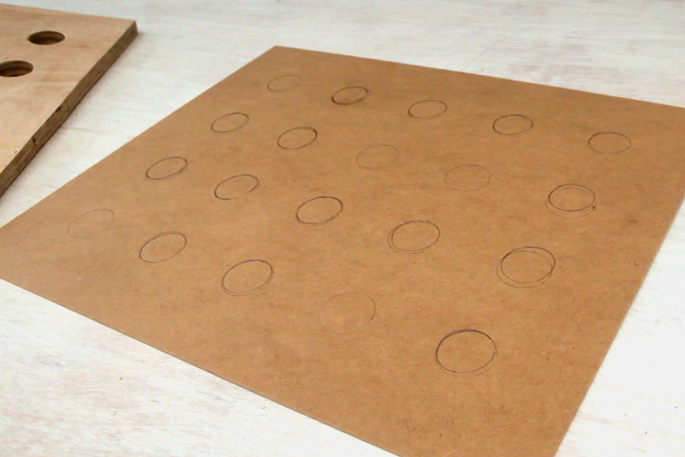
STEP 3: Create the grid
You want to create an equal margin on all sides. Once you have these marked out you can divide the space between the lines by the number of photos you have.
I had a 3 inch margin (from the edge of the plywood to the centre of the photos) on all sides. I then divided the space in-between by the number of photos that were going to be in each row and column.
STEP 4: Drill the holes for the photos
Keep the drill as straight and as perpendicular to the plywood as possible
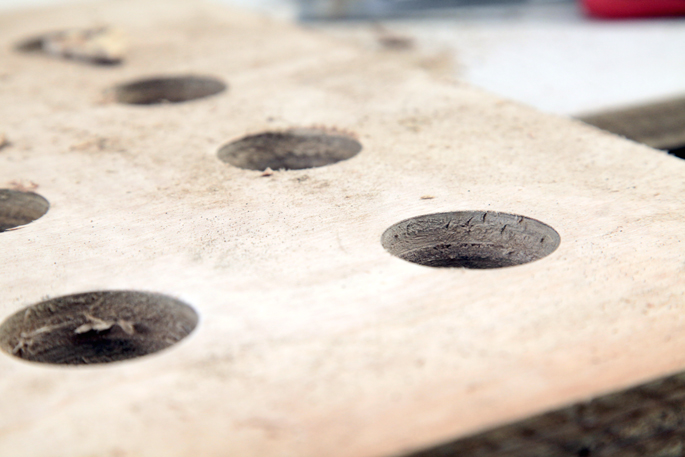
STEP 5: Sand down the rough edges
If you get a bit of tear while drilling the holes, you can use some fine grit sandpaper to sand it down.
STEP 6: Cut out the photos
I cut the photos out with some extra room around them, to make it easier to glue.
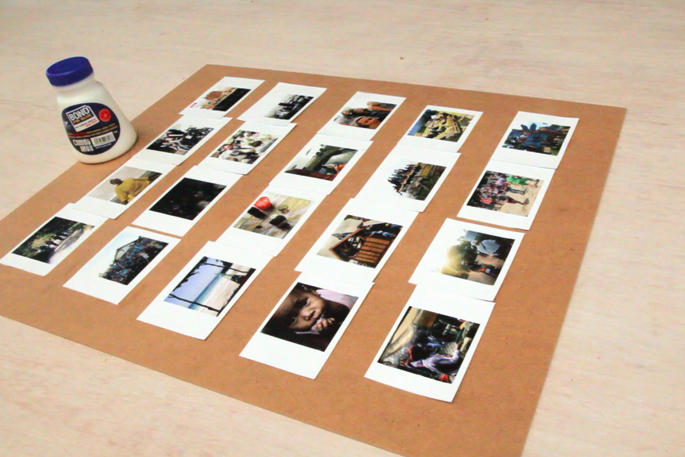
STEP 7: Mark out where the photos will be glued and glue the photos over the circles
I glued the photos to the backboard of the photo frame. I put the plywood with the holes over the backboard, and drew where the holes would be. The photos were then glued over the circles.
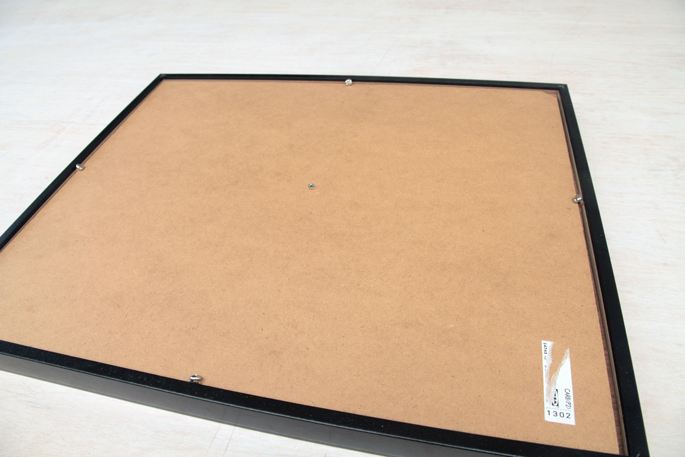
STEP 8: Fixing the plywood and backboard to the frame
Put the plywood into the frame, followed by the backboard with the photos. 4 tiny screws were screwed into the frame to keep the backboard and plywood in place.

Email me at jacob@hometreeatlas.com with photos if you make your own, or if you have any questions.
For more DIY projects and ideas, visit The Mill @ Home Tree Atlas


Comments are closed.