Home Tree Atlas

Stress Free Living: How To Declutter Your Bedroom

Stress Free Living: How To Declutter Your Bedroom

Imagine checking into a hotel room and how relaxing it can be. You only brought what you need. The hotel room is tidy, relaxing, and clutter free. Creating this feeling in your own bedroom isn’t that hard. In this post I’ll show you the 4 checklist steps on how to organize your bedroom to declutter and create a relaxing space.

Step 1: Identify the Clutter Areas

Clutter piles up in certain areas. The first step to declutter your bedroom it is to take a look around the room and see where the problem areas are.

Some areas to watch out for include:

  • Bedside tables
  • Dressing tables (makeup, jewellry, etc.)
  • Ontop of counters
  • Inside closets
  • Inside drawers

Step 2: Pick Which Way you Want to Declutter

A) Bit by Bit: Pick one area and tackle that area for the day. A draw, or say the bedside table. This decluttering method works slowly, but is ideal if you are limited on time. The upside is that you accomplish decluttering one area, instead of trying to tackle the whole room and not really decluttering any one area. You slowly build momentum.

B) All in One: Grab some boxes, and chuck everything (or almost everything) in the boxes and put these boxes in another room. This way you get the decluttered feeling straight away. You’ll then go through and sort through the boxes outside of the bedroom when you have time.

C) Trash It: Grab trash bags, and storage boxes and take the day to completely go through everything and either trash it, store it, or find a place for it in the bedroom. Make it a goal of doing it in one day. Otherwise it might just drag on and never get done. Be ruthless in throwing things out, and once you build momentum you’ll be able to work faster and faster. Don’t stop and think too much on one item, keep moving forward.

Step 3: Clutter Busters

To beat clutter, you’ll need to find a way to keep things a bit more organized. The key here is to make it as easy as possible for you to keep things tidy.

The easiest way to do this is by having ‘clutter bowls’. These are decorative bowls placed in clutter prone areas. Have one by the bedside or on the dresser to hold your keys, wallet, phone, coins, etc.


These bowls group together clutter items, making for a cleaner and tidy space. It is a quick fix. The same can be done in drawers and on shelves.

There are more sophisticated organisation and declutter options than the ‘clutter’ bowls, but the bowls are the fastest and easiest way to go.
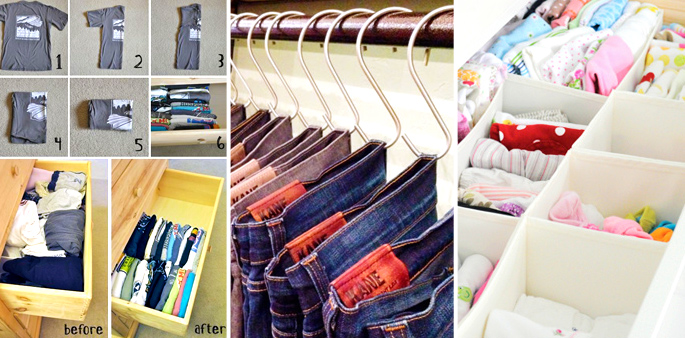
Drawers

Drawers are where things go to get lost. They get buried, and pushed to the back. Horrible places. You should never really have just one big draw open like that if you want to store a number of items in them. Instead have drawer dividers. This helps group things together, creates an isolated space for items, and prevents things from getting mixed up.

Shelves

The same thing for drawers can be said for shelves. If you are storing a number of items on a shelf, and they get moved around a lot, then you’ll want to have shelf dividers to keep things inline.

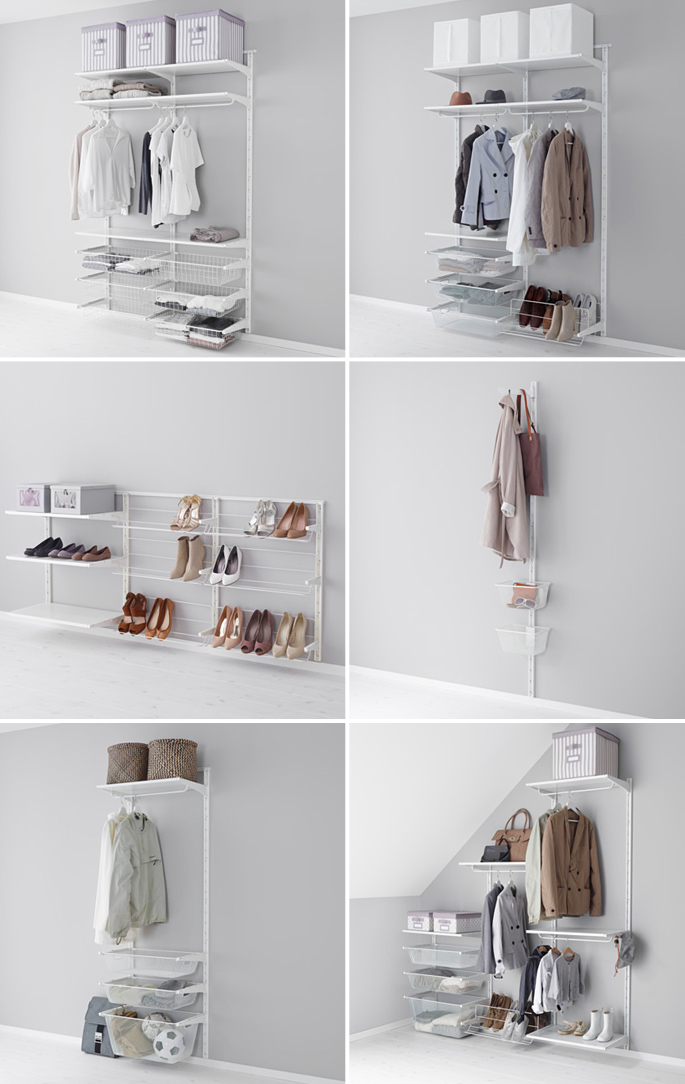
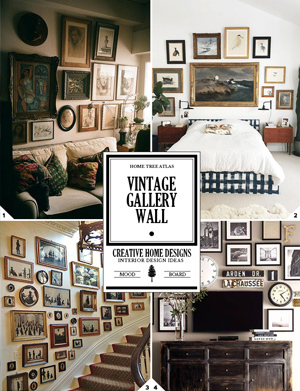
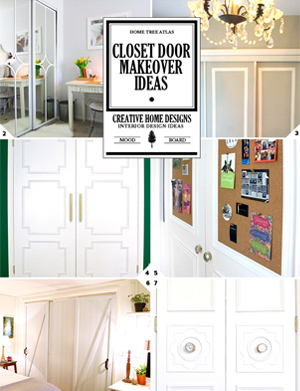
For specific ideas on organizing your closet, have a look at my post here:

For shoes, have a look here:

And for storage ideas around the bedroom have a look at my post here:

Get Rid of Visual Clutter

Clutter usually comes in the small form. Bits and pieces here and there. But I think there is also visual clutter that needs to be taken of, which helps greatly in creating a relaxing space.

For example, imagine if your closet didn’t have doors and you could see everything inside of it from your bed. I’d rather have curtains put up so it is hidden away.

If you have gym equipment, or something like a home office – try and hide it away by hanging up a curtain or build a DIY room divider (Ideas Mood Board: DIY Room Divider).

Try and keep your bedroom visually clutter free.  Store items in decorative storage containers such as wicker baskets, wire baskets, galvanized containers, etc.


Step 4: Build on That Clutter Free Feeling

Now that you have a more relaxing bedroom space, you’ll want to keep it that way. One way to do this is to buy premium statement pieces for your bedroom. Spending a little money on some premium and luxury items will make you want to take care of your room, and make sure that you keep it tidy and clutter free.

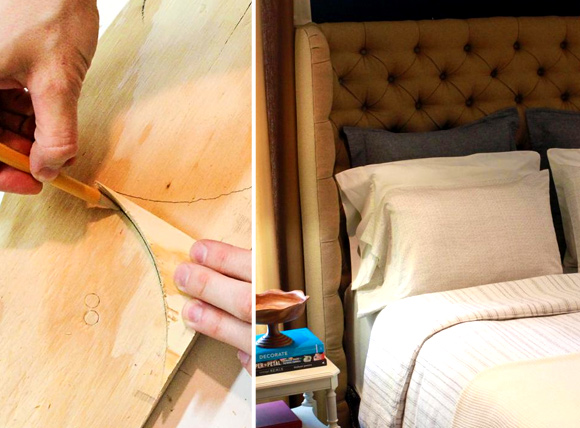
Since the bed is the biggest piece in the bedroom, making it the focal point, I’d say buy some premium bedding.

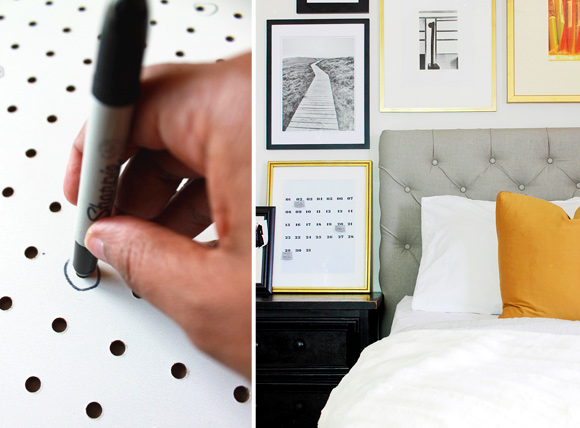
Wall art is another area to splurge.

If the bedside table is a problem area, then splurge on an art/decor piece that can be placed on the table. Same goes for any countertops. Replace the clutter with premium, highly loved decor pieces.

More bedroom posts that you might like:

February 23, 2016 in Bedroom

ReDesigning Your Closet: Ideas and Steps on How To Organize Your Closet and Clothes

ReDesigning Your Closet: Ideas and Steps on How To Organize Your Closet and Clothes

There is no one size fit all solution for when it comes to organizing your clothes and a closet. There are however some concrete steps on how to tackle your own closet, create a system that works for you, and get everything organized in a way that fits your needs. Below I go over the steps and all of the questions you need to ask yourself to get your closet organized.

Step 1: Trimming down 80/20

Pretty much everybody could do with some trimming down in their closet. You have to be pretty ruthless here, and get rid of as much as possible.

Trimming down the number of clothes you have will mean:

  • You’ll have less decision making to do when you open up the closet
  • Every time you open your closet, it will be easier to get dressed – because you will really like everything in your closet
  • It is easier to get dressed when you have less

3 Questions To Ask Yourself

  • “What do I love in my closet vs. what is just ok?” (try and git rid of the ok items)
  • “Have I worn it in the last 12 months?” (Figure out which pieces you use the most, and the ones that just sit round. We tend to use 20% of our clothes 80% of the time – those are the pieces you want to keep)
  • “If I saw it in a store now, would I buy it?”

If you have any sentimental items that are too hard to get rid of, store them out of the way.

Step 2: Figuring Out Your Needs

The next step is to figure out what you need in a closet system.

These questions below will help you figure out what sort of closet system you need. If you have dresses to hang up, you’ll maybe need more railings than shelves. If you have winter vs summer clothes to store, then you’ll probably need closet storage containers that can be closed up and stored away at the top of the closet, or under the bed.

The items you use the most, you’ll want to be super organized and the easiest to get to. These pieces should be upfront and center and clutter free.

  • What items do you need in your closet? What can you store out of the way?
  • Do you have long dresses?
  • Winter and summer wear?
  • Do you need to store linens?
  • Do you need to store other items?
  • What are the clothes you use the most? Workwise, and weekend wise?

Step 3: Designing Your Closet

Once you know what you need to store, the next step is to figure out how to organize your closet. So the next thing you need to do is to compare what are your needs (from step 2), with what you have to work with as your current closet – and what you need to change to get it right.

Are you building a closet from scratch, or do you have drawers, or just railings. Can you expand your closet? Are you able to store non essential items out of the way, under the bed or in a different room.

  • What are you going to need in your closet system?
  • If you have drawers, then you’ll need dividers to keep things organized – get some here
  • If you don’t have enough railings or closet shelving, is there a way to change it up
  • If you need more shelving than railing space, then you could get one of these hanging closet organizers and shelving units
  • Do you need shoe racks to keep your shoes tidy?
  • If you use drawers, could you do with drawer dividers to keep things organized?
  • Shelf dividers can help keep shelf space tidy
  • Do you need zip up storage or bins with lids to store seasonal items?

One great closet organization system design is IKEAs ALGOT. You can pick and choose railings, shelving, and all of the containers to store things away. These can be fitted into existing closets.

ReDesigning Your Closet: Ideas and Steps on How To Organize Your Closet and Clothes

A Few Storage and Closet Organization Ideas

Here are a few quick ideas on storing clothes in your closet. You’ll need to find the right ideas that fit your needs and the space you have.

ReDesigning Your Closet: Ideas and Steps on How To Organize Your Closet and Clothes: Simple storage ideas

1) Here is a way to fold your shirts so they stand up in your drawers – making them easy to get to. 2) Steel hooks can be used to hang up pants – the ones pictured are expensive ones available on Etsy but you can get cheap ones here. 3) Drawers are where things go to get lost. Keep them organized with dividers. Picture from Lifeflix – get your drawer organizers here.

If you need help with shoe storage, head on over to my other post: Unique Closet and Entryway Shoe Storage Ideas

Need Extra Storage Space?

When storing things in the bedroom it is best to keep things hidden away and out of sight. This creates a less visually cluttered bedroom.

  • Hooks or even a pegboard attached to the inside of the closet doors is one way of adding storage space.
  • Under the bed rolling drawers
  • A bedroom bench with storage
  • Do you have any suitcases that are being stored away? These can be used to keep seasonal wear.
  • Alternative ideas include over the door hooks, a standing coat rack, or a ladder to hang up everyday cloth items like jackets (Ideas for Decorating With Ladders).

If you have a small closet, then have a look at this post for some creative ideas: Smart Small Closet Ideas and Storage Organization Tricks.

Style Tip: Get Decorative

It wouldn’t hurt to make your closet space look good, at the same time keeping it organized. You can easily do this by getting more decorative storage items such as:

  • Wicker baskets
  • Wire baskets
  • Enamel buckets

Check out my storage page for more stylized ideas.


Adding some closet lights, such as battery powered motion sensing lights, will help you see things in the back of the closet.

How about this chic simple closet makeover idea from Popsugar:

ReDesigning Your Closet: Ideas and Steps on How To Organize Your Closet and Clothes: Closet makeover

For more closet makeover ideas, check out my post here: DIY Challenge: Give Your Closet Doors a Makeover

Getting Started

Step 1: Trim down

Pull everything out of your closet. Get ruthless in decluttering and getting rid of everything that you don’t need.

Step 2: Figure out your needs

Once you are left with just the items that matter, you can start to plan out what type of closet you’ll need to keep your clothes organized.

Step 3: Adjusting your closet design

You can start to adjust and customize your closet to fit your needs. By adding or taking away railings, drawers, or by buying drawer organizers and shelf dividers.

More closet related posts:

header image credits: 2/3

February 23, 2016 in Closets, Storage

Is That a Pallet Swimming Pool? 24 DIY Pallet Outdoor Furniture Creations and Big Builds

Is That a Pallet Swimming Pool? 24 DIY Pallet Outdoor Furniture Creations and Big Builds

There is so much creativity in these DIY outdoor pallet furniture and build creations. That’s what happens when you’re limited to building with scrap, salvaged, and recycled wood. Not all of the pallet builds below have instructions, but they are straight forward enough to be built from looking at the pictures.

Pallet Furniture

1. A pallet swing bed

Is That a Pallet Swimming Pool? 24 DIY Pallet Outdoor Furniture Creations and Big Builds: #1 A pallet swing bed

From The Merry Thought

2. DIY swing chair

Is That a Pallet Swimming Pool? 24 DIY Pallet Outdoor Furniture Creations and Big Builds: #2 DIY swing chair

From Instructables

3. DIY daybed and side table combo

Is That a Pallet Swimming Pool? 24 DIY Pallet Outdoor Furniture Creations and Big Builds: #3 DIY daybed and side table combo

From Lovely Greens

4. DIY outdoor seating lounge

Is That a Pallet Swimming Pool? 24 DIY Pallet Outdoor Furniture Creations and Big Builds: #4 DIY outdoor seating lounge

From Instructables

5. Cinema night made out of pallets

Is That a Pallet Swimming Pool? 24 DIY Pallet Outdoor Furniture Creations and Big Builds: #5 Cinema night made out of pallets

From Home Tree Atlas

6. Cozy balcony lounge (pallet walls, flooring seats, couch, planter, table)

Is That a Pallet Swimming Pool? 24 DIY Pallet Outdoor Furniture Creations and Big Builds: #6 Cozy balcony lounge

From A Piece of Rainbow

7. Outdoor pallet bar diy

Is That a Pallet Swimming Pool? 24 DIY Pallet Outdoor Furniture Creations and Big Builds: #7 Outdoor pallet bar diy

From Green Thumb Print

8. Pallet dining table set

Is That a Pallet Swimming Pool? 24 DIY Pallet Outdoor Furniture Creations and Big Builds: #8 Pallet dining table set

From Brit + Co

9. Cute pallet picnic table

Is That a Pallet Swimming Pool? 24 DIY Pallet Outdoor Furniture Creations and Big Builds: #9 Cute pallet picnic table

From Needles and Nails

10. Table and succulent planter combo

Is That a Pallet Swimming Pool? 24 DIY Pallet Outdoor Furniture Creations and Big Builds: #10 Table and succulent planter combo

From Make

11. Round pallet table top pattern

Is That a Pallet Swimming Pool? 24 DIY Pallet Outdoor Furniture Creations and Big Builds: #11 Round pallet table top pattern

From Fruhstuck

Pallet Builds

12. Tool storage DIY

Is That a Pallet Swimming Pool? 24 DIY Pallet Outdoor Furniture Creations and Big Builds: #12 Tool storage DIY

From Our Little Acre

14. A charming DIY pallet gate

Is That a Pallet Swimming Pool? 24 DIY Pallet Outdoor Furniture Creations and Big Builds: #14 A charming DIY pallet gate

From Funky Junk Interiors

15. A mini outdoor reading room

Is That a Pallet Swimming Pool? 24 DIY Pallet Outdoor Furniture Creations and Big Builds: #15 A mini outdoor reading room

From Little Bit Funky

16. A kids fort (made out of apple crates)

Is That a Pallet Swimming Pool? 24 DIY Pallet Outdoor Furniture Creations and Big Builds: #16 A kids fort (made out of apple crates)

From The Little Veggie Patch Co

17. The pallet wigwam / tepee

Is That a Pallet Swimming Pool? 24 DIY Pallet Outdoor Furniture Creations and Big Builds: #17 The pallet wigwam / tepee

From Laura Crane

18. A DIY pallet playhouse

Is That a Pallet Swimming Pool? 24 DIY Pallet Outdoor Furniture Creations and Big Builds: #18 A DIY pallet playhouse

From Instructables

19. A simple pallet bike rack

Is That a Pallet Swimming Pool? 24 DIY Pallet Outdoor Furniture Creations and Big Builds: #19 A simple pallet bike rack

From 1001 Pallets

20. Rustic walkway path

Is That a Pallet Swimming Pool? 24 DIY Pallet Outdoor Furniture Creations and Big Builds: #20 Rustic walkway path

From Funky Junk Interiors

21. Mini foot bridge

Is That a Pallet Swimming Pool? 24 DIY Pallet Outdoor Furniture Creations and Big Builds: #21 Mini foot bridge

From Home Talk

22. Pallet storage shed

Is That a Pallet Swimming Pool? 24 DIY Pallet Outdoor Furniture Creations and Big Builds: #22 Pallet storage shed

From Calion

23. The pallet deck

Is That a Pallet Swimming Pool? 24 DIY Pallet Outdoor Furniture Creations and Big Builds: #23 The pallet deck

From Remodelaholic

24. 9 pallets = A pallet pool?

Is That a Pallet Swimming Pool? 24 DIY Pallet Outdoor Furniture Creations and Big Builds: #24 A pallet pool

From Torben Jung

More DIY idea posts:

February 19, 2016 in DIY, Outdoors

How to Design Your Own DIY Tufted Headboard in 4 Steps

How to Design Your Own DIY Tufted Headboard in 4 Steps

Building your own DIY tufted headboard is pretty easy to do and cheap. Most of the tutorials below follow pretty much the same set of instructions (foam and plywood, thread buttons, etc.). The more challenging part is in designing an elegant and professional looking headboard. The 4 steps I’ve outlined below will take you through how to design your own.

STEP 1. The Shape: Will you be going for the classic rectangle or cut your own shape?

The first step is going to be getting a backboard for your headboard. Which means figuring out the shape that you want. Most people will go with the simple rectangle. But it wouldn’t be so hard to create your own custom shape. Here are two ways of creating a shape

A. A sheet of plywood and a power jigsaw (you can see an example of a custom cut headboard in the ‘Border’ section below.

B.Transform an old headboard or thrifted one into a tufted headboard.

Here are a few shape ideas to choose from:

How to Design Your Own DIY Tufted Headboard in 4 Steps: Step #1 The shape

And here is a tutorial by Cre8tive Designs Inc for transforming an old king headboard, with an elegant shape, into a tufted one:

How to Design Your Own DIY Tufted Headboard in 4 Steps: Step #1 The shape

STEP 2. A Border: Do you want to build a border?

The next step is deciding if you want to have a border. Most people don’t, which creates a classic look.

Some people like to add studs, but that can be hard to pull off a professional look. A more stylish option is to create a simple border for your tufted headboard. Just like Amy did over at The Idea Room.

How to Design Your Own DIY Tufted Headboard in 4 Steps: Step #2 A border?

Or how about creating a cozy wingback DIY upholstered headboard. You can find instructions to build the headboard in the picture below over at DIY Network:

How to Design Your Own DIY Tufted Headboard in 4 Steps: Step #2 A border?

STEP 3. The Buttons: How would you like to layout your buttons?

There are a few choices here. You have the more popular diamond shape, seen in this queen sized DIY bed by Homemade Carmona:

How to Design Your Own DIY Tufted Headboard in 4 Steps: Step #3 The buttons

There are also square tufts – a tutorial by Remodelaholic:

How to Design Your Own DIY Tufted Headboard in 4 Steps: Step #3 The buttons

Or you can go with less buttons to create a more minimalist and modern wall mounted tufted headboard by Shift Ctrl Art:

How to Design Your Own DIY Tufted Headboard in 4 Steps: Step #3 The buttons


STEP 4. The Fabric Choice: What look are you going for?

Fabric for the DIY Headboard: The bed takes up the most space in the bedroom, which makes it a focal point. This means the style of your bed determines the style of the bedroom. And the includes the headboard, sheets, and bed frame. Imagine if one day you had black bedsheets, then the next day red. It will completely change the feel in the room.

This all means that you’ll want to take some time to think about the fabric that you want to use for your DIY padded headboard. What color bedsheets do you like using and do you use, and how will this match/clash with the color of the headboard.

Simple and elegant choices include dark grey, light grey, and cream/off white cloth.

How to Design Your Own DIY Tufted Headboard in 4 Steps: Step #4 The fabric choice

Fabric for The Buttons: There are 2 options when it comes to the buttons 1) Buy pre-made fabric buttons or 2) Buy a button kit (get one hereand use the same fabric as your headboard.

Those are the 4 steps to designing your own DIY tufted headboard. Send pictures here if you make your own. For more ideas and inspiration, check out my other headboard posts:

Related Posts Plugin for WordPress, Blogger...
February 18, 2016 in DIY