Here is a great selection of air dry clay projects to try out at home. My own next personal experiment will be to make shadow candle holders.
On The Wall
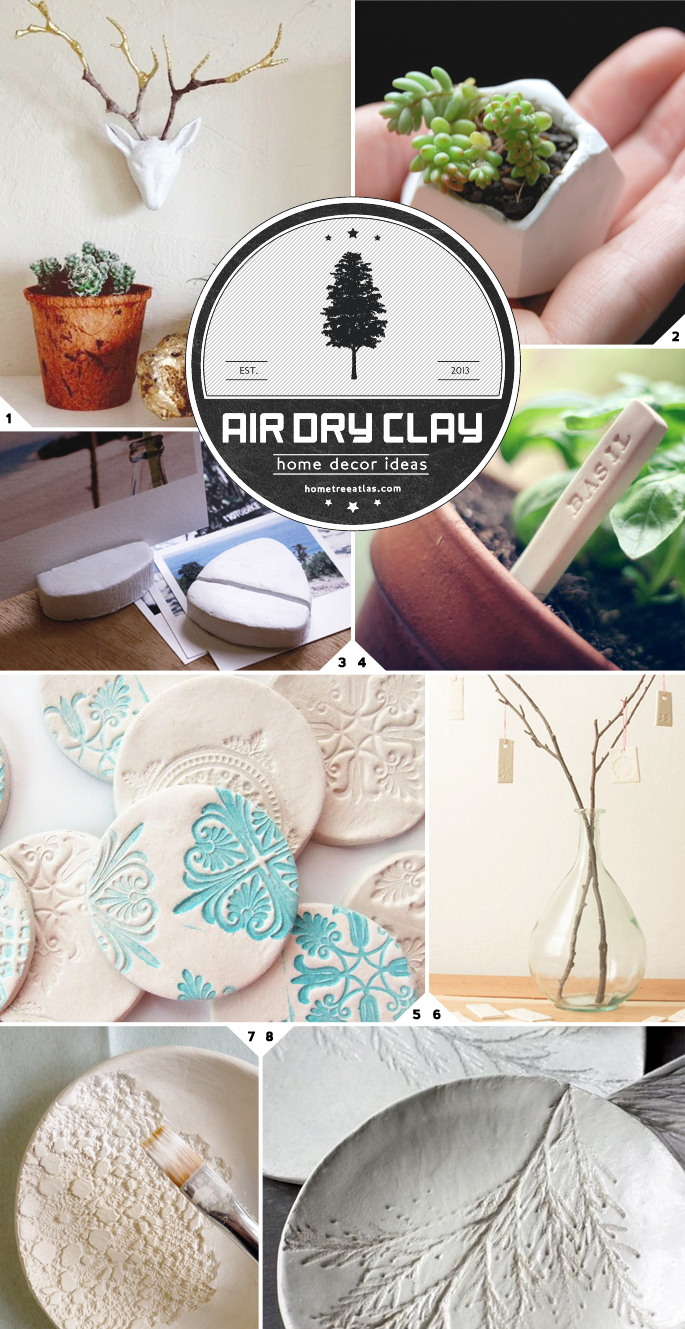
The first DIY project is a good one – a faux deer bust, complete with antlers as seen in picture (1). Heather from Poppy Haus even has step by step directions on how to make the deer head shape, so even someone like me, or kids, could artistically create it.
Green Thumb
The tiny succulent planters in picture (2) were made using polymer clay, but I’m sure air dry modeling clay would work too. Head on over to Transient Expression for the tutorial.
Over at Wit and Whistle Amanda used oven baked clay to create some elegant DIY garden markers (3).
Displaying Travel Moments
One simple DIY project that I did myself, was to use air drying clay to create minimalist photo stands for my travel photos (4). You can find out more about them here: Simple DIY Clay Photo Display Stands.
Get a little homemade art up on your fridge by using stamps on air drying clay to create magnets – just like the ones from Gathering Beauty in the picture (5).
On The Table
Clay can be used to create hanging tags. Arrange them on a branch like in picture (6) and you have a homemade centrepiece.
One of the more popular air dry clay ideas is to make bowls and trays. And by using organic pieces like leafs or branches, you can create elegant stamps. Follow along with the instructions here on Urban Comfort to create the organic inspired trays in picture (7). Or how about using a doily to stamp an intricate detailed design (8) – made by VT Wonen.
More home decor DIY posts:
 After working on the