
![]()
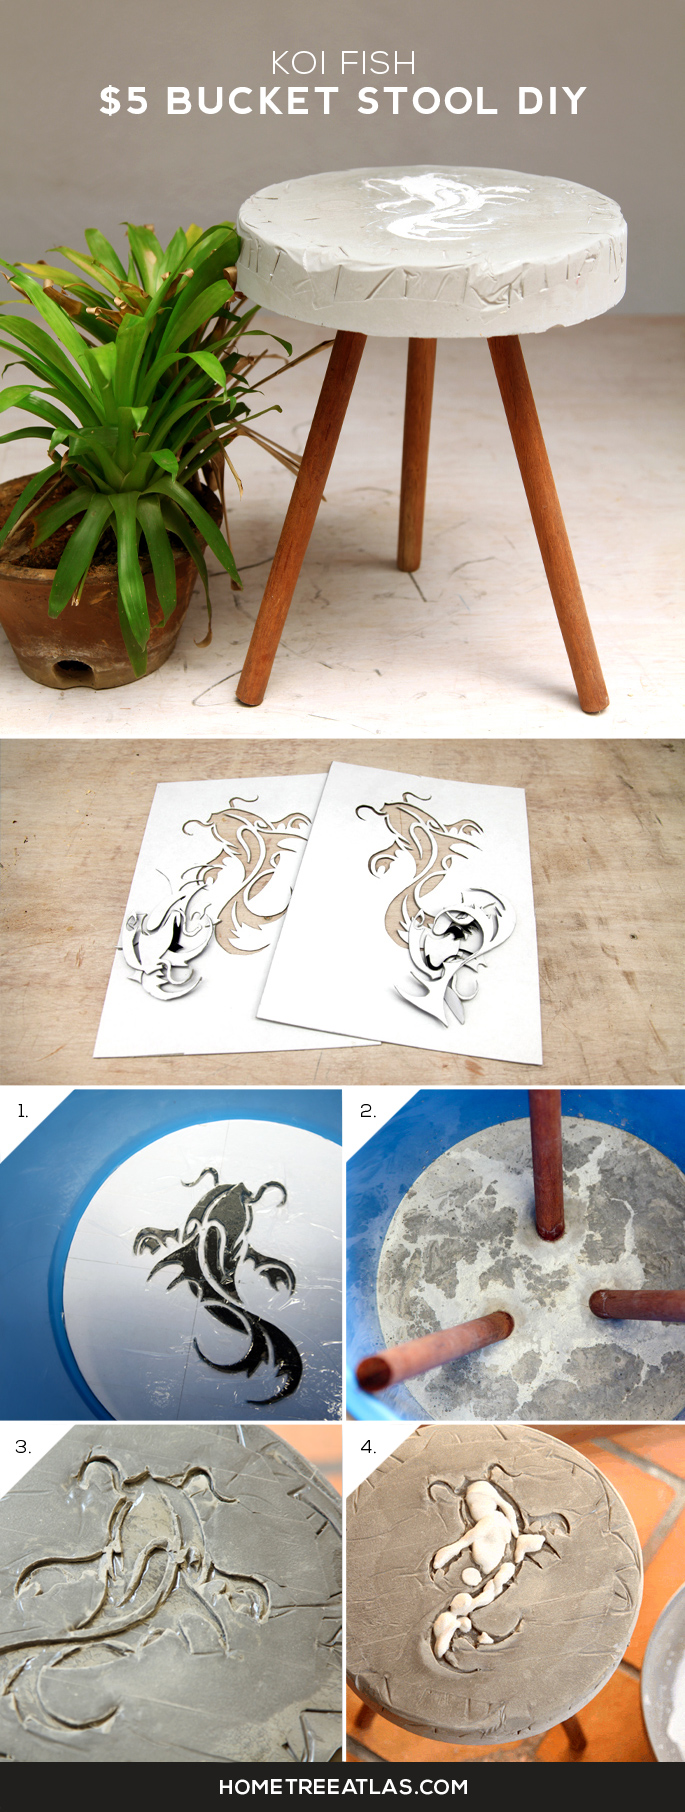
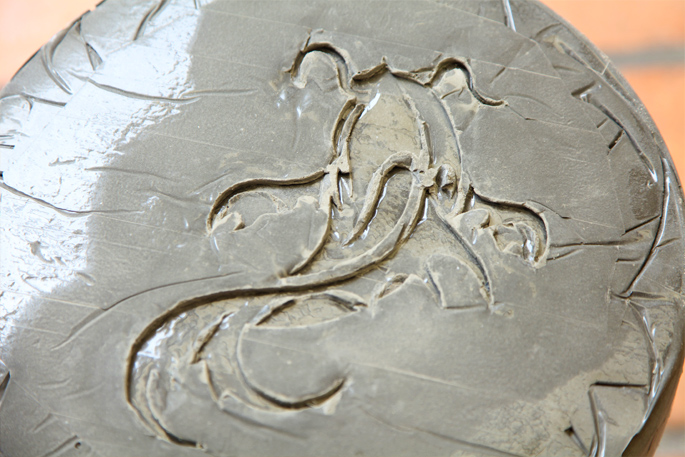
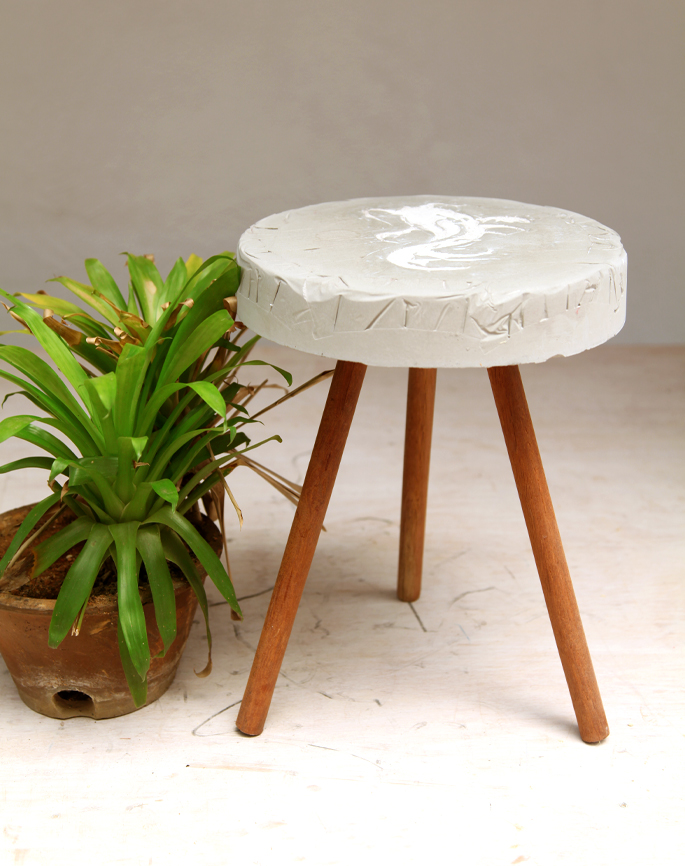
The simple bucket stool DIY, where you fill a bucket with cement and poke in some dowels, comes from Ben over on Homemade Modern. I wondered if there was any way to customize the face of the stool. So I ended up experimenting with debossing / inlaying an image into the cement – using cardboard.
You can check out my other experiments trying to emboss cement (again, with cardboard) here: DIY Experiment: Embossing Cement Challenge.
TOOLS
- Saw
You’ll need a saw jigsaw/circ saw/hand saw to cut the dowels to length
MATERIALS AND SUPPLIES
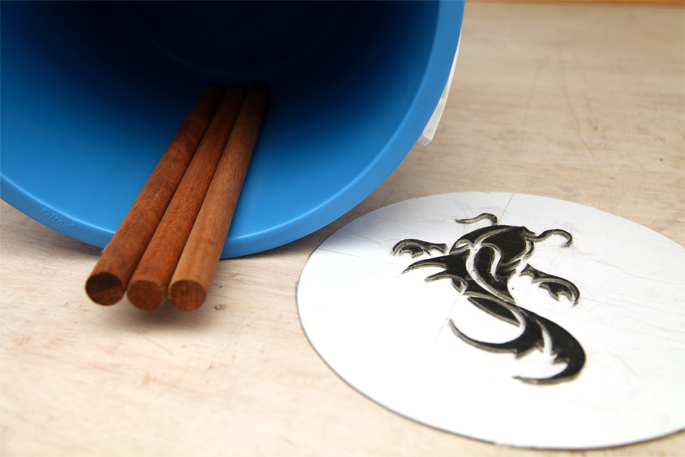
- Bucket
Ben uses a 5 gallon bucket from Home Depot, with a smooth bottom. I used what I could get my hands on. You basically need a bucket wide enough that you can sit on.
- Dowels
1 1/4 inch dowels 48 inches long. For mine, again I used what was available – which was much thinner dowels – they are still sturdy stool legs.
- x2 Concrete
I went ahead and mixed my own cement – buying concrete and sand. You can always get Quikrete 5000 concrete which is premixed for you, so you just need to add water.
You’ll also need another color of concrete to pour into the inlay. You can do this by buying a bag of white concrete such as Quikrete Countertop mix in white. Or just buy the white concrete and a concrete pigment dye (like red) – instead of buying 2 bags on concrete.
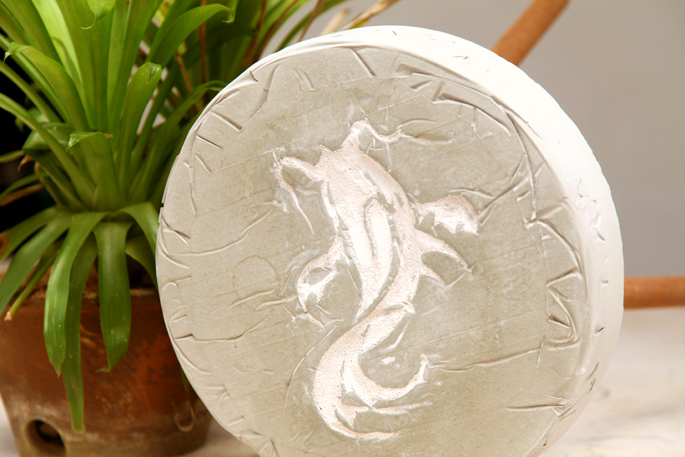
- Illustration
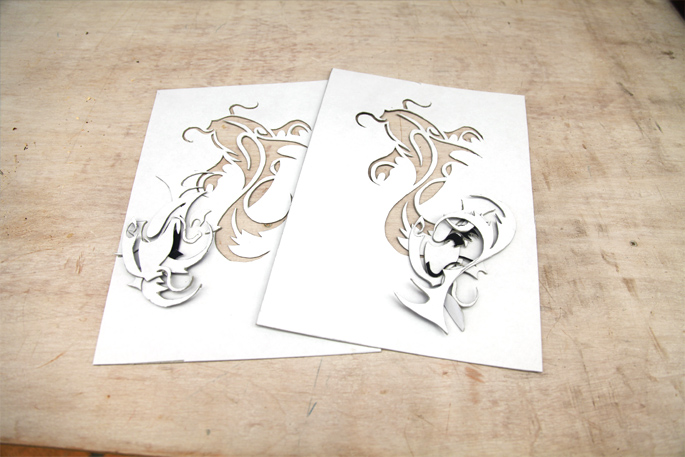
I found my illustration by searching for ‘koi fish black and white illustration’ on google. You’ll need to print this out (in reverse) the size you’ll want it on your seat – I did this at home with on an A4 sheet of paper.
- Cardboard, Packing Tape, Compass (or String and a Pencil)
You’ll need enough cardboard to make 2 templates of your design and to make a circle the size of your bucket. The packing tape is going to be used to cover the template to make it waterproof.
- Fine Grit Sandpaper (around 100-grit)
INSTRUCTIONS
Step 1: The Design
So you’ll need to print out your design. Remember it needs to be in reverse since it will be a mirror image when you are done.
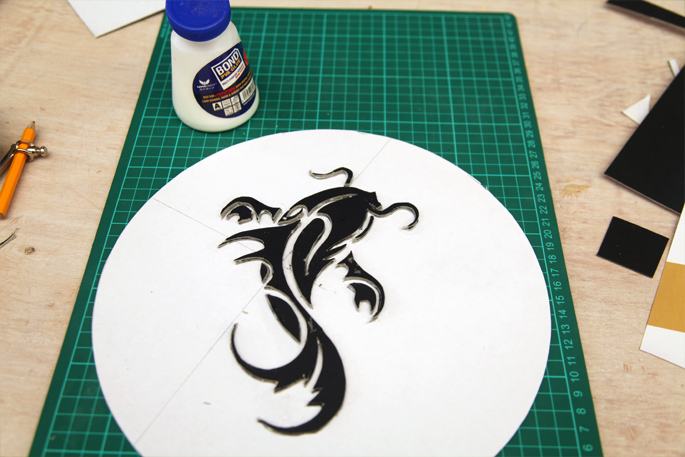
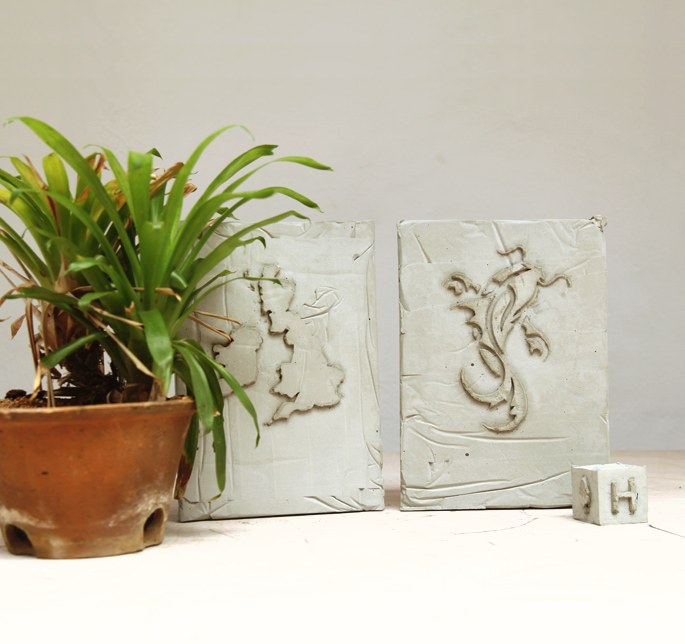
I ended up cutting two sheets of cardboard to create the mold shape for the cement pour. I did this so I could double up the cardboard to get a deep inlay in the seat. I saved the scrap piece of the template (the outside) to create the embossed cement plaques DIY (seen at the end of this post).
Step 2: The Mold
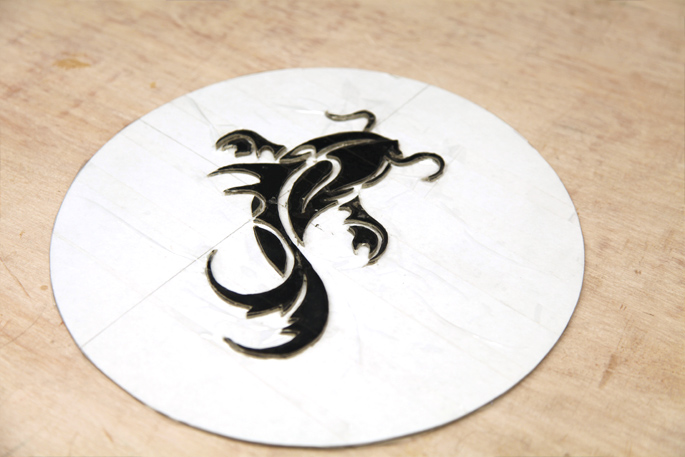
The next step is measure the size of your bucket and cut out a circle using the cardboard. A compass or a piece of string and a pencil can be used to mark out the circle.
Then glue the pieces of your design together and onto the circle.
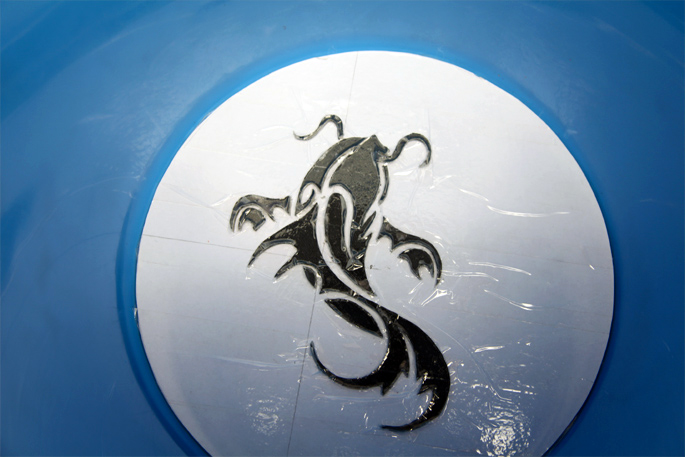
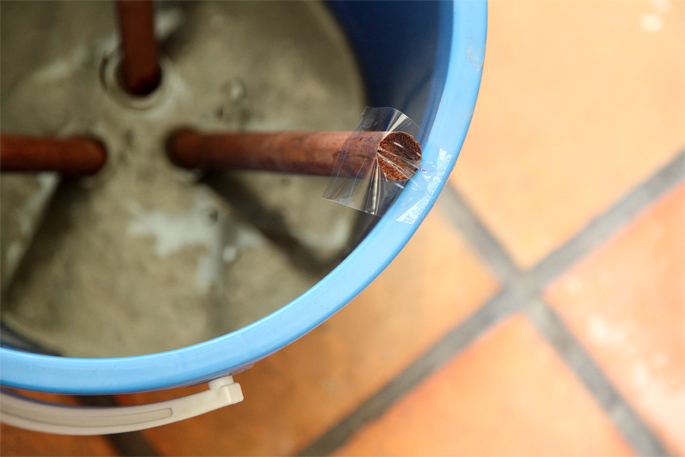
Step 3: Waterproofing
Use the packing tape to cover the the mold to waterproof it. Then put the mold into the bucket. I went ahead and put taped up the sides where the cardboard disk meets the bucket.
Step 4: Cutting the Legs
I ended up cutting the legs to the right height I wanted them. Ben’s instructions are to cut them 16″ long.
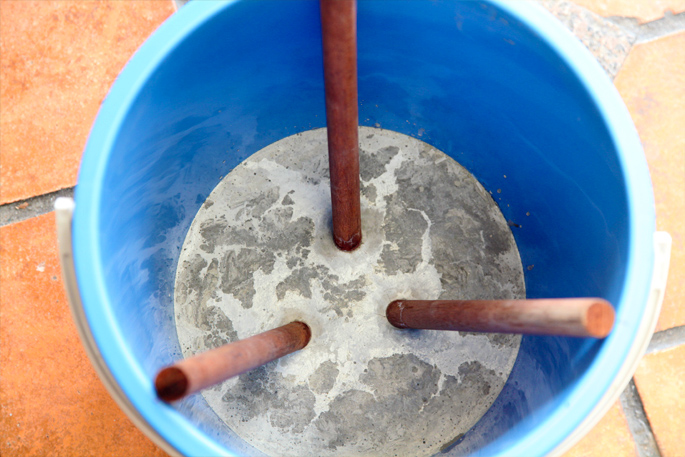
Step 5: Pouring the Cement
Mark 3 inches from the bottom of the bucket upwards. This will let you know when to stop pouring the cement.
Mix up your concrete with water and start pouring. You want the mix to be a bit watery so that it covers the mold well. Shake the bucket gently and tap on the sides of it to bring up the air bubbles.
Step 6: Adding the Legs
Make a mark on the dowels 1 1/2 inches from one end. This is how far into the cement you’ll want to push the dowels in. Then place them equally around the bucket.
I used tape to hold down the dowels, since they kept wanting to float up.
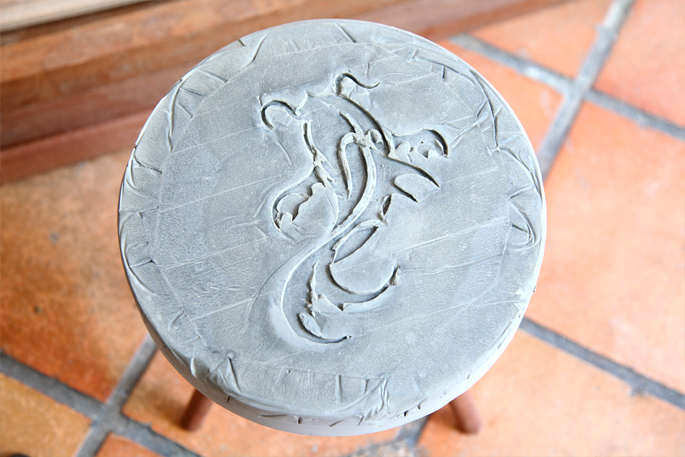
Step 7: The Reveal
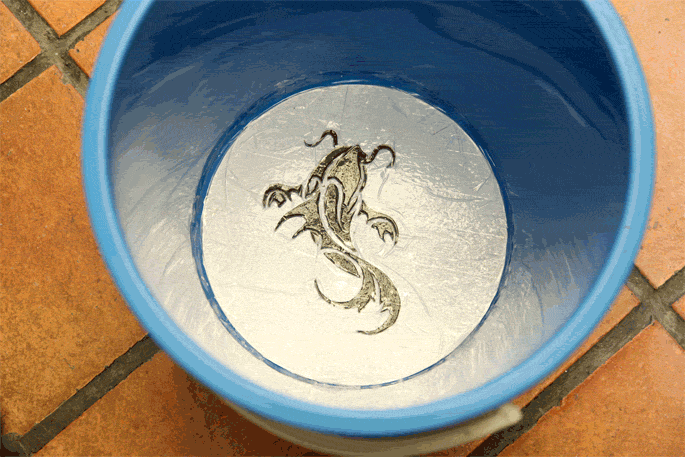
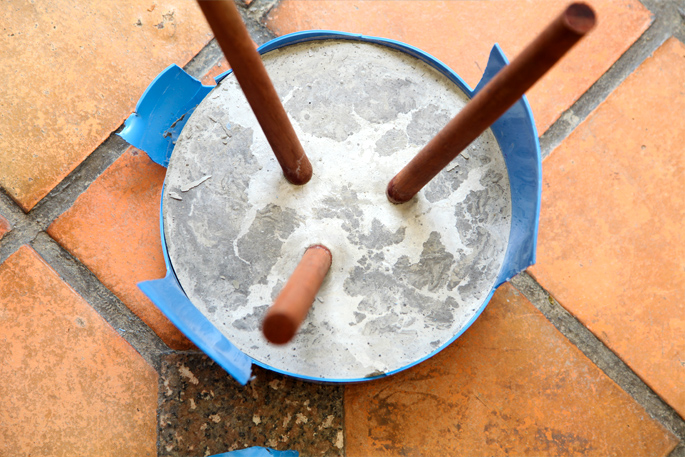
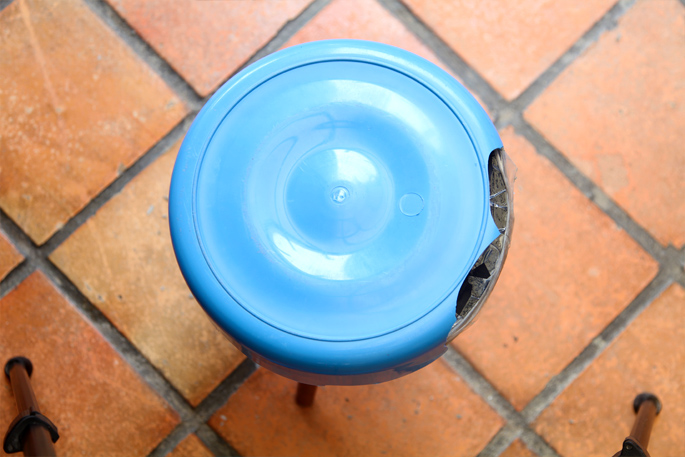
Wait for over a whole day (20 hours+) for the cement to dry. Now depending on the bucket you have, you might be able to pull out the stool by the legs by bending the bucket to loosen it. In my case, I had to break it apart.
And carefully peel off the cardboard. The cement is still not fully dry – so right now you can either use sandpaper to smooth it out, or what I did was to leave it with all the wavy marks and waited another day for it to fully dry.

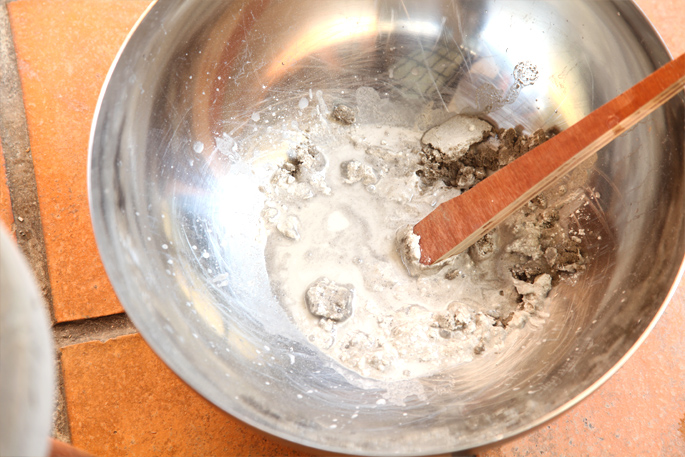
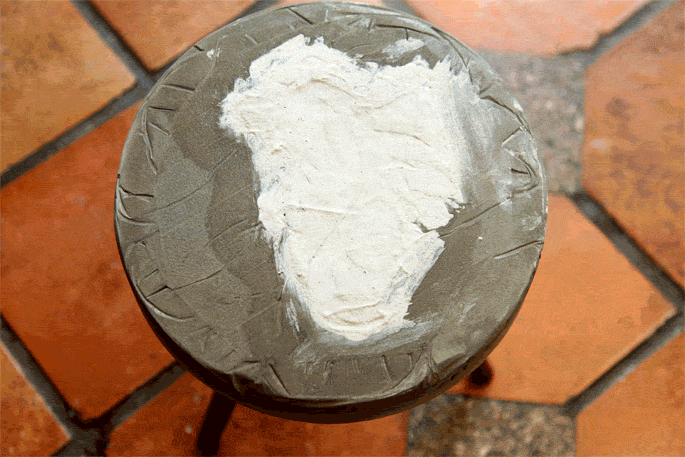
Step 8: Pouring the Inlay
Here comes round two of pouring the cement. This time use the colored/white concrete, and carefully pour it into the inlay. You can use a tooth pick to push the cement into the corners and move it around.
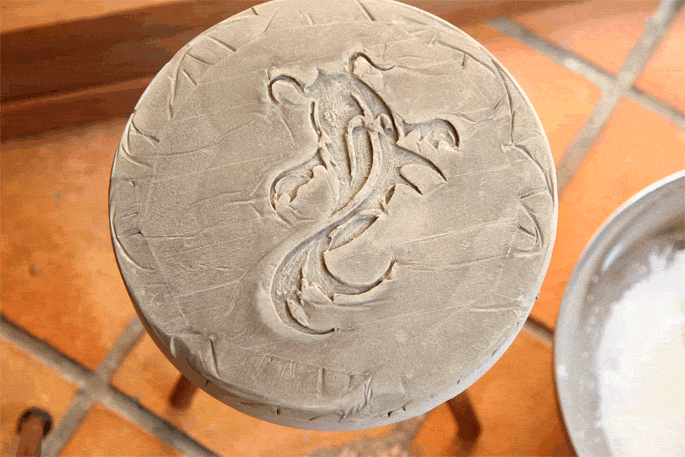
Step 9: Going Fishing
Wait another day for the cement to dry. Then use the sandpaper to carefully sand the new cement to unmask the design.
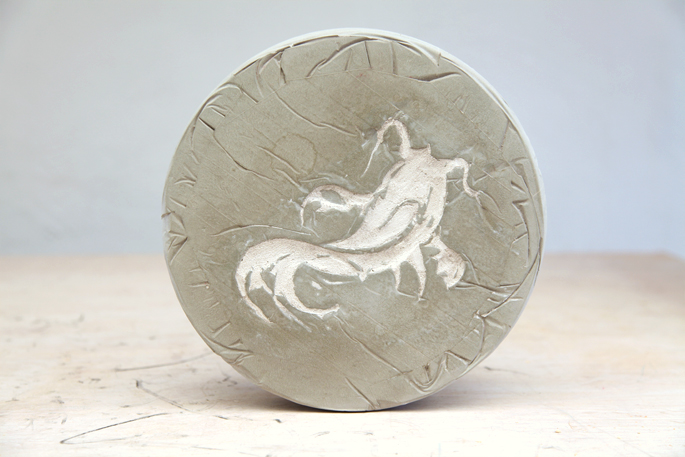
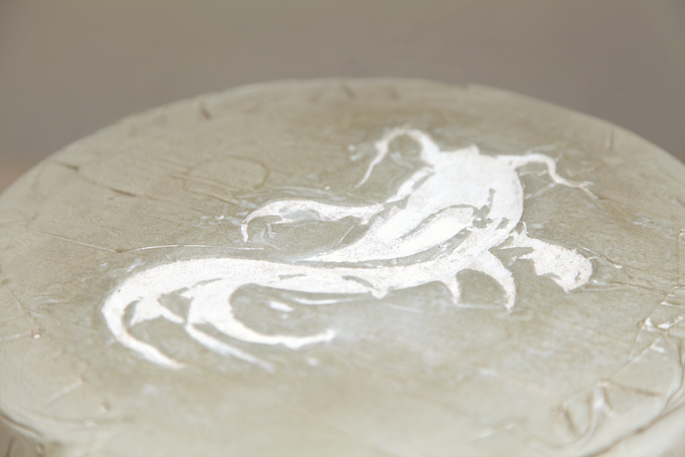
That’s it. I’m curious to know if anyone else will try this with another design. Email me at jacob@hometreeatlas.com with photos if you make your own, or if you have any questions.
Check out my experiment in embossing cement here.


Comments are closed.