Home Tree Atlas

Made By HtA

Batman Plywood DIY Bench Seat With Fire Burning

Batman Plywood DIY Bench Seat With Fire Burning

Batman Plywood DIY Bench Seat With Fire Burning

Batman Plywood DIY Bench Seat With Fire Burning

Batman Plywood DIY Bench Seat With Fire Burning - Step #9 Burning the wood

Batman Plywood DIY Bench Seat With Fire Burning

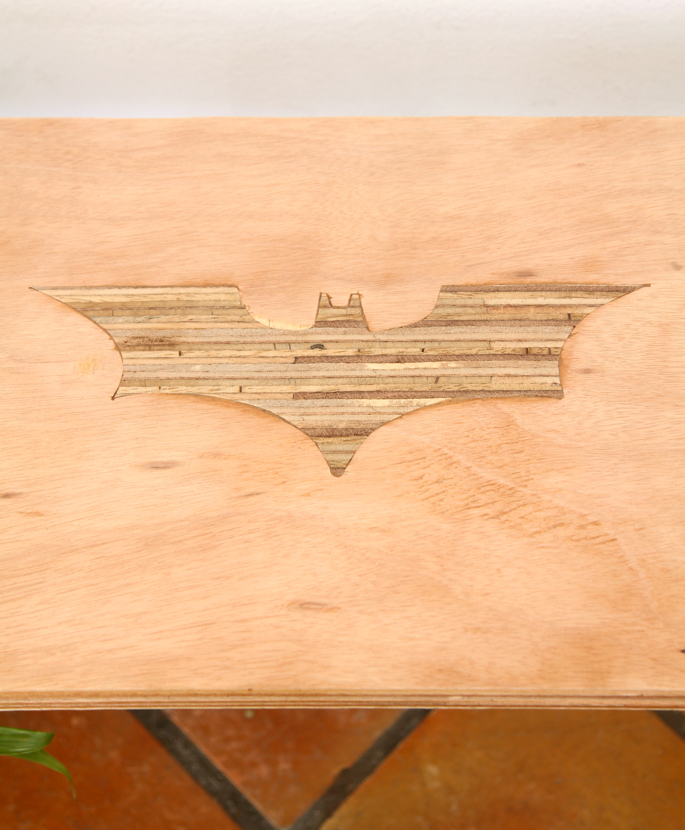
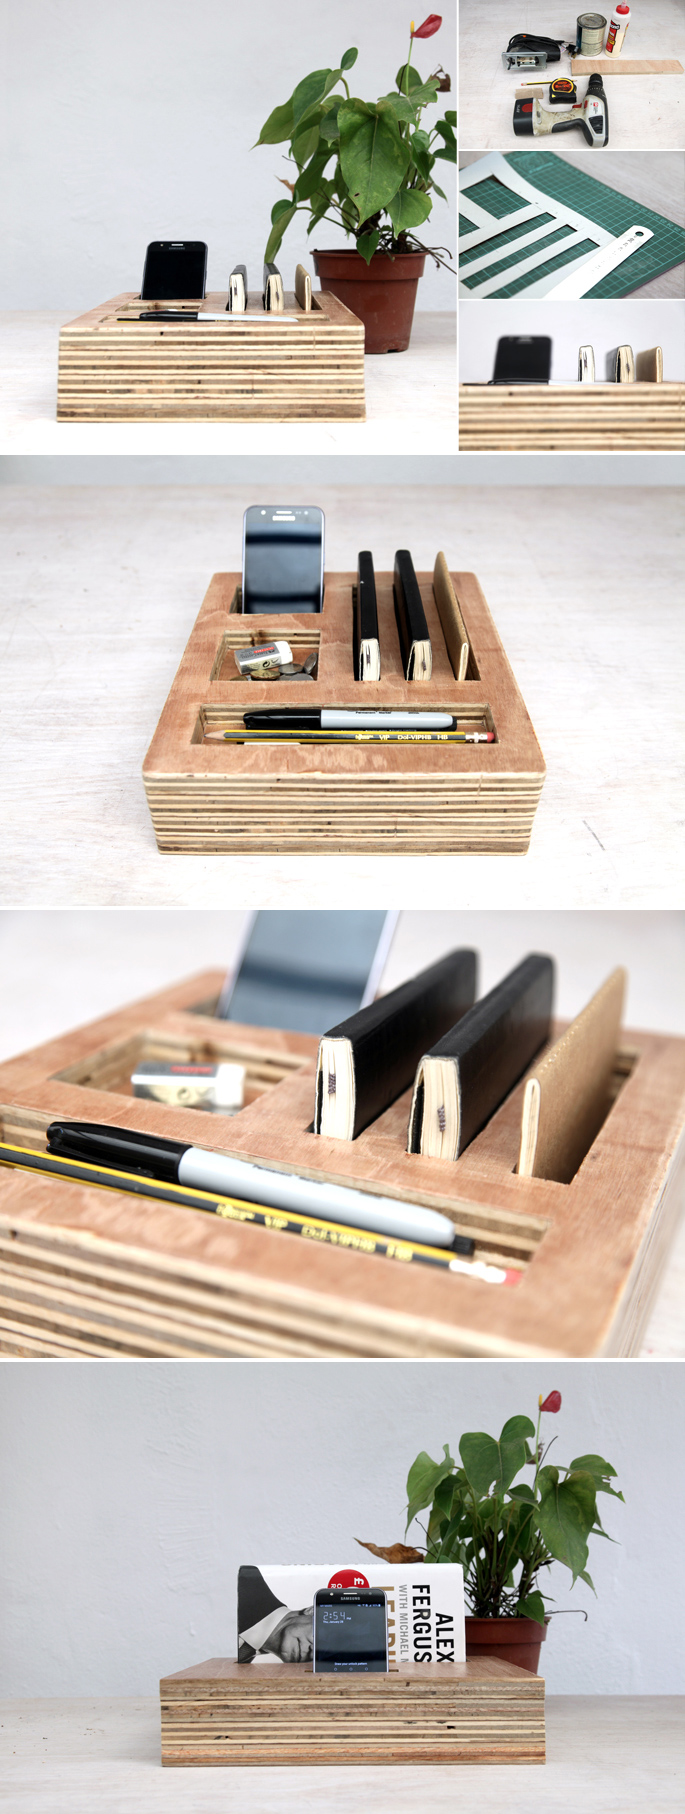
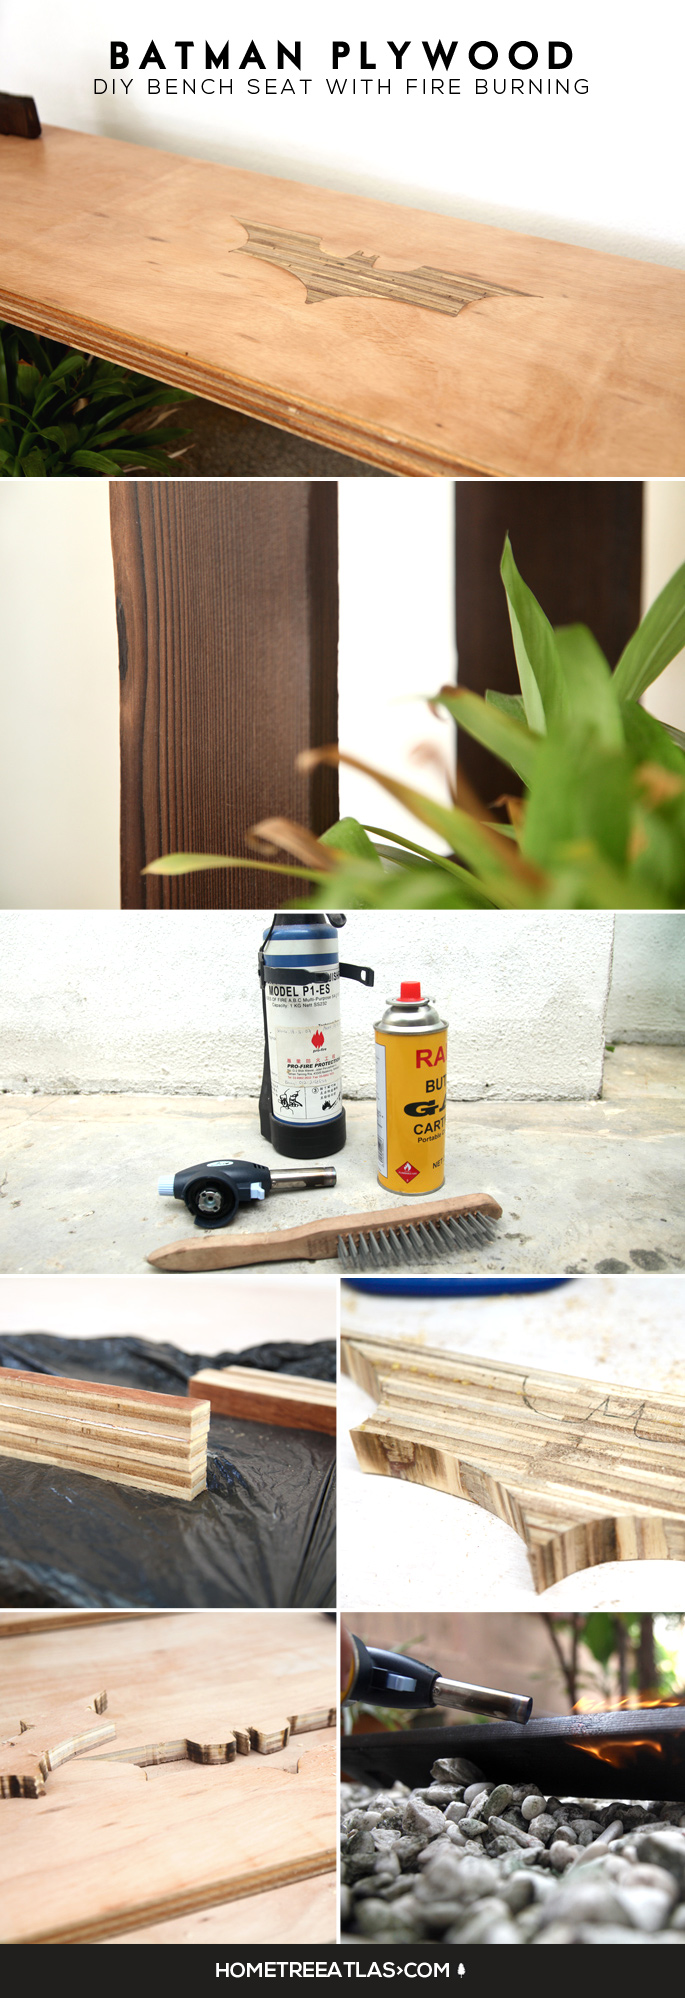
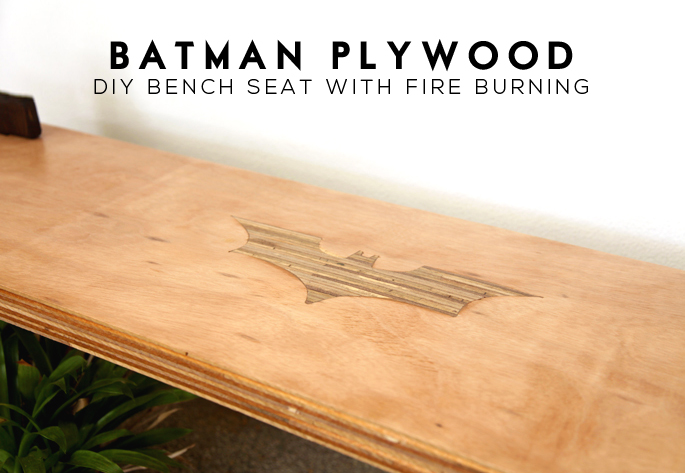
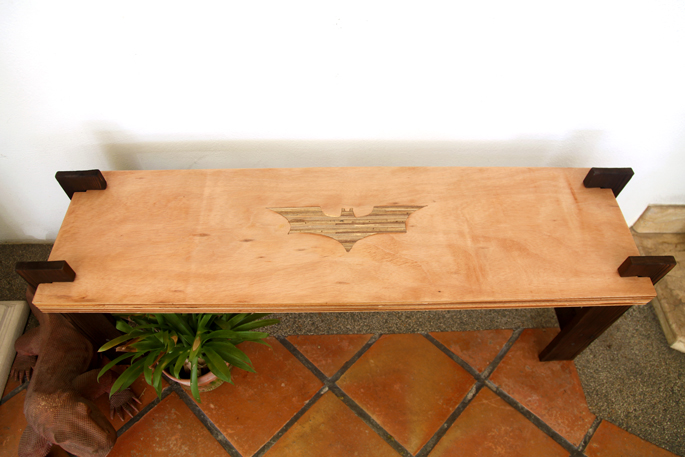
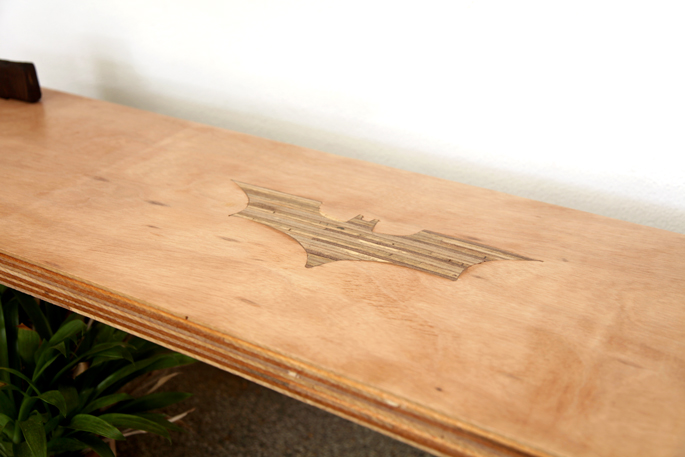
You can go with any symbol or shape when creating this DIY plywood bench. I went with Batman’s symbol from the Dark Knight.

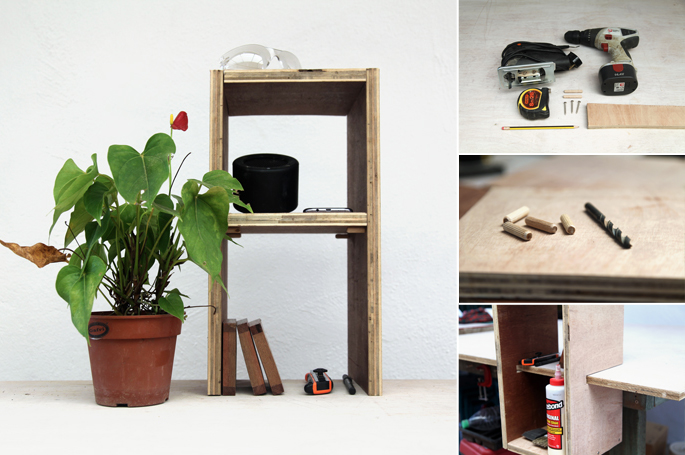
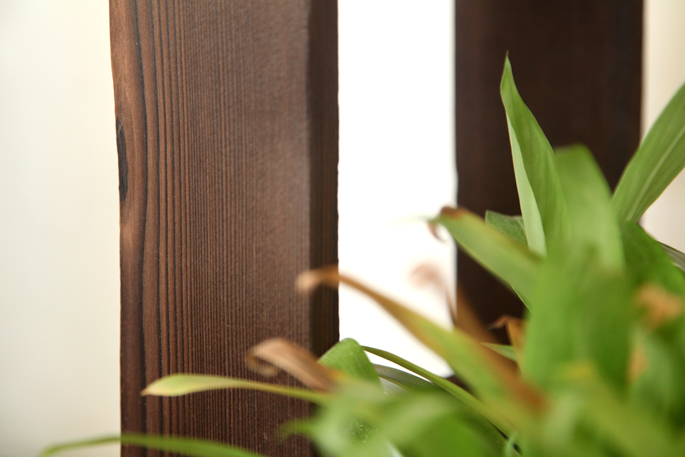
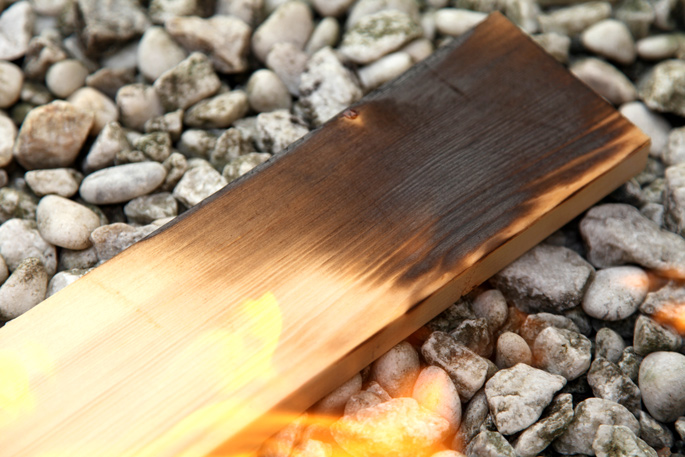
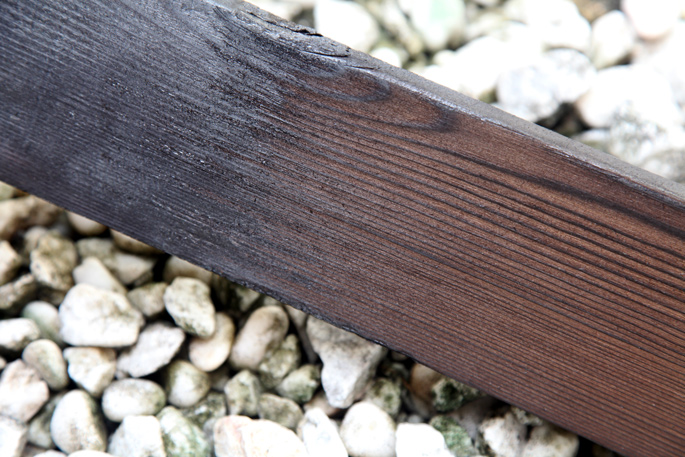
The legs were burned. It’s what the Japanese call Shou Sugi Ban – where you burn the top layer of the wood which forms a protective layer. I did it, mostly to try it out and to get the dark brown/black stained look. It also raises the grain, so you can feel all of the grooves in the wood.
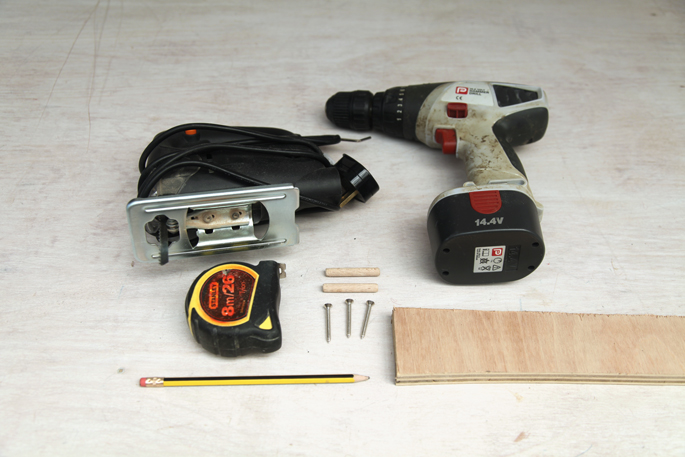
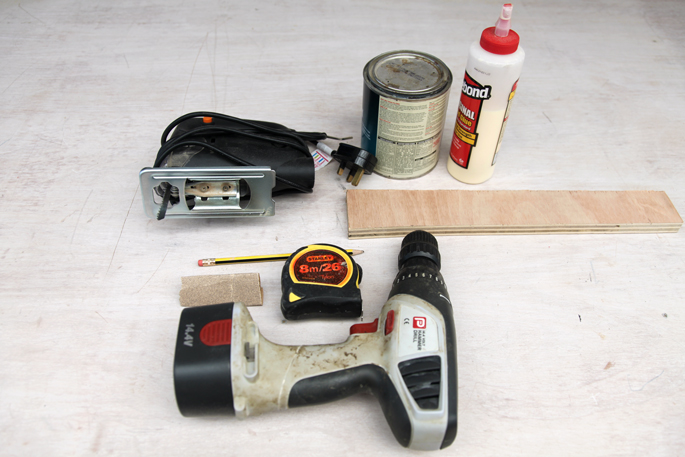
Batman Plywood DIY Bench Seat With Fire Burning - Materials

Home Tree Atlas DIY Projects

TOOLS

  • Jigsaw

Used to cut the shape out of the plywood
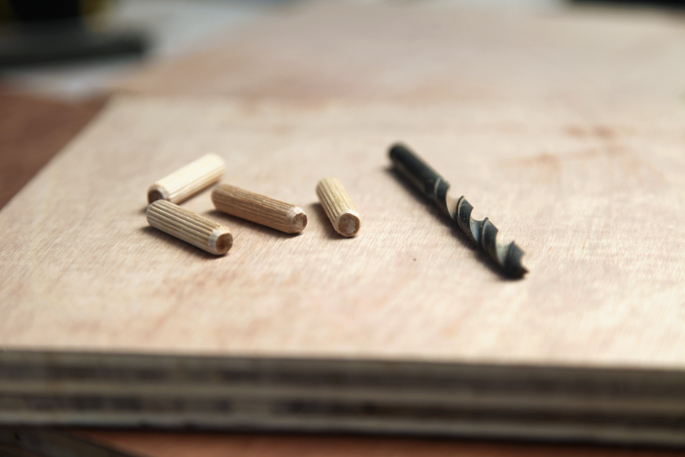
  • Drill

This will be used to drill holes so that the jigsaw’s blade can fit into the plywood

MATERIALS AND SUPPLIES

  • Plywood

I used 3/4 inch

  • Polyurethane

This is what I used to give the plywood a little gloss and to protect it

  • Wood Glue

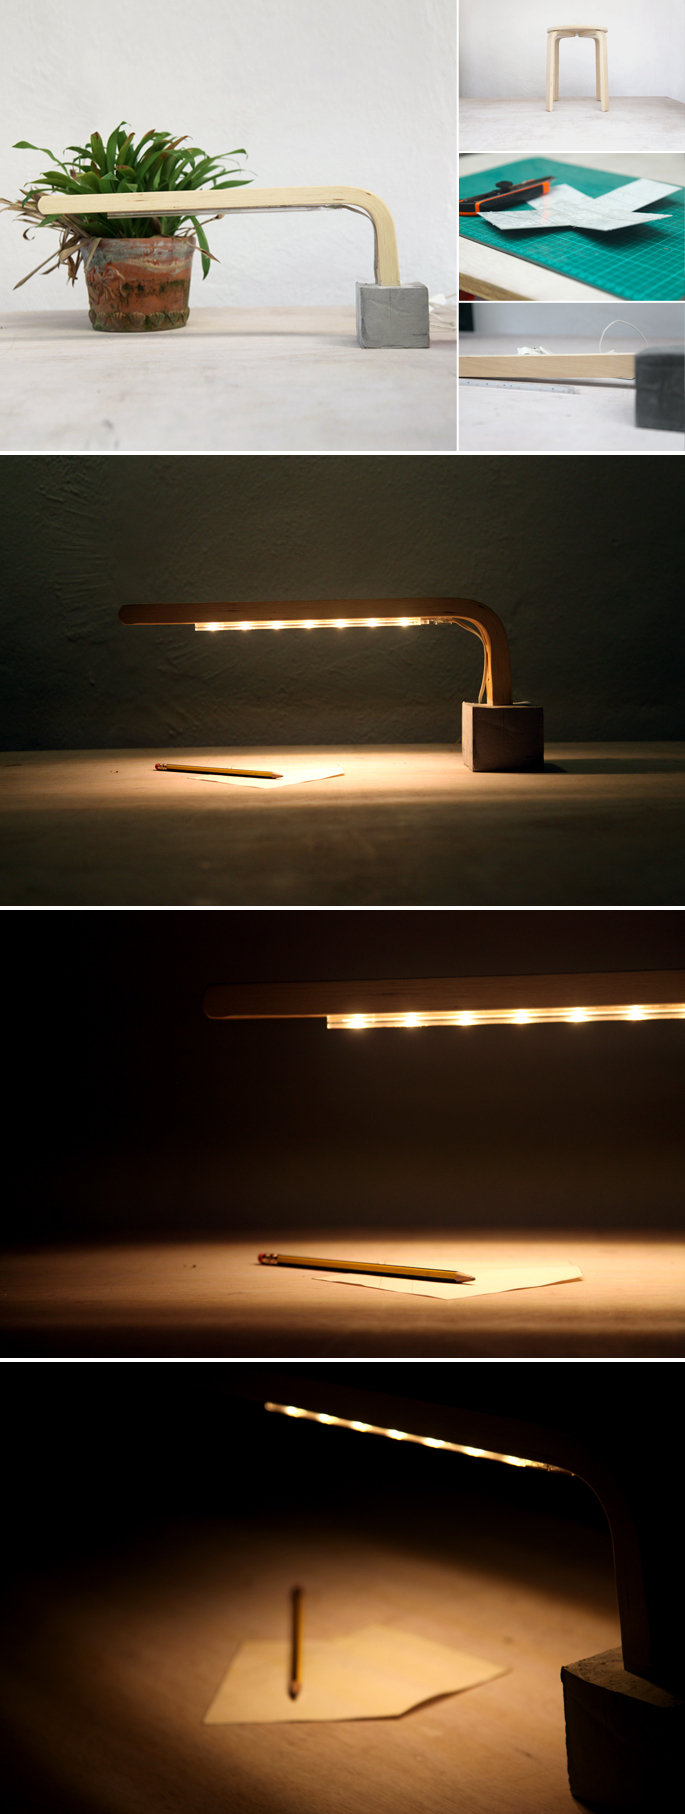
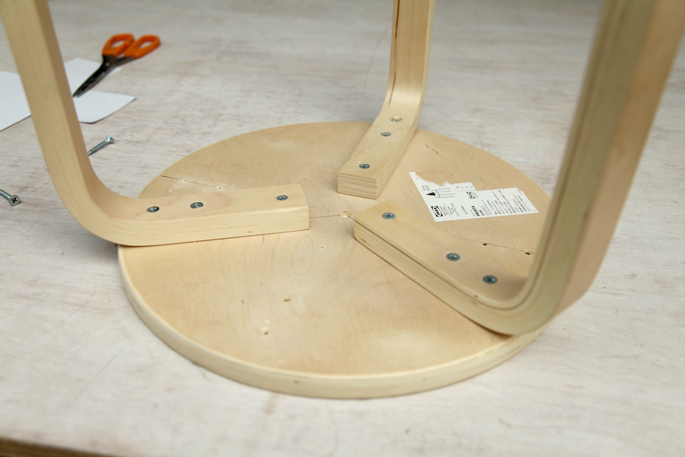
For the legs, you can save yourself a lot of time by using hairpin legs that can be screwed into the base of the bench.

  • Pine Boards

For the legs I went with 4 pieces of 19 inch by 3.5 inch pine boards. These were 3.5 inches thick. Cedar is what is normally used for Shou Sugi Ban – but I had pine, and it still worked.
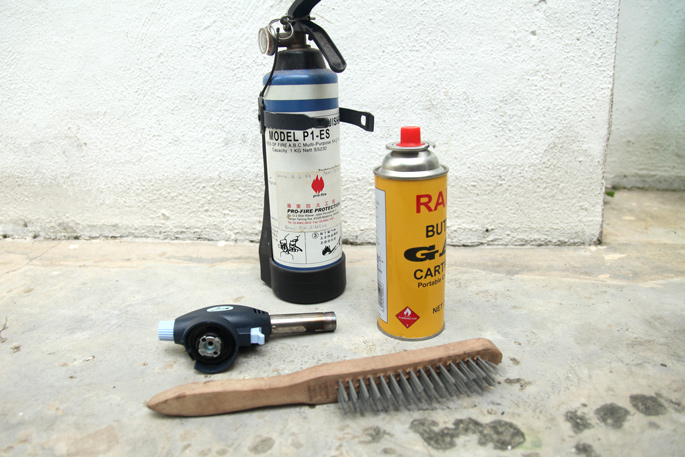
  • Torch

My hardware store had Butane canisters and a trigger starter. You can also use this Propane canister with a trigger starter.

  • Wire Brush

This will be used to brush off the soot after burning the legs. Wire Scratch Brush

OPTIONAL

  • Linseed/Tung Oil

This can be used to coat the legs after they have been burned. I left mine as is.
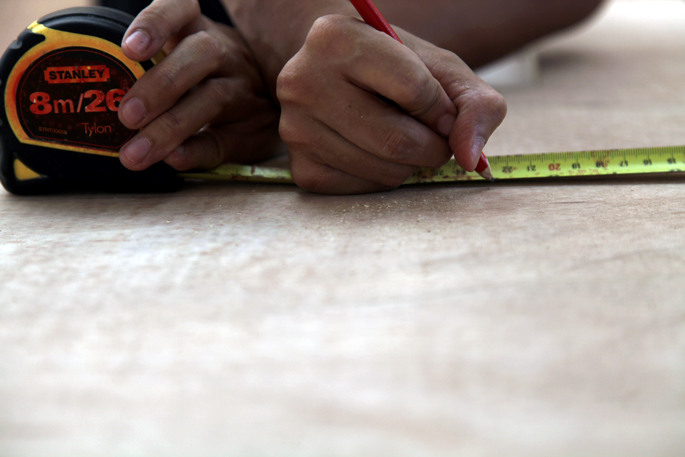
INSTRUCTIONS

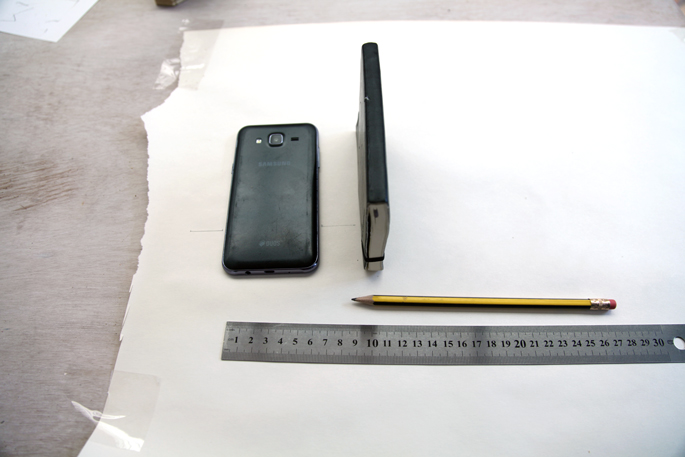
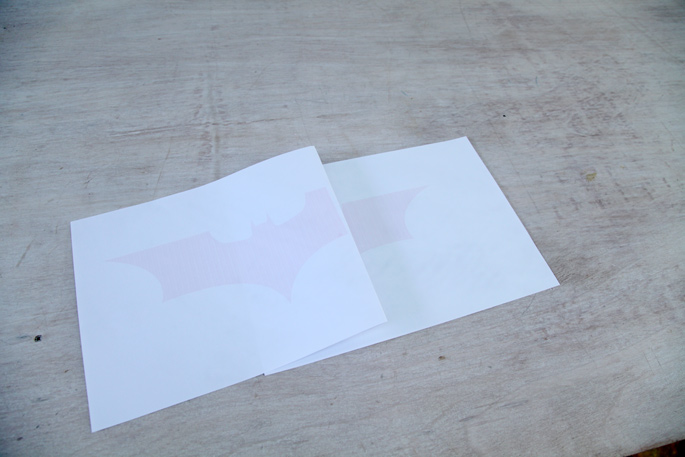
Step 1: The template

You can use any symbol (country outline, illustration, etc.) that you want. I went with the Dark Knight symbol. I knew I wanted my bench to be 43 inches long and 12 inches wide, so I printed out my template to fit into that size.

Batman Plywood DIY Bench Seat With Fire Burning - Step #1 The Template

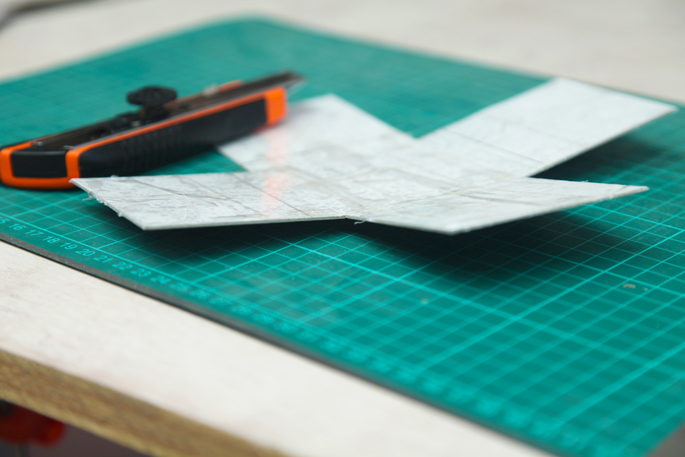
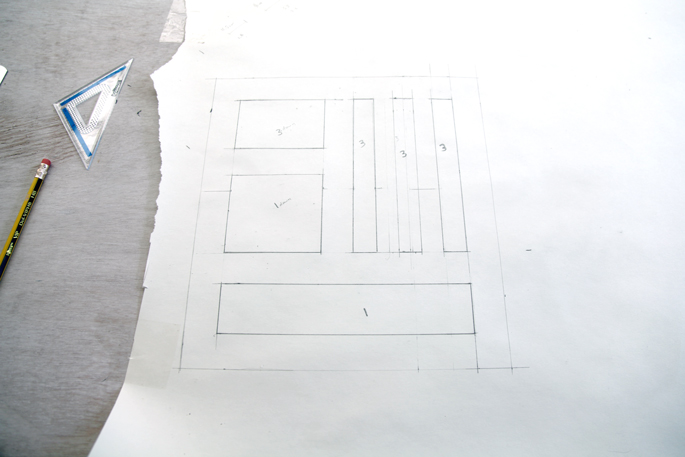
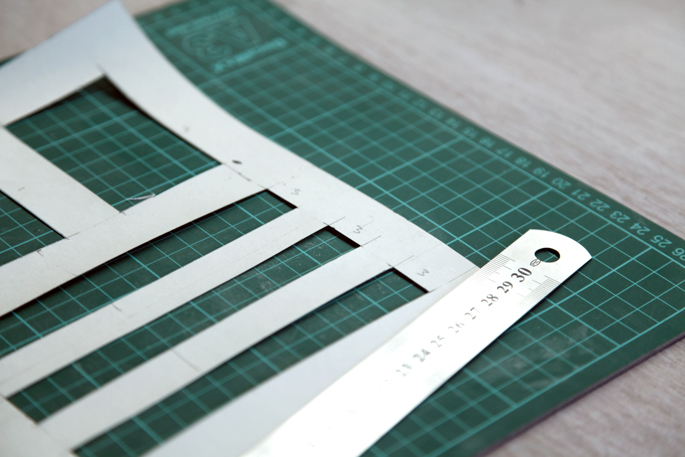
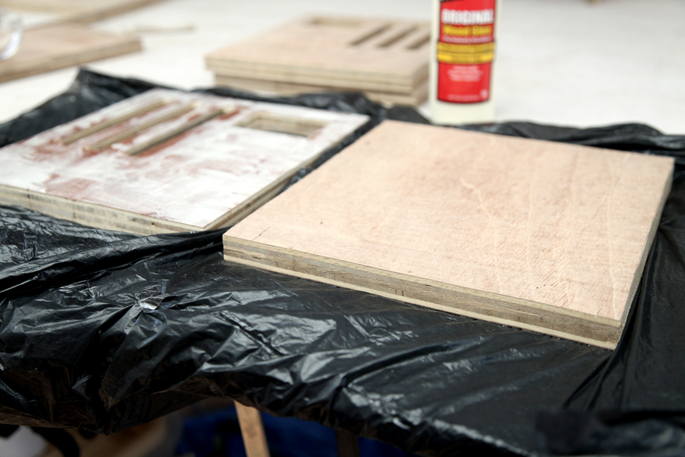
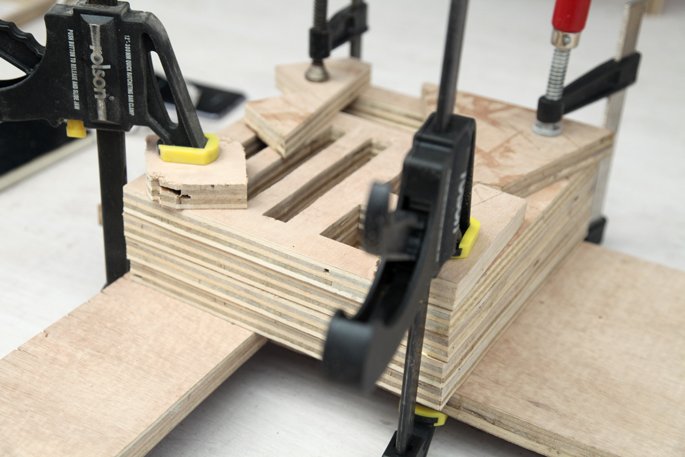
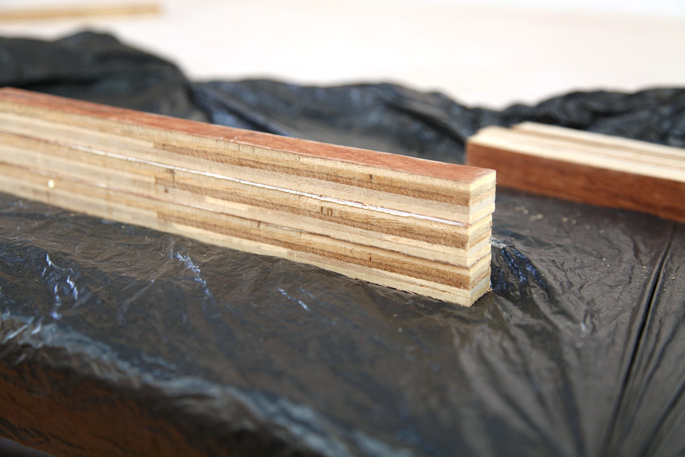
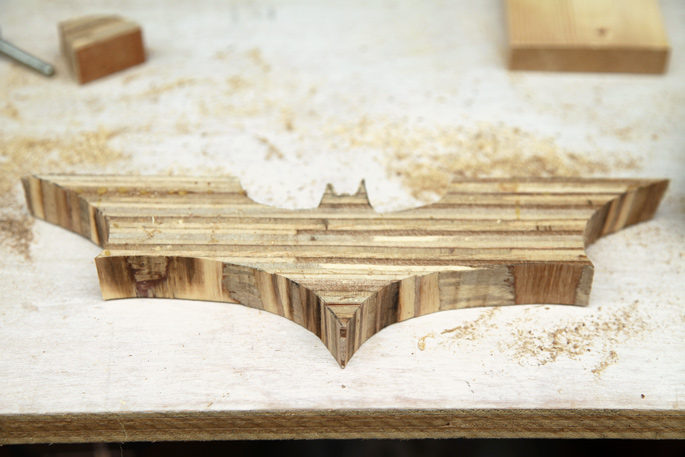
Step 2: Plywood strips

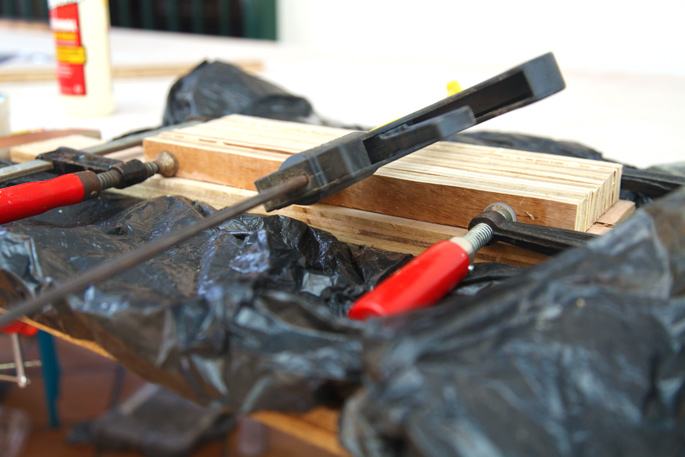
To create the Bat symbol out of plywood i needed to cut 6 pieces of plywood 13 inches by 1 inch.

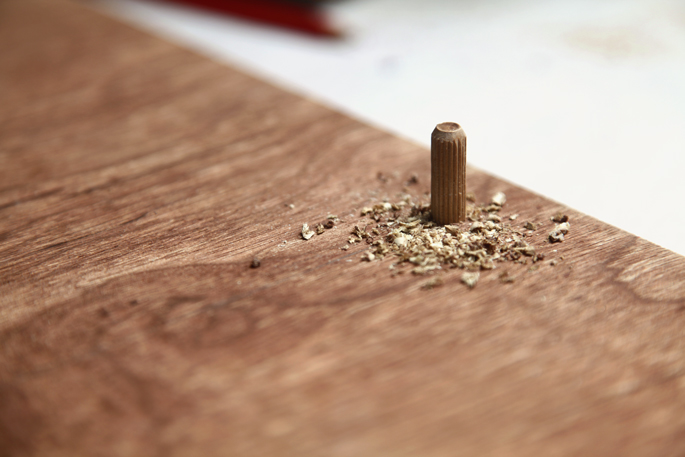
These strips were then glued together, and clamped.

Batman Plywood DIY Bench Seat With Fire Burning - Step #2 Cutting the plywood strips

Batman Plywood DIY Bench Seat With Fire Burning - Step #2 Glueing the plywood strips

Batman Plywood DIY Bench Seat With Fire Burning - Step #2 Glueing the plywood strips

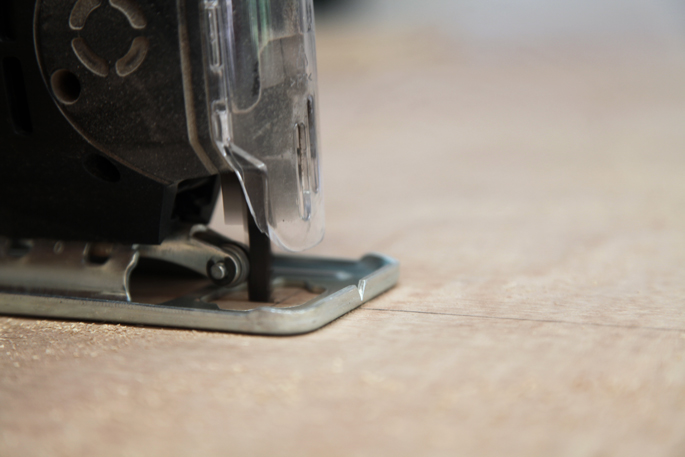
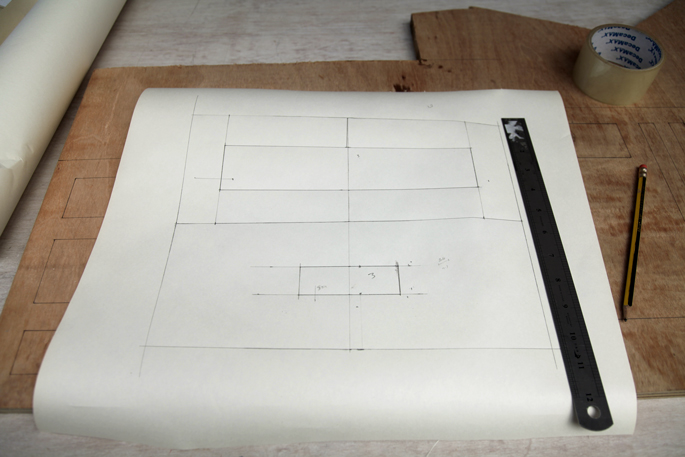
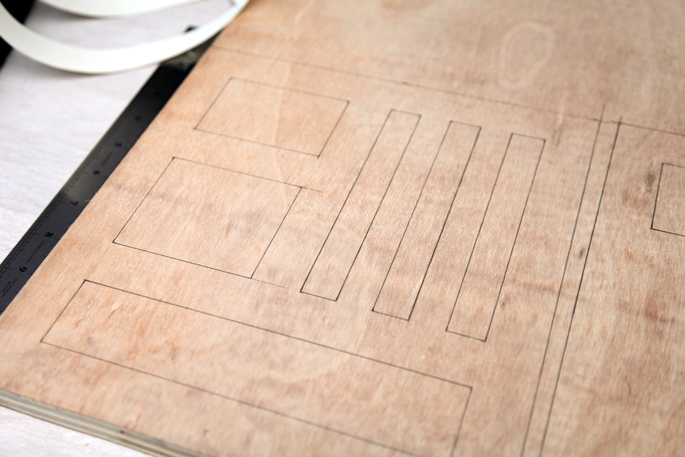
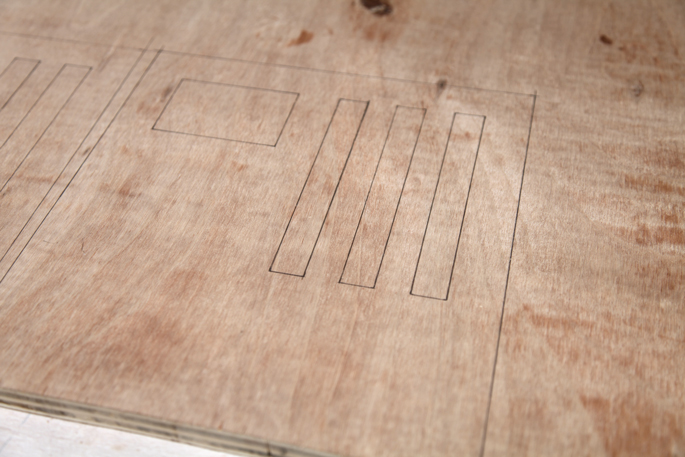
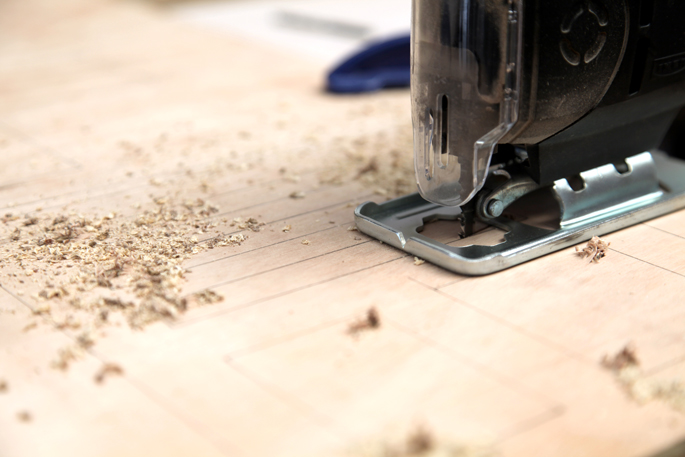
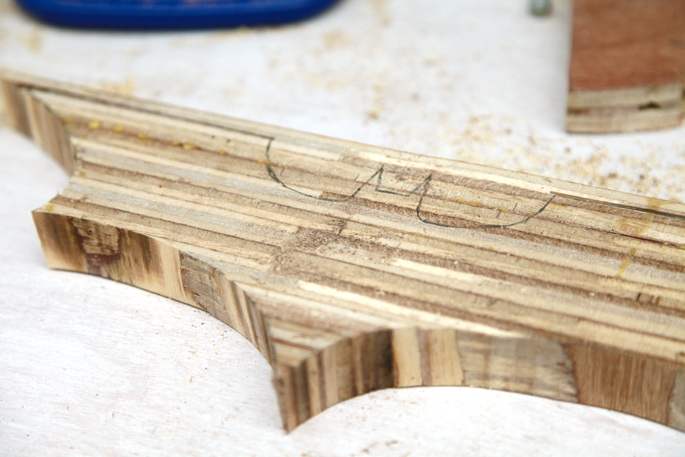
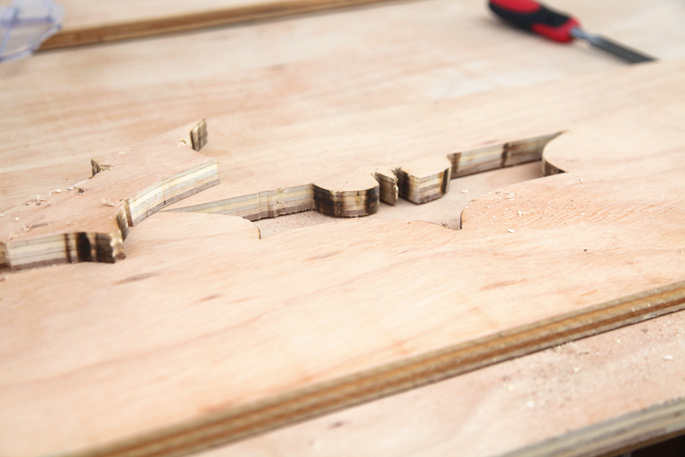
Step 3: Tracing and cutting the plywood

Once the glue dried, the template was traced onto the plywood block. It was then cut using the jigsaw. You can use the drill to create holes to fit the blade of the jigsaw into, if you have hard to cut areas.

Batman Plywood DIY Bench Seat With Fire Burning - Step #3 Tracing the symbol

Batman Plywood DIY Bench Seat With Fire Burning - Step #3 Cutting the symbol

Batman Plywood DIY Bench Seat With Fire Burning - Step #3 Cutting the symbol

Batman Plywood DIY Bench Seat With Fire Burning - Step #3 Cutting the symbol

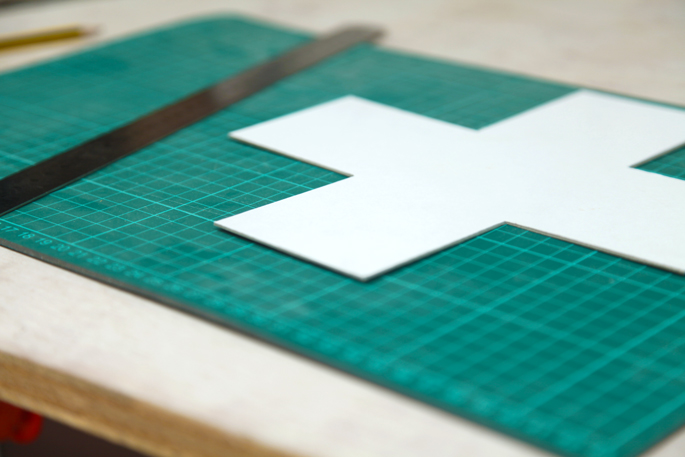
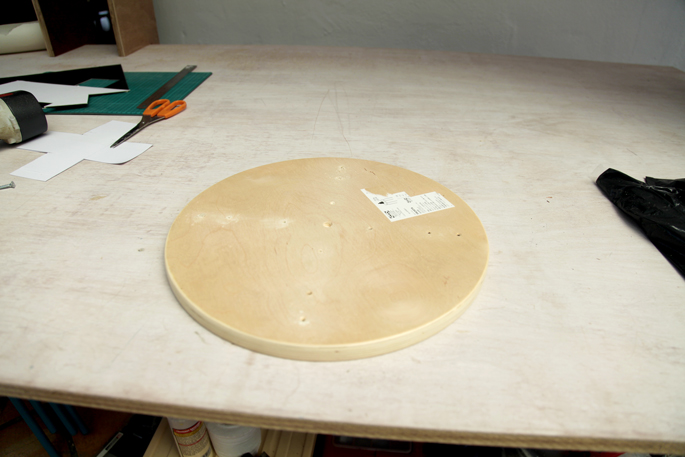
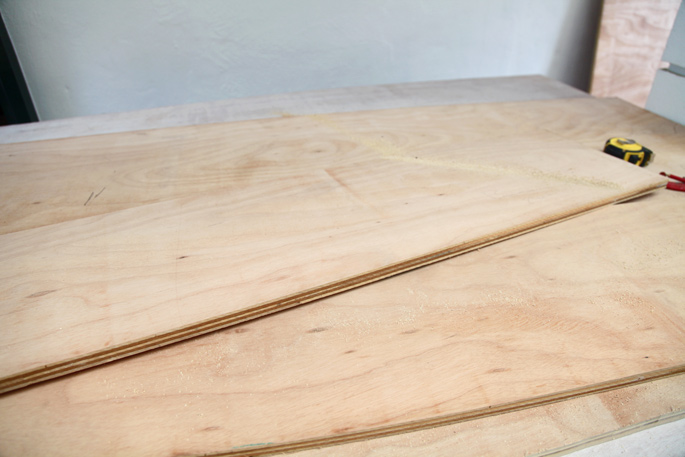
Step 4: Cutting the bench

The next step was cutting the boards for the bench. Two plywood sheets – 43 inches by 12 inches.

Batman Plywood DIY Bench Seat With Fire Burning - Step #4 Cutting the bench

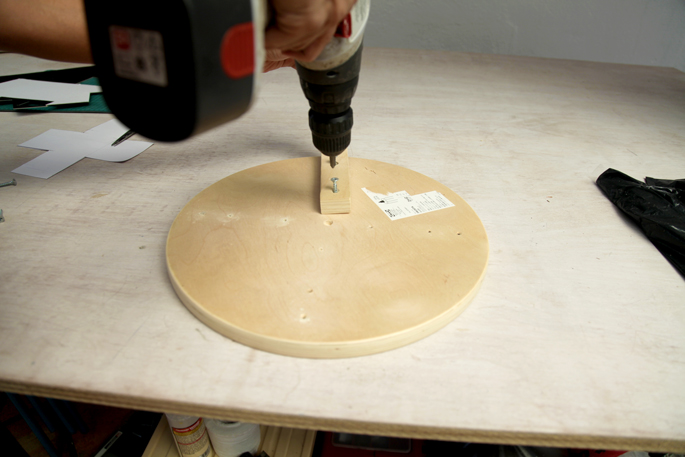
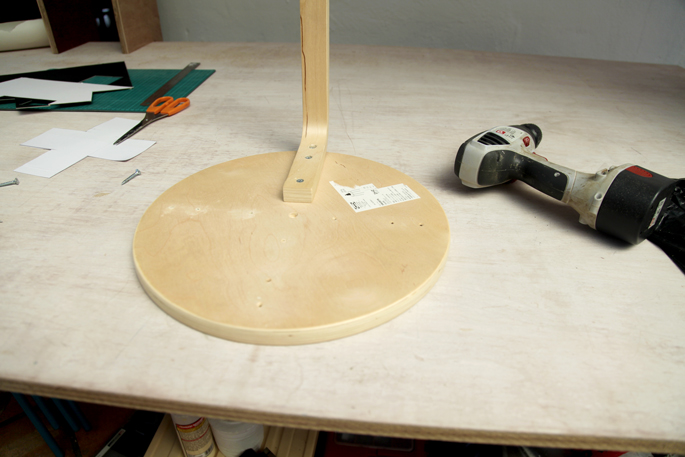
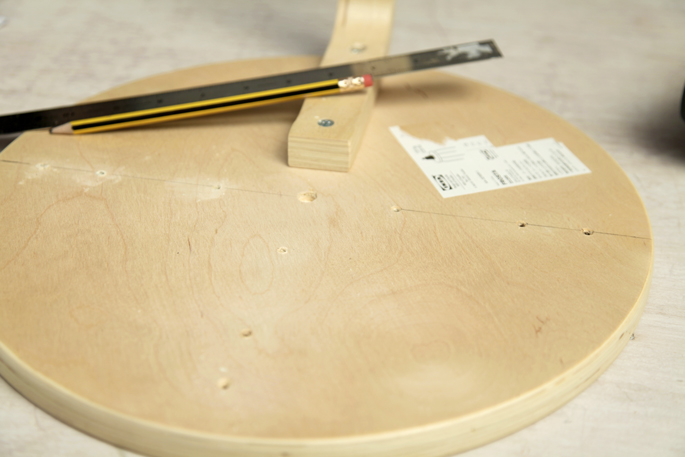
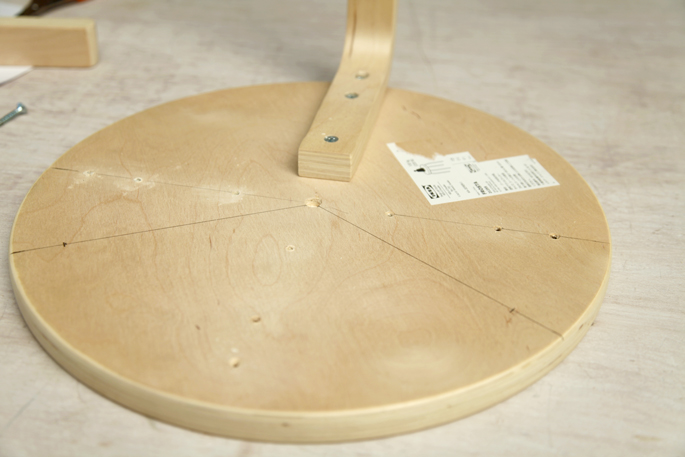
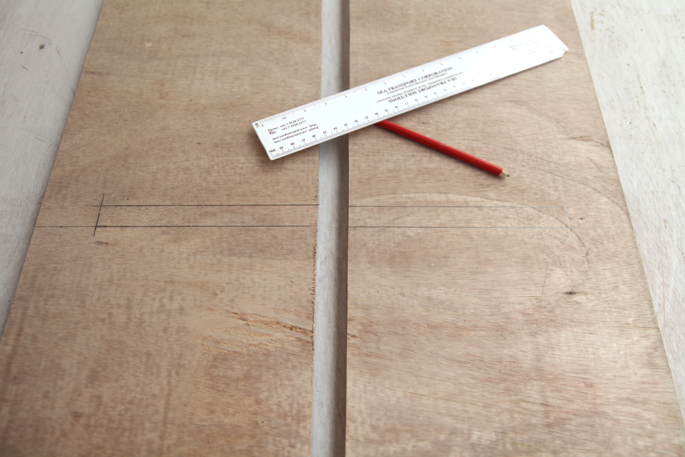
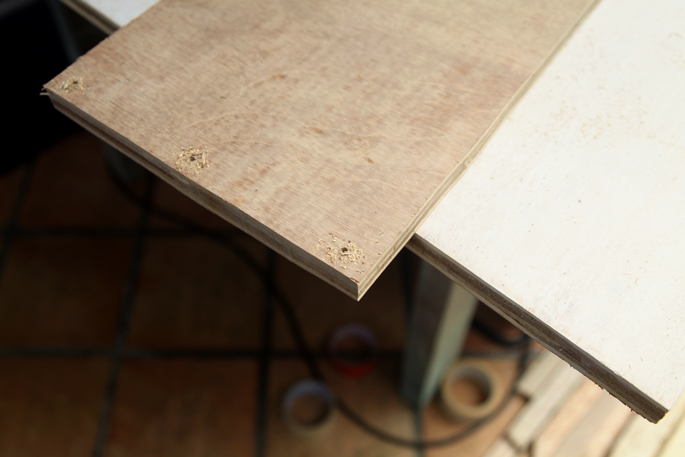
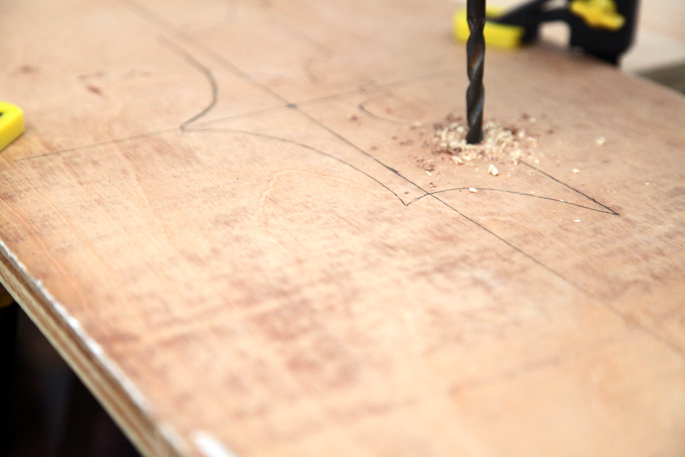
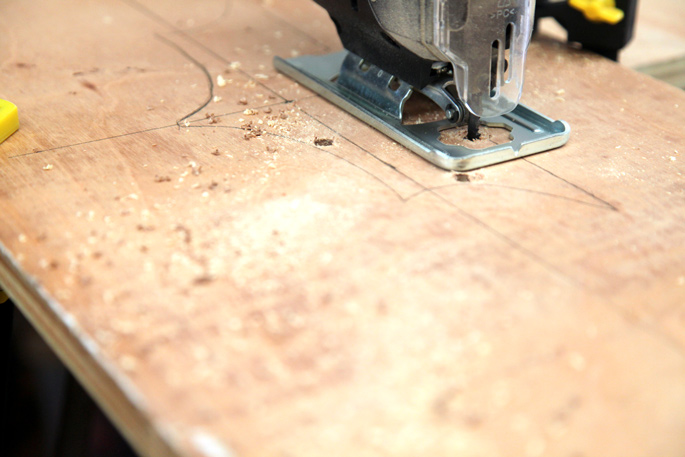
Step 5: Cutting the hole

The first step was figuring out the center of the bench, and then tracing the template over it.

Then holes were drilled around the template so that the blade of the jigsaw could fit in and start cutting.

Batman Plywood DIY Bench Seat With Fire Burning - Step #5 Cutting the hole

Batman Plywood DIY Bench Seat With Fire Burning - Step #5 Cutting the hole

Batman Plywood DIY Bench Seat With Fire Burning - Step #5 Cutting the hole

Batman Plywood DIY Bench Seat With Fire Burning - Step #5 Cutting the hole

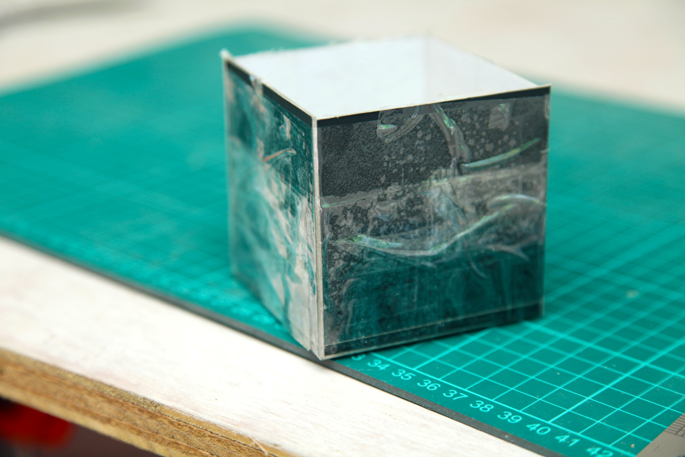
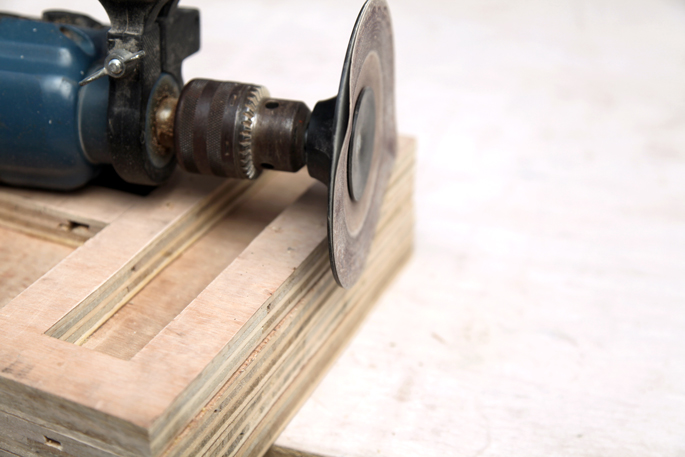
Step 6: Fitting in the plywood bat symbol

Some sanding was needed to fit the bat into the bench.

Batman Plywood DIY Bench Seat With Fire Burning - Step #6 Fitting in the Bat symbol

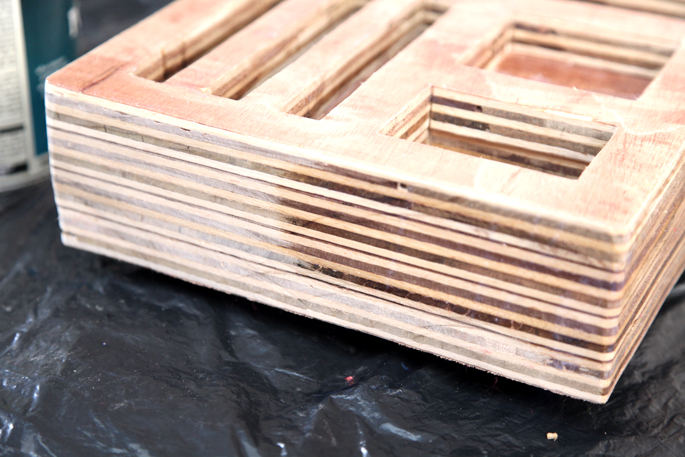
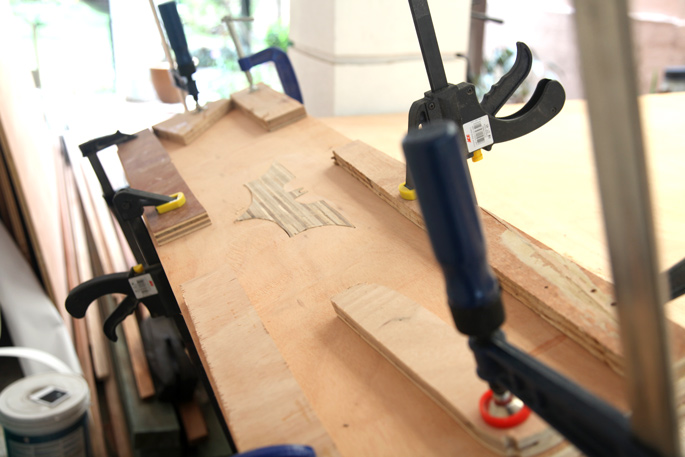
Step 7: Gluing the bench together

Once the bat was inside of the top bench sheet, the two plywood sheets that made up the bench were then glued and clamped together.

Batman Plywood DIY Bench Seat With Fire Burning - Step #7 Glueing the bench together

Batman Plywood DIY Bench Seat With Fire Burning - Step #7 Glueing the bench together

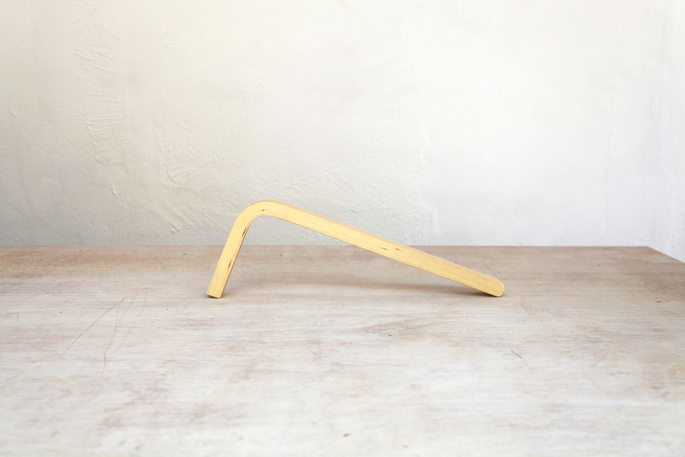
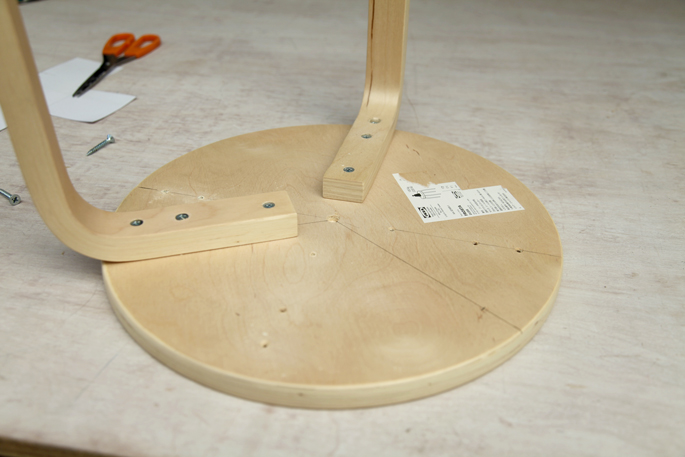
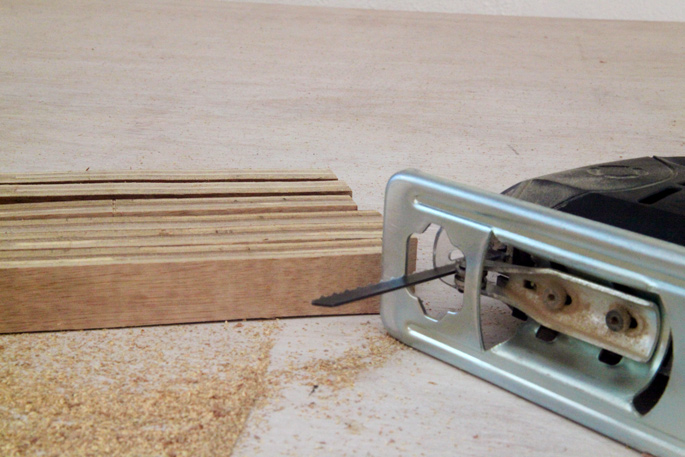
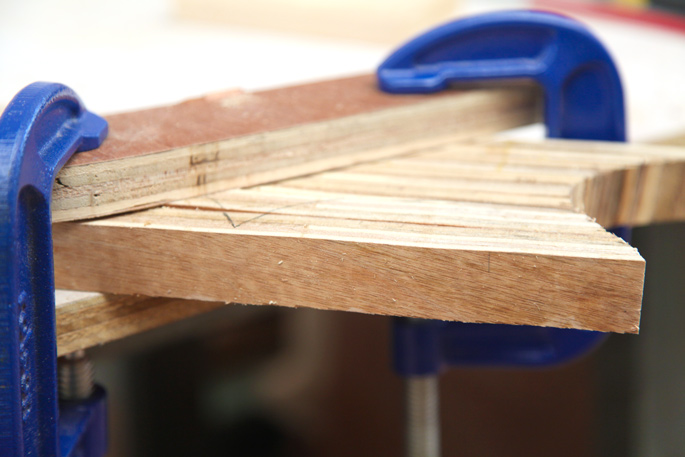
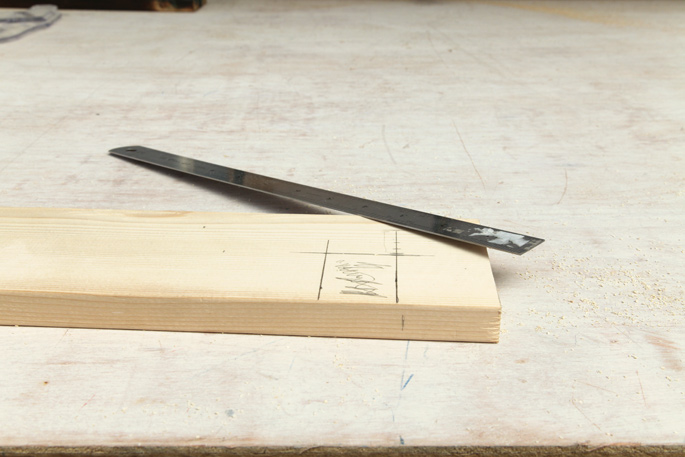
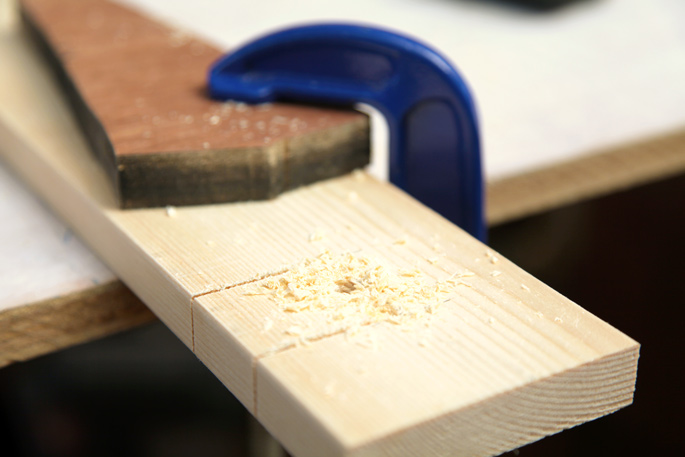
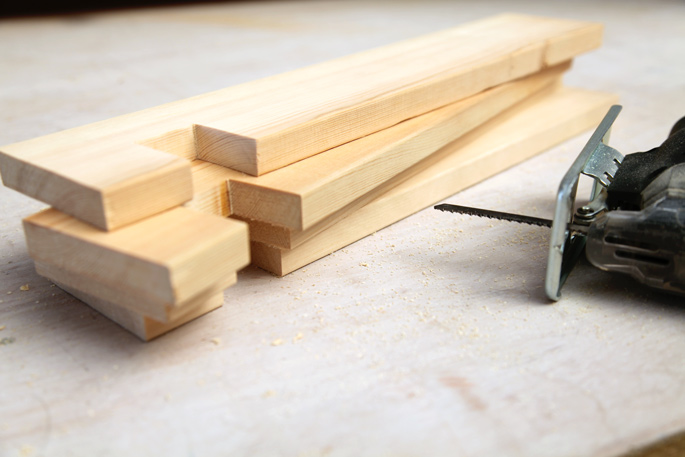
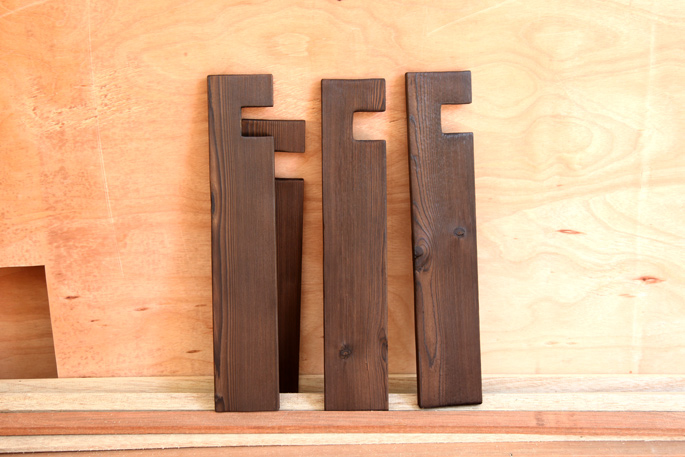
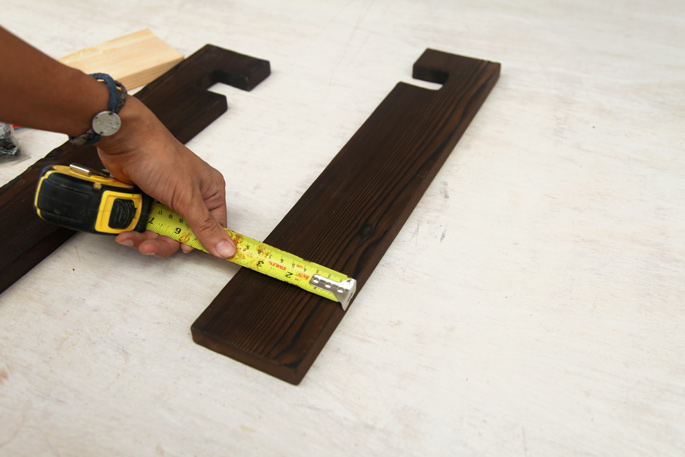
Step 8: Making the legs

The legs are 19 inches high. And a slot was cut out of them so they could fit onto the bench. The slot was 1.5 inches wide (to fit two layers of 3/4 inch plywood into it) and 3/4 inch deep. The slots were cut 16 and 1/4 inches from the bottom.

Batman Plywood DIY Bench Seat With Fire Burning - Step #8 Making the legs

Batman Plywood DIY Bench Seat With Fire Burning - Step #8 Making the legs

Batman Plywood DIY Bench Seat With Fire Burning - Step #8 Making the legs

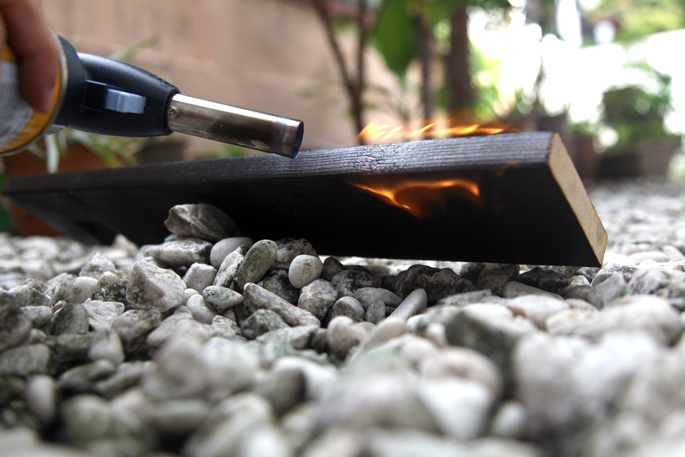
Step 9: Burning the wood

I had a fire extinguisher nearby just in case. But at no time did I ever feel as if I needed it. Just do it in an open space. STAY AWAY FROM SAWDUST. Don’t be burning near any work areas that have saw dust.

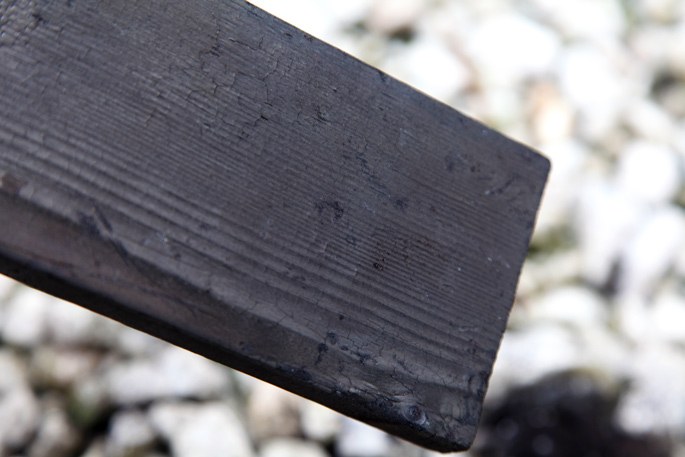
I set my torch to the lowest setting. You are just burning the top layer, so it is completely black. Sometimes the wood does catch on fire, and you just need to blow it out.

After you have covered all sides, hose it down.

Batman Plywood DIY Bench Seat With Fire Burning - Step #9 Burning the wood

Batman Plywood DIY Bench Seat With Fire Burning - Step #9 Burning the wood

Batman Plywood DIY Bench Seat With Fire Burning - Step #9 Burning the wood

Batman Plywood DIY Bench Seat With Fire Burning - Step #9 Burning the wood

Batman Plywood DIY Bench Seat With Fire Burning - Step #9 Burning the wood

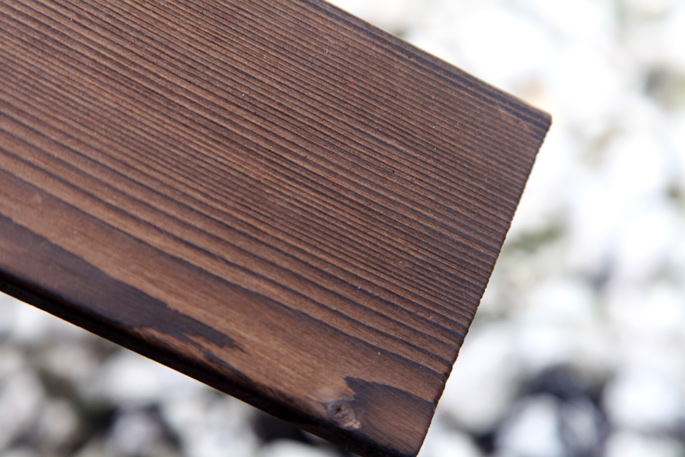
Step 10: Brushing off the soot

Once the wood has dried, grab the metal brush and softly brush away the top layer of soot. You’ll be left with a beautiful texture and color.

Batman Plywood DIY Bench Seat With Fire Burning - Step #10 Brushing off the soot

Batman Plywood DIY Bench Seat With Fire Burning - Step #10 Brushing off the soot

Batman Plywood DIY Bench Seat With Fire Burning - Step #10 Brushing off the soot

Batman Plywood DIY Bench Seat With Fire Burning - Step #10 The Shou Sugi Ban bench legs

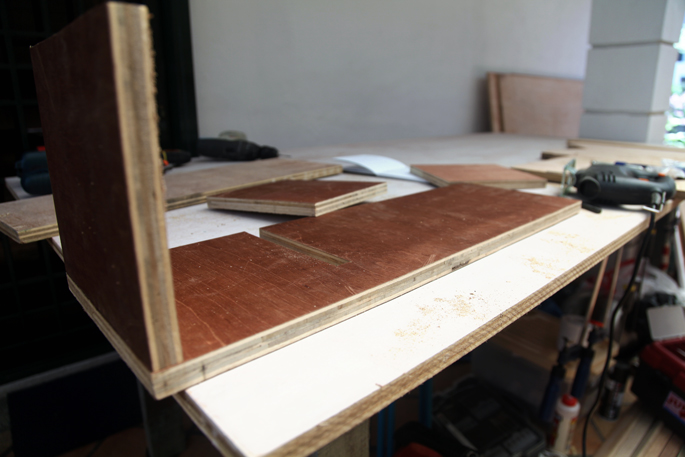
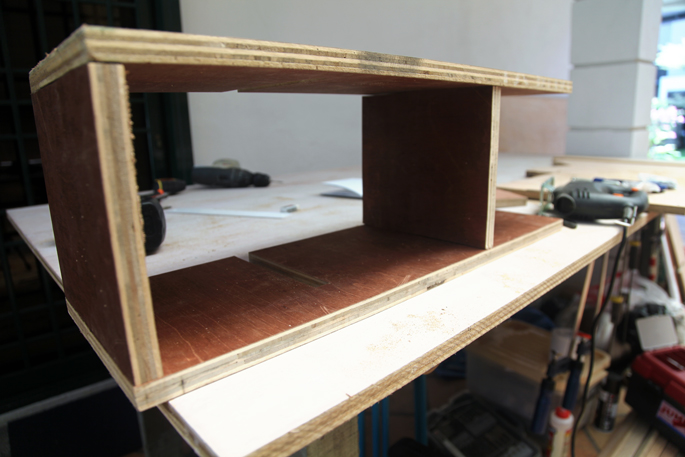
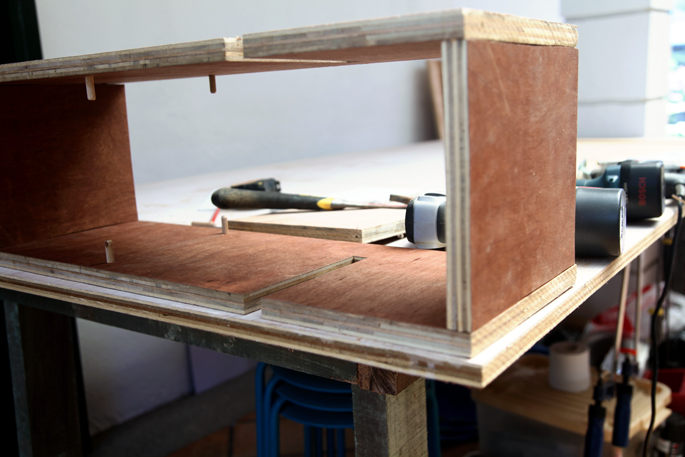
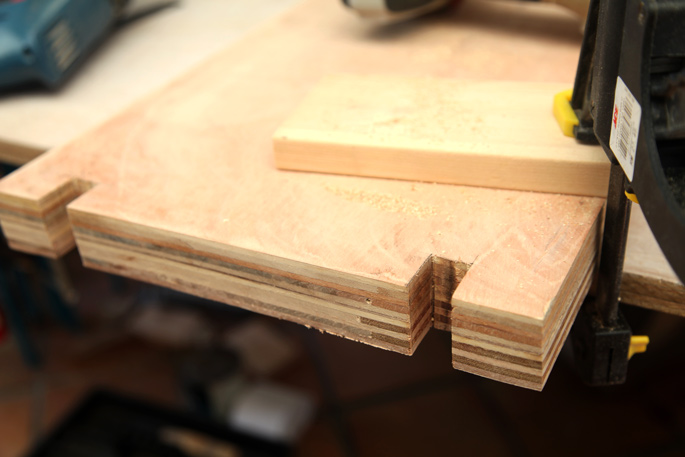
Step 11: Cutting the bench

The bench can be cut after the glue has dried. These slots are for the legs to fit into. These slots were 3/4 inch wide (the same as the thickness of the legs) and 1 inch deep.

Batman Plywood DIY Bench Seat With Fire Burning - Step #11 Cutting the bench

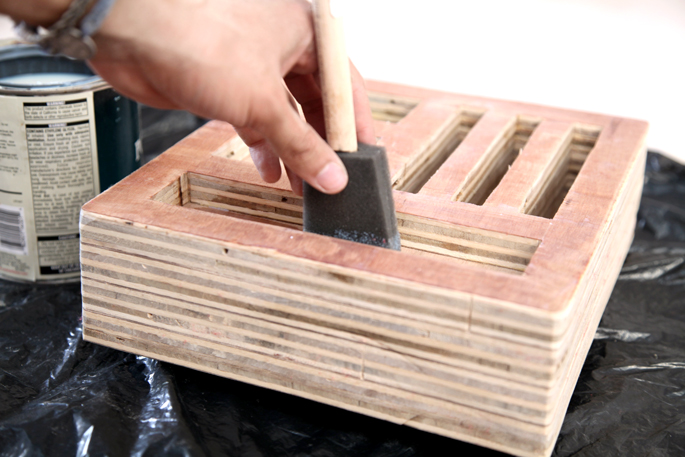
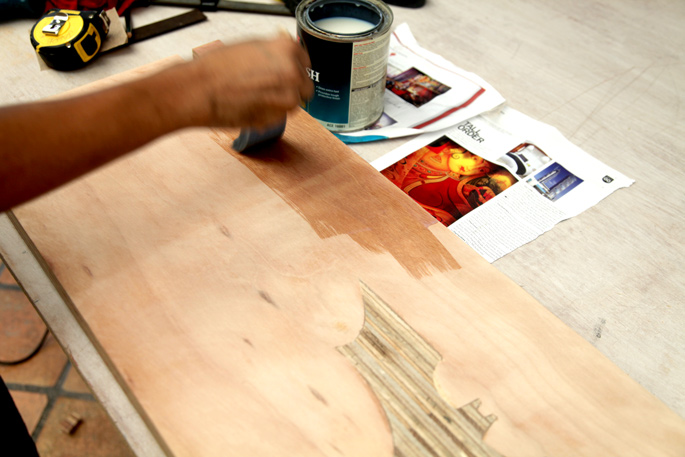
Step 12: Adding the gloss

I added 3 coats of polyurethane. Waiting 2-3 hours in-between each coat and sanding it down after each coat.

Batman Plywood DIY Bench Seat With Fire Burning - Step #12 Adding the gloss

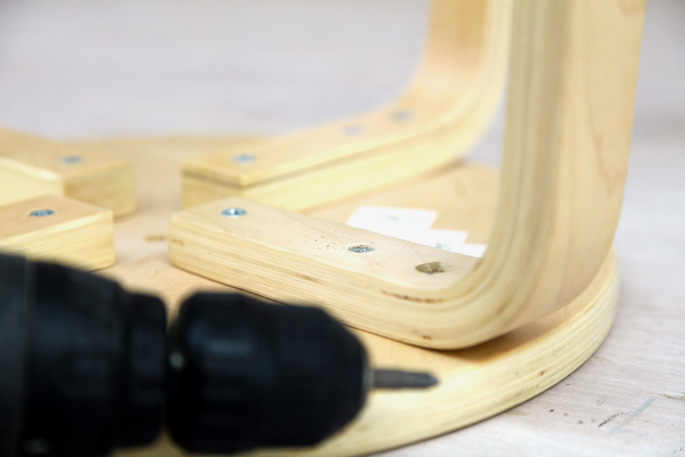
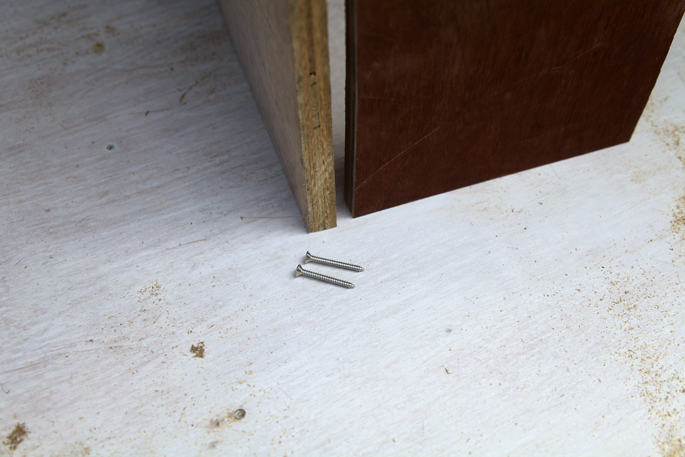
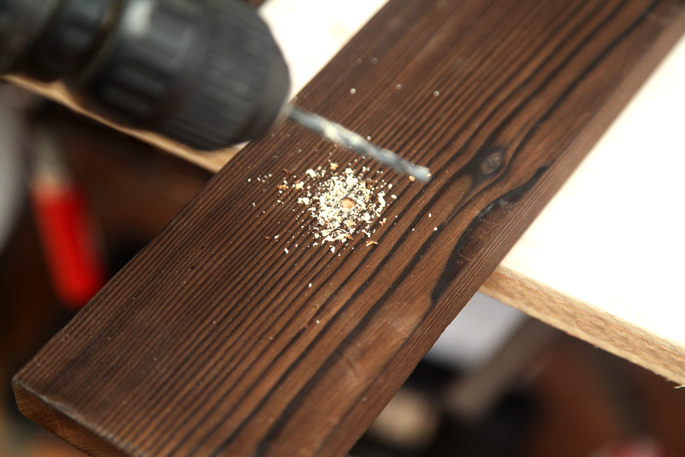
Step 13: Cross bracing

To add some stability to the legs, I added a cross piece that connects the two legs together. These pieces were burned too, and screwed into the legs.

Batman Plywood DIY Bench Seat With Fire Burning - Step #13 Adding the cross bracing

Batman Plywood DIY Bench Seat With Fire Burning - Step #13 Adding the cross bracing

Batman Plywood DIY Bench Seat With Fire Burning

Batman Plywood DIY Bench Seat With Fire Burning

Batman Plywood DIY Bench Seat With Fire Burning

Batman Plywood DIY Bench Seat With Fire Burning

Email me at jacob@hometreeatlas.com with photos if you make your own, or if you have any questions.

Home Tree Atlas DIY Projects

February 12, 2016 in Made By HtA

An IKEA Stool Turns Into a DIY Lamp and Tripod Stool Combo

An IKEA Stool Turns Into a DIY Lamp and Tripod Stool Combo

DIY IKEA FROSTA Lamp and Tripod Stool Combo

Home Tree Atlas DIY Projects

The curved leg of IKEA’s FROSTA stool looked like it could be turned into a stylish lamp. The good thing about this project is that you can rebuild the stool using the left over 3 legs – creating a tripod stool. And no tools are need to do all of this.

MATERIALS AND SUPPLIES

  • IKEA FROSTA Stool

I had one that was already being used as a stool

  • Concrete and Rubber Gloves

Premixed bags like Quikrete are easy to use since you just need to add water. But I used a bag of concrete and a bag of sand and made my own mix.

  • LED Lights and Superglue

I used some basic IKEA DIODER LED lights which I had

  • Paper, Cardboard, and Stanley Knife

This is to make the template and the box that will be used to pour the cement into

INSTRUCTIONS

STEP 1: Taking the stool apart

Since I’m using a FROSTA stool that I already had, I needed to take it apart

DIY IKEA FROSTA Lamp and Tripod Stool Combo - STEP 1 Taking it apart

DIY IKEA FROSTA Lamp and Tripod Stool Combo - STEP 1 Taking it apart

STEP 2: Making the template

The next step is to make a box for the cement. Draw a cross with 4 and 1/2 inch wide and tall panels. After cutting it out, trace it onto some thick cardboard.

I scored the insides of the box to make it easier to fold the sides.

DIY IKEA FROSTA Lamp and Tripod Stool Combo - STEP 2 Making the template

DIY IKEA FROSTA Lamp and Tripod Stool Combo - STEP 2 Making the template

DIY IKEA FROSTA Lamp and Tripod Stool Combo - STEP 2 Making the template

DIY IKEA FROSTA Lamp and Tripod Stool Combo - STEP 2 Making the template

STEP 3: Marking the base

When the cement is poured, you’ll want to have a bit of a base before putting in the wooden leg. So mark 1/2 inch on all sides of the box.

DIY IKEA FROSTA Lamp and Tripod Stool Combo - STEP 3 Marking the base

STEP 4: Waterproofing the cardboard and taping it together

Cover the inside of the template with tape to protect it from the wet cement. Then tape the sides together.

DIY IKEA FROSTA Lamp and Tripod Stool Combo - STEP 4 Waterproofing the cardboard

DIY IKEA FROSTA Lamp and Tripod Stool Combo - STEP 4 Taping the box together

STEP 5: Mixing the concrete

You’ll need some rubber gloves when mixing the concrete, as it can burn your skin. If you are using Quikrete, you’ll just need to follow the directions and mix it with water. I used the top of a cut off water bottle to mix 1 part concrete with 2 parts sand with enough water to get a wet mix.

DIY IKEA FROSTA Lamp and Tripod Stool Combo - STEP 5 Mixing the concrete

DIY IKEA FROSTA Lamp and Tripod Stool Combo - STEP 5 Mixing the concrete

STEP 6: Pouring the cement

Pour the cement until you reach the 1/2 mark. Then shake the box a bit to flatten out the cement. Now you can put the stool leg into the box, using books/scrap wood/paint tins/anything to hold up the leg at the right level.

As you pour the cement, use a thin stick to poke all the way around the box to help release the air bubbles. Tapping on the outside of the box lightly also helps release air bubbles.

I had to put some scrap wood onto of the stool leg to hold it down, as it would try and float up as I poured in the cement.

DIY IKEA FROSTA Lamp and Tripod Stool Combo - STEP 6 Pouring the base

DIY IKEA FROSTA Lamp and Tripod Stool Combo - STEP 6 Pouring the base

STEP 7: While you wait – the FROSTA Tripod Stool

I left the cement to dry overnight. While I was waiting I used this tutorial by Apartment Therapy to rebuild the stool, using 3 legs.

STEP A: Screw one leg

Screw one of the legs back into the seat, in a set of holes that are already there

DIY IKEA FROSTA Lamp and Tripod Stool Combo - STEP 7 Building the 3 legged stool

DIY IKEA FROSTA Lamp and Tripod Stool Combo - STEP 7 Building the 3 legged stool

DIY IKEA FROSTA Lamp and Tripod Stool Combo - STEP 7 Building the 3 legged stool

STEP B: Draw the horizontal line

Following the screw holes on opposite sides, create a line across the seat.

DIY IKEA FROSTA Lamp and Tripod Stool Combo - STEP 7 Building the 3 legged stool

STEP C: Marking the new lines

Make a mark 3 and 5/8 inches (9.2cm) down from the horizontal line along the edge on both sides of the stool. Then connect the marks with the centre hole in the stool.

DIY IKEA FROSTA Lamp and Tripod Stool Combo - STEP 7 Building the 3 legged stool

STEP D: New hole placements

Measure the distance from the edge of the stool to one of the first screw holes where the legs use to be. My measurement was 1 inch from the edge. Make this mark on your lines, this is where you’ll need to screw the first screw. Then line up the end of the leg with the line and screw the next screws in.

DIY IKEA FROSTA Lamp and Tripod Stool Combo - STEP 7 Building the 3 legged stool

DIY IKEA FROSTA Lamp and Tripod Stool Combo - STEP 7 Building the 3 legged stool

STEP 8: Removing the cardboard

I waited overnight before removing the cardboard box. Once it was removed I waited for about half a day for the sides and bottom areas to fully dry.

DIY IKEA FROSTA Lamp and Tripod Stool Combo - STEP 8 Removing the cardboard

STEP 9: Adding the Light

Next glue the LED lights to the underside of the stool leg – not too close to the curve since it will need to be connected to the power supply.

DIY IKEA FROSTA Lamp and Tripod Stool Combo - STEP 9 Adding the LED lights

DIY IKEA FROSTA Lamp and Tripod Stool Combo - STEP 9 Adding the LED lights

DIY IKEA FROSTA Lamp and Tripod Stool Combo

DIY IKEA FROSTA Lamp and Tripod Stool Combo

Email me at jacob@hometreeatlas.com with photos if you make your own, or if you have any questions.

Home Tree Atlas DIY Projects

January 30, 2016 in Made By HtA

The DIY Table Tower – Basic Edition: Plywood Shelves that Slot Onto a Table

The DIY Table Tower - Basic Edition: Plywood Shelves that Slot Onto a Table

The DIY Table Tower - Basic Edition: Plywood Shelves that Slot Onto a Table

The DIY Table Tower - Basic Edition: Plywood Shelves that Slot Onto a Table

The DIY Table Tower - Basic Edition: Plywood Shelves that Slot Onto a Table

Home Tree Atlas DIY Projects

I needed some storage space around my work table, and I couldn’t put up any shelves on the walls. So I figured out a way to build a shelf tower that could slot onto my table. It can be customized to your own storage needs. The one I built here is quite basic. But I have ideas for:

  • A Workshop Table Tower with lots of sliding shelves to store screws and side brackets to hold pliers.
  • A Desk Table Tower that will have a dowel to hang up headphones, a caddy to store notebooks, and a bracket to store pens.

The DIY Table Tower - Basic Edition: Plywood Shelves that Slot Onto a Table - Materials

TOOLS

  • Jigsaw

This is the only power saw I have, so this is what I used.

  • Drill

To cut the inside of the slot, you’ll need a drill and a drill bit the size of the jigsaw’s blade

MATERIALS AND SUPPLIES

  • Plywood

I used 3/4 inch plywood

  • Screws

1 and 1/2 inch wood screws

  • Dowels

These can be bought, but I had a few left over from an IKEA bookcase. You could also use small screws.

INSTRUCTIONS

STEP 1: The height of the tower

The tower I built is 27 inches tall, 8 inches wide (excluding the thickness of the side panels), and 9 inches deep.

So the two side panels need to be marked out: 27 inches tall and 9 inches wide. The 3 panels that fit in-between the side panels are 8 inches by 9 inches.

The DIY Table Tower - Basic Edition: Plywood Shelves that Slot Onto a Table - STEP 1 The height of the tower

STEP 2: Cut the plywood

Once the pieces are marked out, cut them all out. For the shelf panel, i just cut the piece slightly skinnier than the top and bottom ones so it can slide into the tower easier.

The DIY Table Tower - Basic Edition: Plywood Shelves that Slot Onto a Table - STEP 2 Cutting the plywood

STEP 3: Measuring the slots

The slots need to be marked out next. I drew a line across both side panels, 8 inches from the bottom.

The thickness of the table I want to put this tower on is 3/4 inch. So I would need to create a slot the same size. I measured 3/4 inches up from the 8 inch mark on both side panels. These slots need to be 7 inches wide.

The DIY Table Tower - Basic Edition: Plywood Shelves that Slot Onto a Table - STEP 3 Measuring the slots

STEP 4: Cutting the slots

Use the jigsaw to cut into the plywood where the slots are marked out. You’ll then need to use the drill to drill a hole for your jigsaw blade to fit through so you can cut the sideways part of the slot, just like in the pictures below.

The DIY Table Tower - Basic Edition: Plywood Shelves that Slot Onto a Table - STEP 4 Cutting the slots

STEP 4: Adding the dowels for the shelf

Measuring 9 inches down from the top, 2 holes (the same size as the dowels) were drilled (not all the way though) on each side panel. The dowels were then hammered in. If the holes you drilled are too wide for the dowels, just put in some glue/woodglue.

The DIY Table Tower - Basic Edition: Plywood Shelves that Slot Onto a Table - STEP 5 Adding the dowels

The DIY Table Tower - Basic Edition: Plywood Shelves that Slot Onto a Table - STEP 5 Adding the dowels

STEP 5: Assemble the Tower

Taking a side piece, drill some sink holes where your screws will go in. Now screw a side piece to either the top or bottom panel. And keep working around until you’ve built the Tower.

The DIY Table Tower - Basic Edition: Plywood Shelves that Slot Onto a Table - STEP 6 Assembling the Tower

The DIY Table Tower - Basic Edition: Plywood Shelves that Slot Onto a Table - STEP 6 Assembling the Tower

The DIY Table Tower - Basic Edition: Plywood Shelves that Slot Onto a Table - STEP 6 Assembling the Tower

The DIY Table Tower - Basic Edition: Plywood Shelves that Slot Onto a Table - STEP 6 Assembling the Tower

The DIY Table Tower - Basic Edition: Plywood Shelves that Slot Onto a Table - STEP 6 Assembling the Tower

The DIY Table Tower - Basic Edition: Plywood Shelves that Slot Onto a Table

The DIY Table Tower - Basic Edition: Plywood Shelves that Slot Onto a Table

The DIY Table Tower - Basic Edition: Plywood Shelves that Slot Onto a Table

Email me at jacob@hometreeatlas.com with photos if you make your own, or if you have any questions.

Home Tree Atlas DIY Projects

January 29, 2016 in Made By HtA

DIY Organization Bloks Made Out of Plywood: Bedroom and Desk Editions

DIY Organization Bloks Made Out of Plywood: Bedroom and Desk Editions

It’s pretty surprising the almost unlimited ways you can get creative building with plywood by gluing pieces together. I’ve only just started basic woodworking, but I’ve already made a lamp, and coasters using scrap plywood – along with a number of other plywood projects.

Bloks, as I like to call them, are organizers made by cutting holes in sheets of plywood and gluing them together. They can be customized to any room, or for any items that you want grouped and organized helping to get rid of clutter on your tables.

DIY Organization Bloks Made Out of Plywood: Bedroom and Desk Editions - Materials

Home Tree Atlas DIY Projects

TOOLS

  • Jigsaw

My power saw jigsaw was bought at IKEA, not the best but still does the job

  • Drill

And a drill bit the size of your jigsaw blade

MATERIALS AND SUPPLIES

  • Plywood

I used 3/4 inch plywood. You can use thinner plywood, but you’ll just need to glue more pieces together to create a stack

  • Sandpaper

I used 150 grit sandpaper

  • 4x Clamps

These will be used to clamp together the plywood while the glue sets

  • Wood Glue
  • Tape Measure and Pencil
  • Polyurethane

This is used to finish off the plywood when you are done – giving it a nice shine. You can also use Linseed oil

INSTRUCTIONS

Step 1: Gather your items

This is a custom organizer for your items, so gather up what you want to organzie. For me this included notebooks, my phone, pens, and loose items.

Next measure how wide your holes need to be to fit your items. For my phone, I needed a hole that was 3 by 2 inches.

I just made sure there was an inch border around the whole block and in-between most holes.

DIY Organization Bloks Made Out of Plywood: Bedroom and Desk Editions - STEP 1 The Template

DIY Organization Bloks Made Out of Plywood: Bedroom and Desk Editions - STEP 1 The Template

Step 2: The depth of each hole

The next step is to figure out how many pieces of plywood sheets you’ll need to create your block. I knew I needed 4 sheets to create the height of the block. There would be one base layer (at the bottom) with no holes in it. The holes for my phone and notebooks would be cut in the next 3 layers, while the holes for the pencils and loose items would only need to be cut in the top plywood sheet.

DIY Organization Bloks Made Out of Plywood: Bedroom and Desk Editions - STEP 2 The depth

The Template for the Bedroom Blok

This one will hold a book in the back and my phone in the front. I ended up having to drill a hole through the side once it was built to feed through my charger cable.

DIY Organization Bloks Made Out of Plywood: Bedroom and Desk Editions - The Bedroom Blok Template

Step 3: Cut out your template

DIY Organization Bloks Made Out of Plywood: Bedroom and Desk Editions - STEP 3 Cutting out the template

DIY Organization Bloks Made Out of Plywood: Bedroom and Desk Editions - STEP 3 Cutting out the template

Step 4: Trace your template onto your plywood

I just mark the corners of the template and use a ruler to connect them

DIY Organization Bloks Made Out of Plywood: Bedroom and Desk Editions - STEP 4 Tracing the template

DIY Organization Bloks Made Out of Plywood: Bedroom and Desk Editions - STEP 4 Tracing the template

DIY Organization Bloks Made Out of Plywood: Bedroom and Desk Editions - STEP 4 Tracing the template

Step 5: Drill your holes

Take your drill and the drill bit that is the same size as the blade for your jigsaw, and drill a hole on opposite corners where each hole will be in the plywood. This hole lets your jigsaw blade get into where you need to cut.

DIY Organization Bloks Made Out of Plywood: Bedroom and Desk Editions - STEP 5 Drilling the holes for the jigsaw blade to fit into

Step 6: Saw out the holes

Take the jigsaw and cut out the holes

DIY Organization Bloks Made Out of Plywood: Bedroom and Desk Editions - STEP 6 Cutting out the pieces

DIY Organization Bloks Made Out of Plywood: Bedroom and Desk Editions - STEP 6 Cutting out the pieces

Step 7: Glue the pieces together and clamping it

Glue the pieces in the right order. When you’re done glueing the plywood together, you’ll need to clamp the block (using scrap wood on the top and bottom) so the glue makes a solid connection with the wood. It will take over 30 minutes for the glue to set.

DIY Organization Bloks Made Out of Plywood: Bedroom and Desk Editions - STEP 7 Glueing the plywood pieces together

DIY Organization Bloks Made Out of Plywood: Bedroom and Desk Editions - STEP 7 Glueing the plywood pieces together

Step 8: Sanding down the edges

Since the jigsaw does not make perfect straight lines, I took some sandpaper and sanded down the edges of the block. You can do this by hand, or you can buy a cheap sanding disk attachment for your drill – which is what I did and it saves a lot of time.

DIY Organization Bloks Made Out of Plywood: Bedroom and Desk Editions - STEP 8 Sanding the edges

Step 9: Adding some gloss

After you’ve sanded down the edges, wipe off the wood dust so you have a clean surface to apply the polyurethane to. After my first coat, I waited 3 hours for it to dry. I hand sanded it down all over before adding a second coat – followed by another sanding after it dried to smooth it out.

DIY Organization Bloks Made Out of Plywood: Bedroom and Desk Editions - STEP 9 Adding the polyurethane

DIY Organization Bloks Made Out of Plywood: Bedroom and Desk Editions - STEP 9 Adding the polyurethane

The Desk Blok

DIY Organization Bloks Made Out of Plywood: Bedroom and Desk Editions - The Desk Blok

DIY Organization Bloks Made Out of Plywood: Bedroom and Desk Editions - The Desk Blok

The Bedroom Blok

DIY Organization Bloks Made Out of Plywood: Bedroom and Desk Editions - The Bedroom Blok DIY Organization Bloks Made Out of Plywood: Bedroom and Desk Editions - The Bedroom Blok

Email me at jacob@hometreeatlas.com with photos if you make your own, or if you have any questions.

Home Tree Atlas DIY Projects

Related Posts Plugin for WordPress, Blogger...
January 28, 2016 in Made By HtA