Home Tree Atlas

21 Kitchen Backsplash Ideas and Design Tips || The Ultimate Creative Guide

21 Kitchen Backsplash Ideas and Design Tips || The Ultimate Creative Guide

I have grouped the kitchen backsplash ideas and designs below into 3 sections:

  • Creative Ideas (such as pegboards, plywood, and photographs)
  • Classic Options (such as copper, Delft tiles, and brick)
  • Modern Styles (such as polished concrete and wood)

Creative Kitchen Backsplash Ideas

21 Kitchen Backsplash Ideas and Design Tips || The Ultimate Creative Guide: #1 Painted Plywood

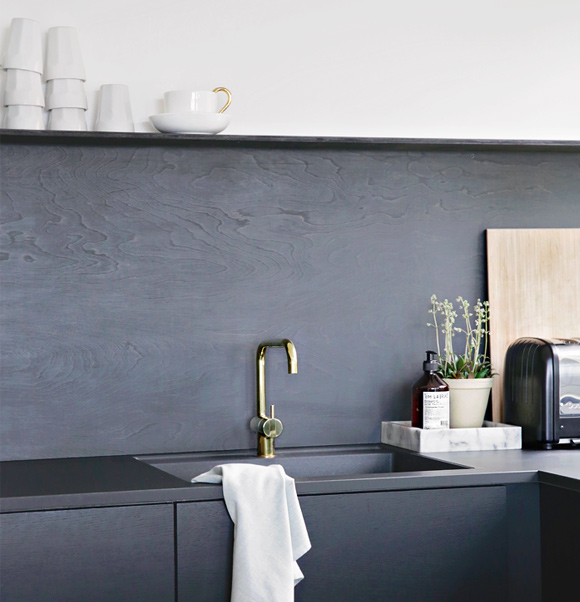
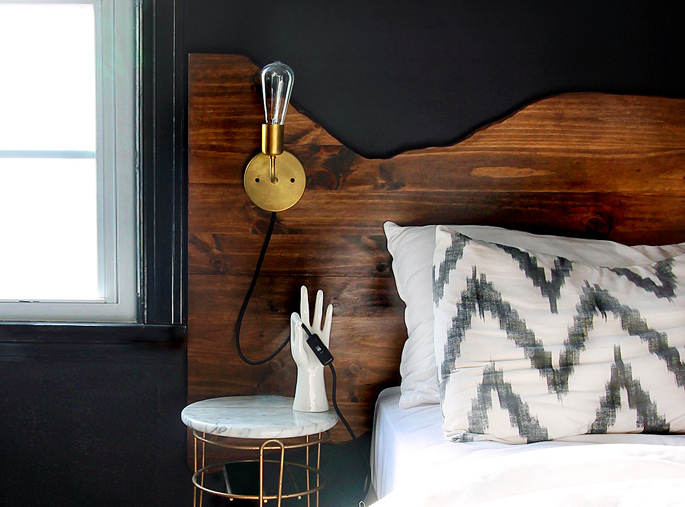
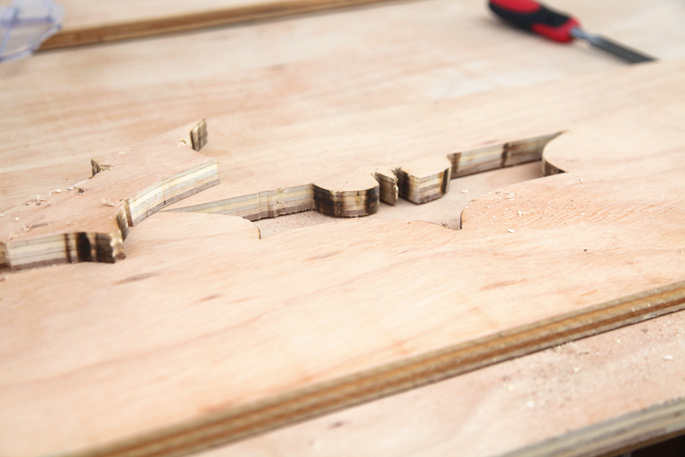
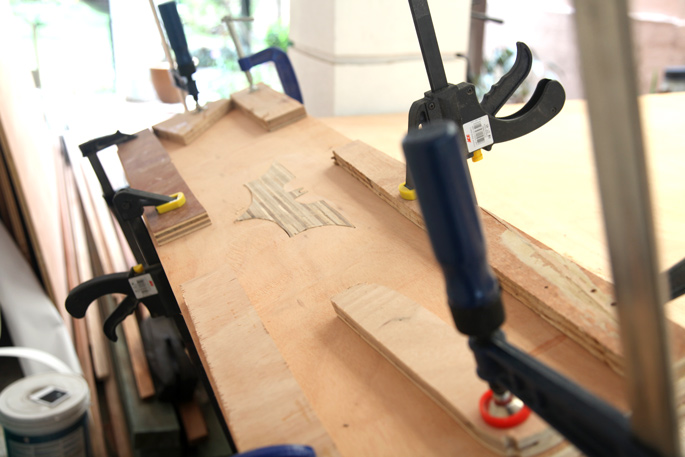
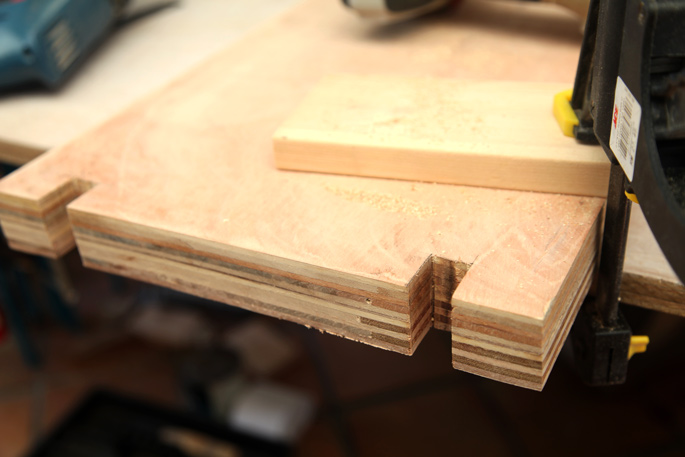
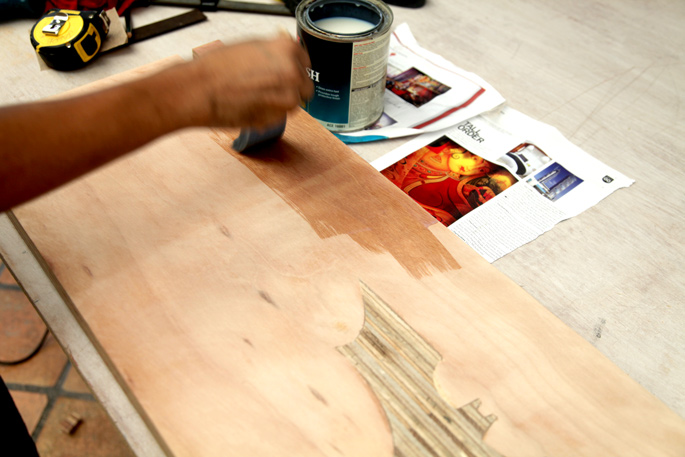
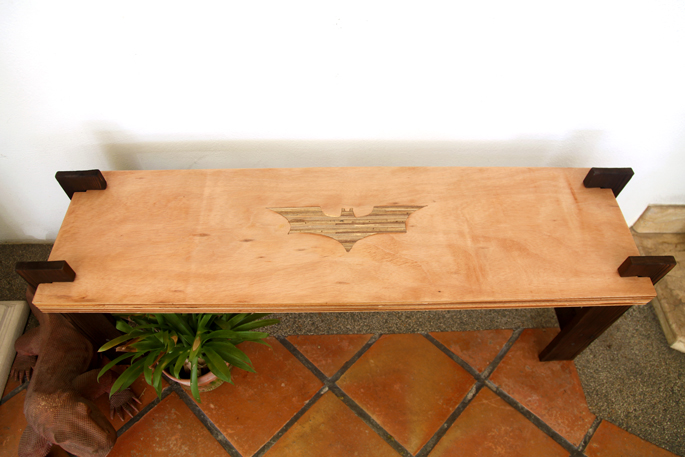
1. Painted Plywood: It is hard to believe that the backsplash in the photo above is plywood – this will really help keep the cost down, and is an easy backsplash idea. The simple black backsplash with the bronze tap makes this space look like a luxury designer kitchen – Stylizmo.

*

21 Kitchen Backsplash Ideas and Design Tips || The Ultimate Creative Guide: #2 Raw plywood kitchen backsplash

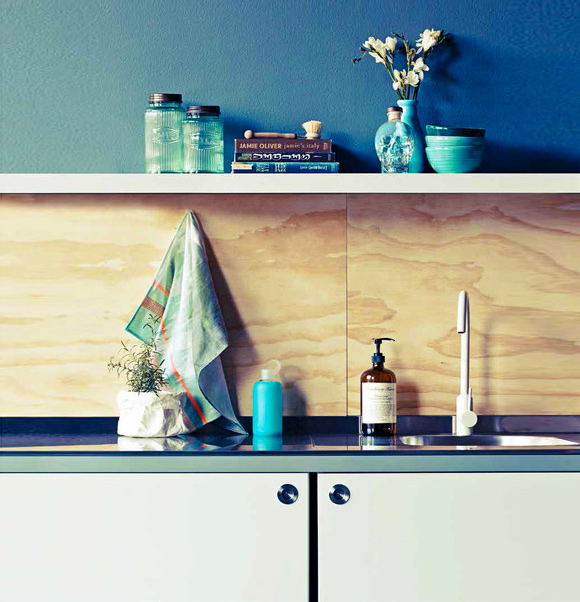
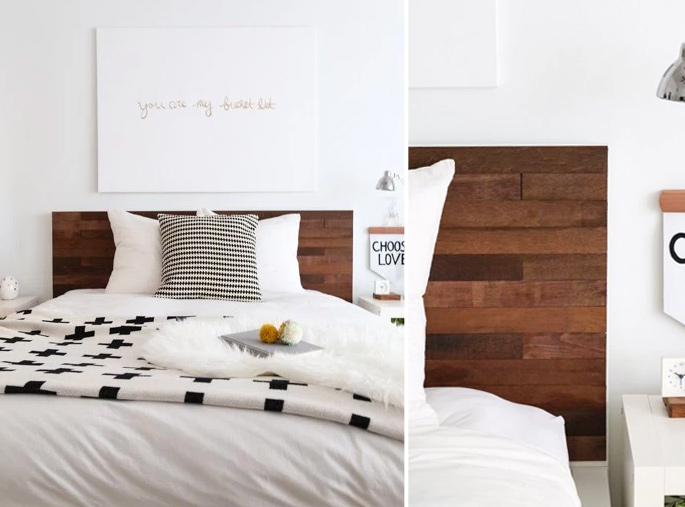
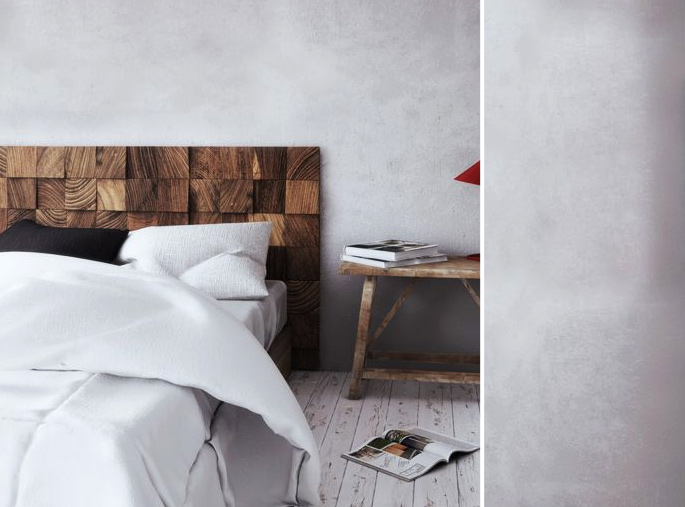
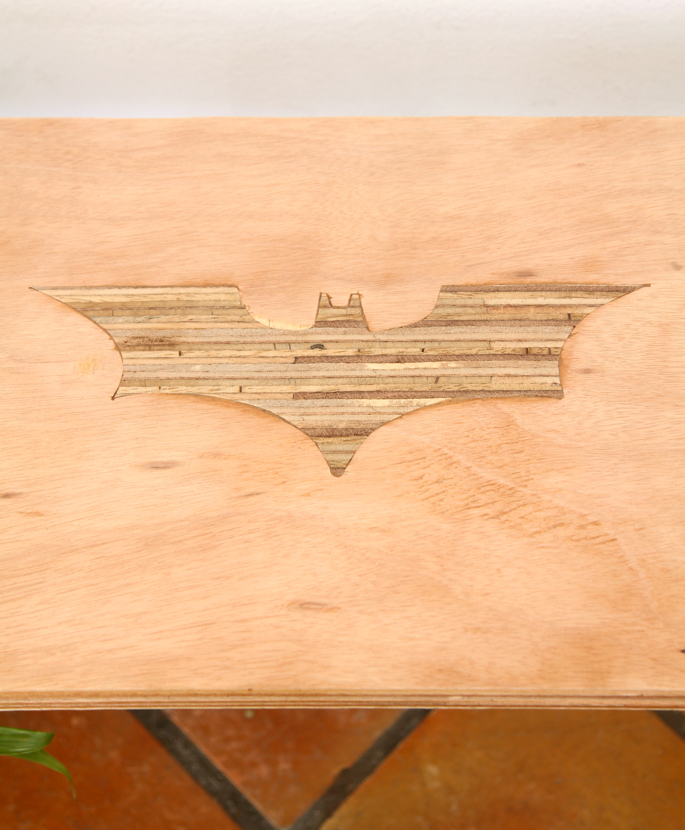
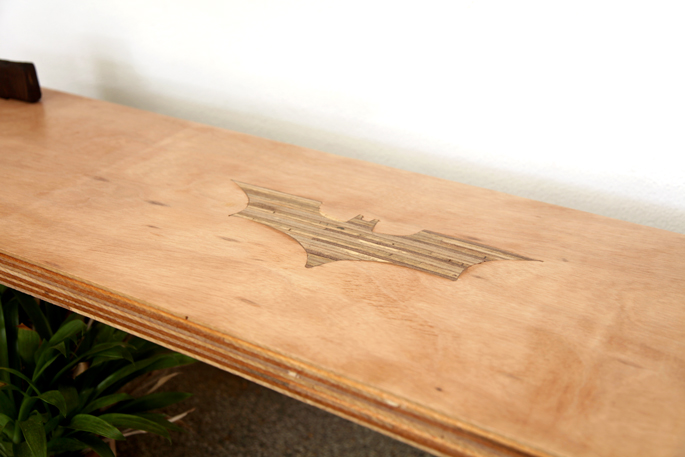
2. Raw Plywood: Leaving the plywood unstained with the natural color creates a more earthy look – Erin Michael

*

21 Kitchen Backsplash Ideas and Design Tips || The Ultimate Creative Guide: #3 Pegboard kitchen backsplash

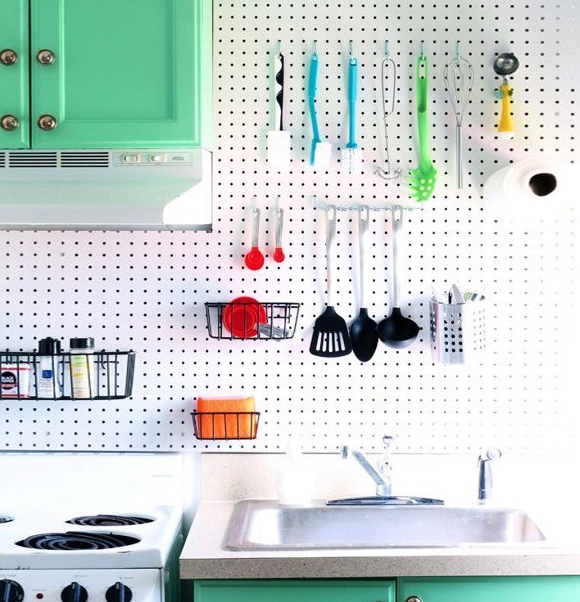
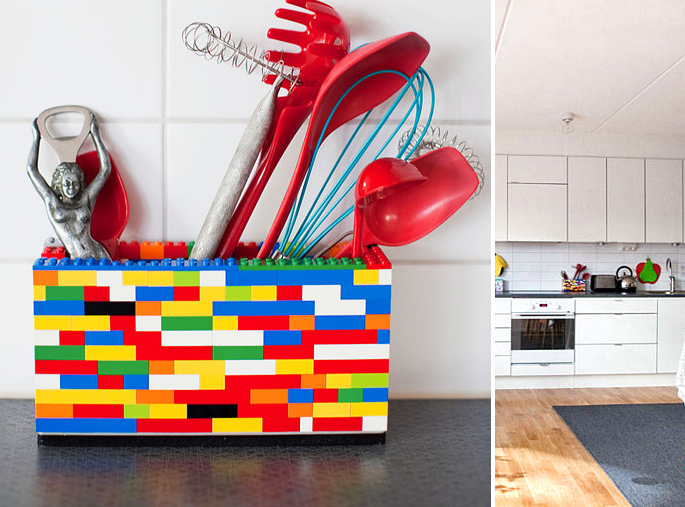
3. The Pegboard Backsplash: Are you really into organising everything in the kitchen? A white pegboard (or you can even paint it) can become a feature piece in the kitchen. Hang up some designer kitchen utensils (or even just colorful ones) and you’ve got some kitchen decor pieces (Beautiful Wall Decor Ideas for the Kitchen) – Houzz.

*

21 Kitchen Backsplash Ideas and Design Tips || The Ultimate Creative Guide: #4 Photo gallery backsplash

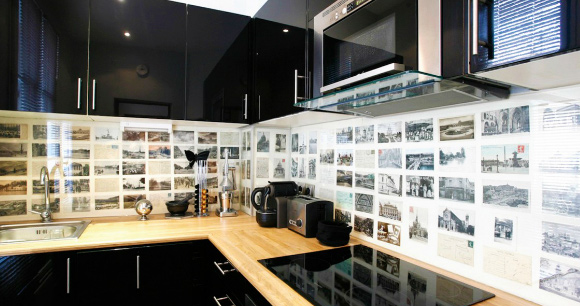
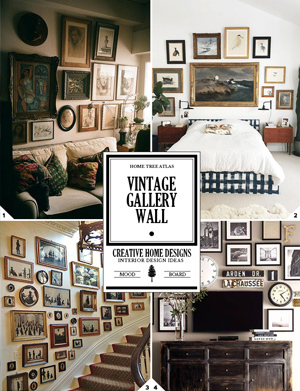
4. Photos for a Gallery Wall Backsplash: You could go with family photos or more artistic images. Turn them black and white for a more modern and designer feel – Jetsetter.

*

21 Kitchen Backsplash Ideas and Design Tips || The Ultimate Creative Guide: #5 Graphic tile kitchen backsplash

5. Large Tiled Graphic: You can find sets of tiles with large graphics on them, or you can even create your own (Home Decor Ideas: DIY Tile Coasters) – Ensuus.

Classic Kitchen Backsplash Options

21 Kitchen Backsplash Ideas and Design Tips || The Ultimate Creative Guide: #6 Brick kitchen backsplash design

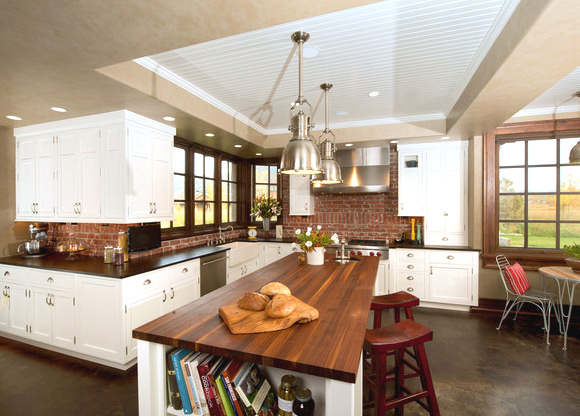
6. Brick: A homely choice that adds earthly colors to the kitchen palette – Houzz

*

21 Kitchen Backsplash Ideas and Design Tips || The Ultimate Creative Guide: #7 White painted brick backsplash

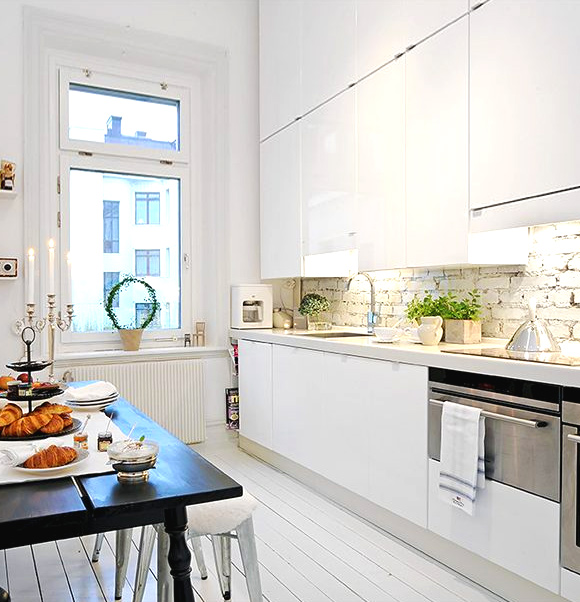
7. Painted Brick: You can also use brick as a kitchen sink backsplash by painting over it, keeping the rustic touch but matching the color of the kitchen – Moje Powidoki

*

21 Kitchen Backsplash Ideas and Design Tips || The Ultimate Creative Guide: #8 Subway tile kitchen backsplash

8. The Subway Tile Kitchen Backsplash: A classic design that looks clean and minimalist – Houzz.

*

21 Kitchen Backsplash Ideas and Design Tips || The Ultimate Creative Guide: #9 Hexagon tiles

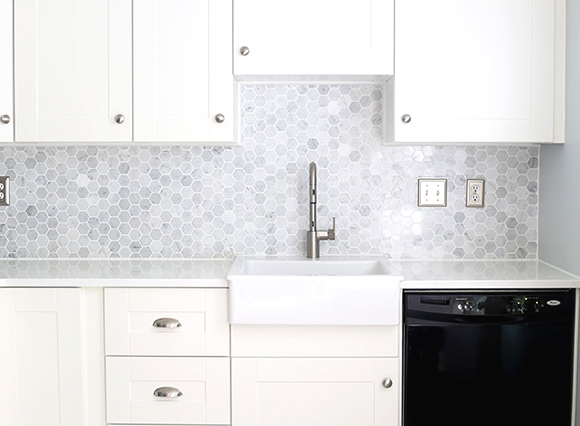
9. Hex Tiles Backsplash: Another classic tile design commonly used for kitchen backsplashes – Just a Girl and Her Blog

*

21 Kitchen Backsplash Ideas and Design Tips || The Ultimate Creative Guide: #10 Blue Delft tiles

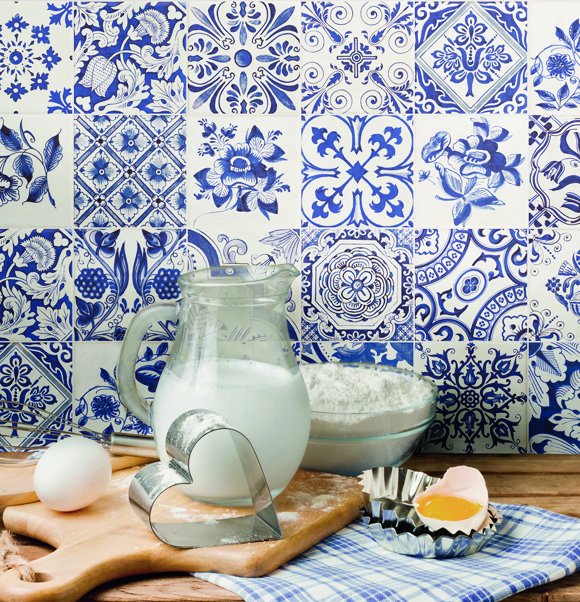
10. Delft Tiles: Blue and white tiles that reminisce antique Chinaware – Simply Tiles.

*

21 Kitchen Backsplash Ideas and Design Tips || The Ultimate Creative Guide: #11 Marble tiles

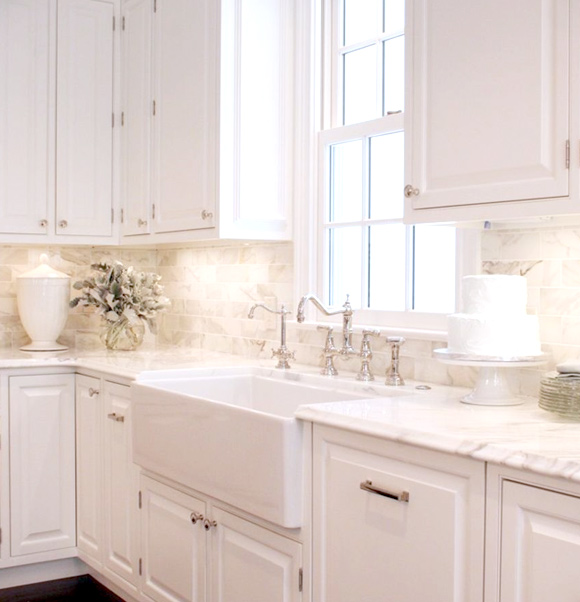
11. Marble Tile: Gives off a subtle and luxurious texture. If you were to use this in combination with a marble counter, it will create a seamless look and make the kitchen space feel larger – Porch.

*

21 Kitchen Backsplash Ideas and Design Tips || The Ultimate Creative Guide: #12 Tin tiles

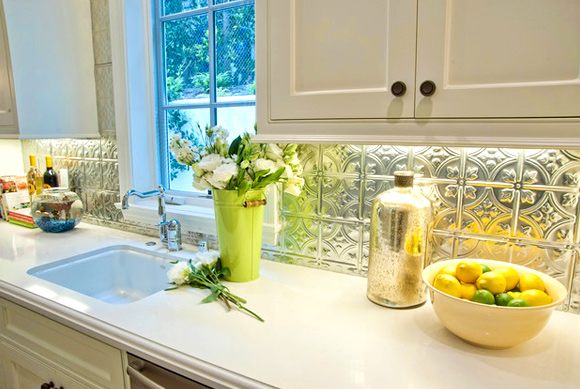
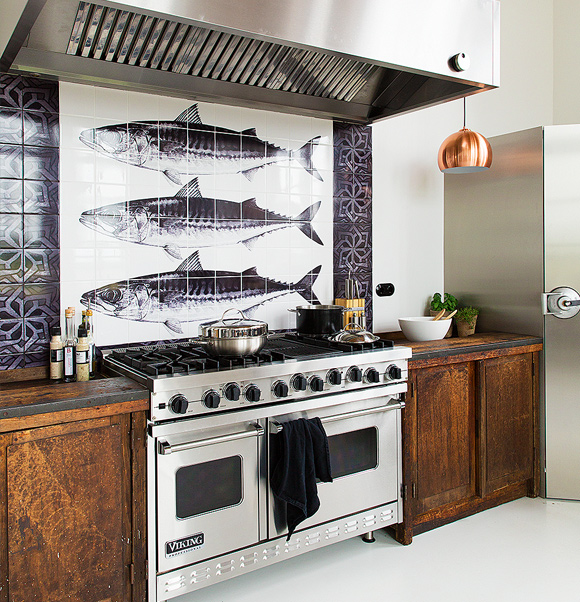
12. Pressed Metal Tin Tiles: A shiny and glossy surface, wether it is cabinet doors or a backsplash, will make a space feel bigger as it bounces light around the room – Houzz.

*

21 Kitchen Backsplash Ideas and Design Tips || The Ultimate Creative Guide: #13 Beadboard kitchen backsplash

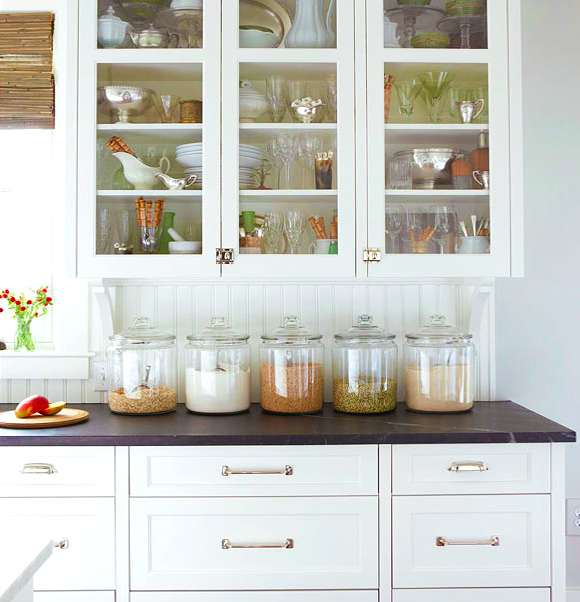
13. Beadboard: Ideal for more country and farmhouse style kitchens – BHG.

*

21 Kitchen Backsplash Ideas and Design Tips || The Ultimate Creative Guide: #14 Granite backsplash

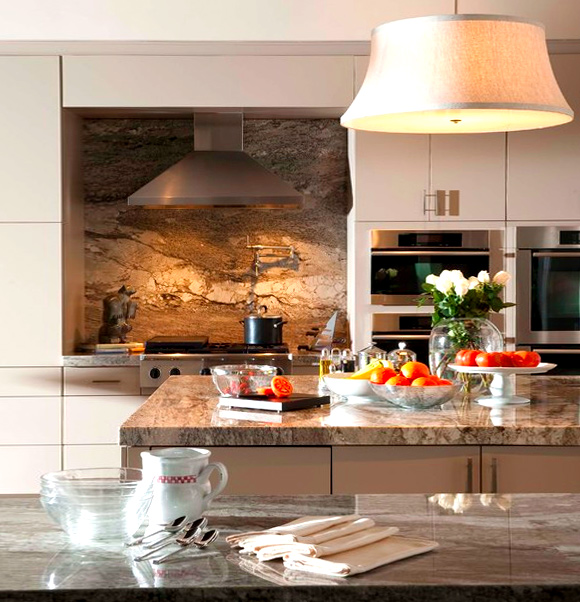
14. Traditional Stones: Granite, marble, and limestone are what high end kitchens use, since they are durable and long lasting – Houzz.

*

21 Kitchen Backsplash Ideas and Design Tips || The Ultimate Creative Guide: #15 Wallpaper backsplash

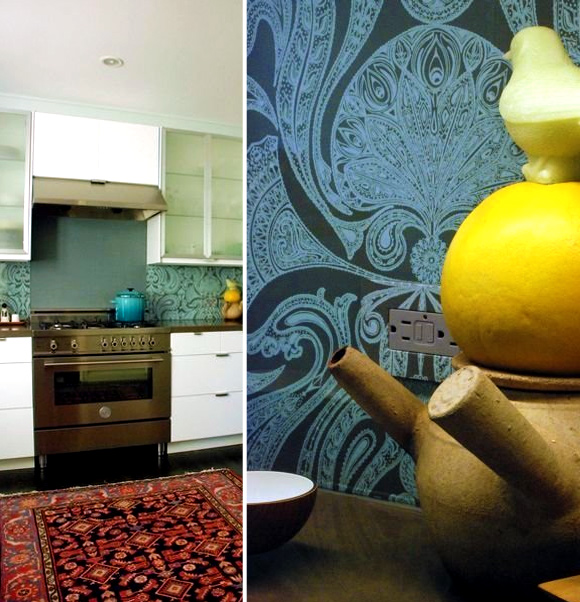
15. Wallpaper: This is a cheap backsplash idea (an even cheaper way would be to paint the walls), and can be easily updated or changed later. To protect the wallpaper near the sink and cooker, a glass covering should be fitted (just like in the Modern Ideas section below) – Apartment Therapy.

*

Modern Kitchen Backsplash Ideas

21 Kitchen Backsplash Ideas and Design Tips || The Ultimate Creative Guide: #16 Modern molded panels

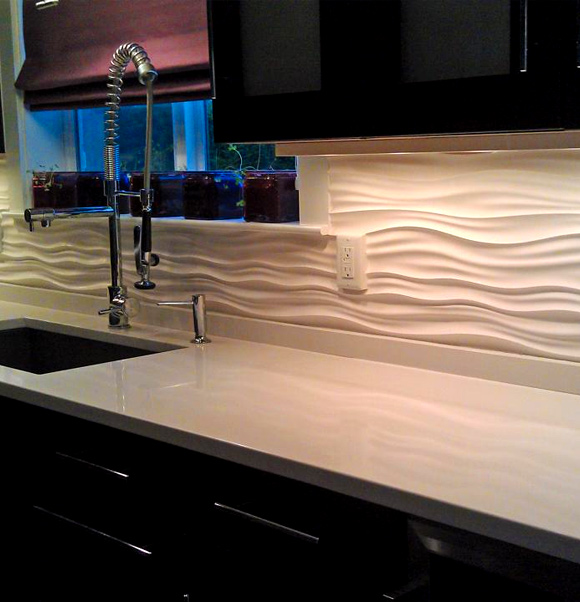
16. Molded Panels: Backsplash panels that look like sand dunes are used in this elegant kitchen design – HGTV.

*

21 Kitchen Backsplash Ideas and Design Tips || The Ultimate Creative Guide: #17 Glass tile

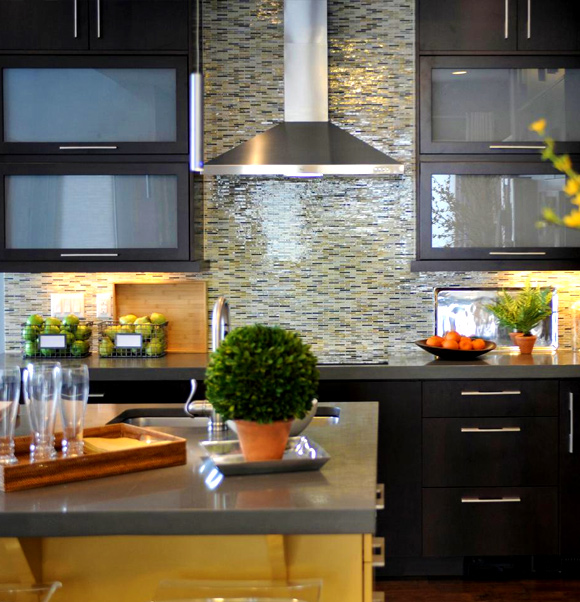
17. Glass Tile: A standard backsplash material these days for a modern look – HGTV.

*

21 Kitchen Backsplash Ideas and Design Tips || The Ultimate Creative Guide: #18 Concrete kitchen backsplash

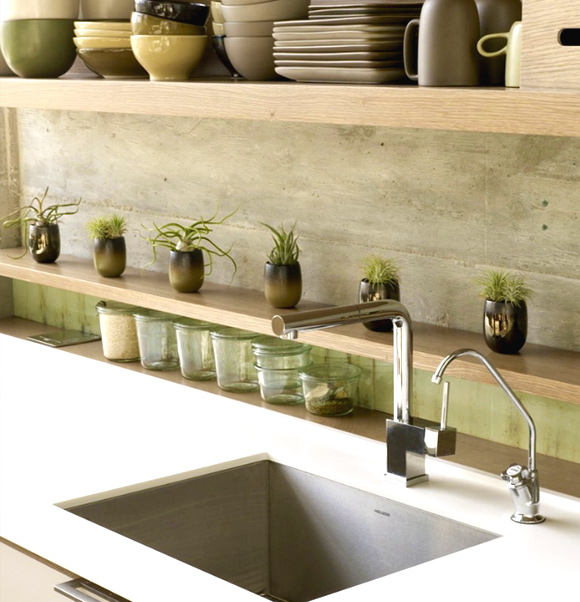
18. Concrete: This can be polished, stained, and even textured to create surprisingly stylish and sleek kitchen backsplash designs.

*

21 Kitchen Backsplash Ideas and Design Tips || The Ultimate Creative Guide: #19 Glass panel (paint or wallpaper behind it)

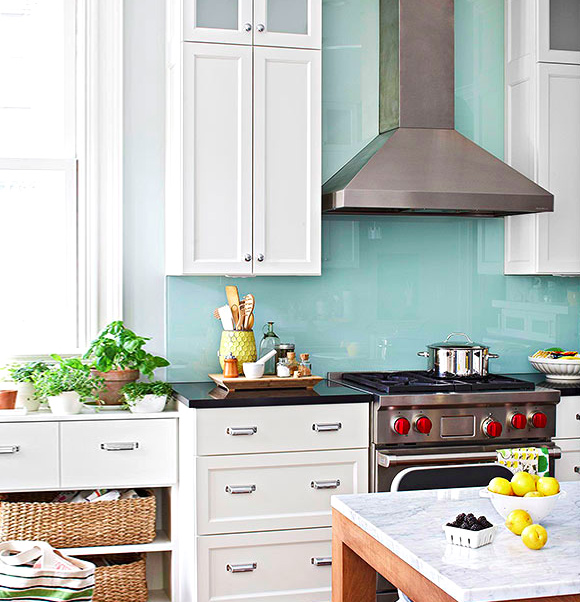
19. Tempered Glass: This modern backsplash can easily be matched to the style of the kitchen since you can paint behind it, or put up wallpaper – BHG.

*

21 Kitchen Backsplash Ideas and Design Tips || The Ultimate Creative Guide: #20 Mirror backsplash

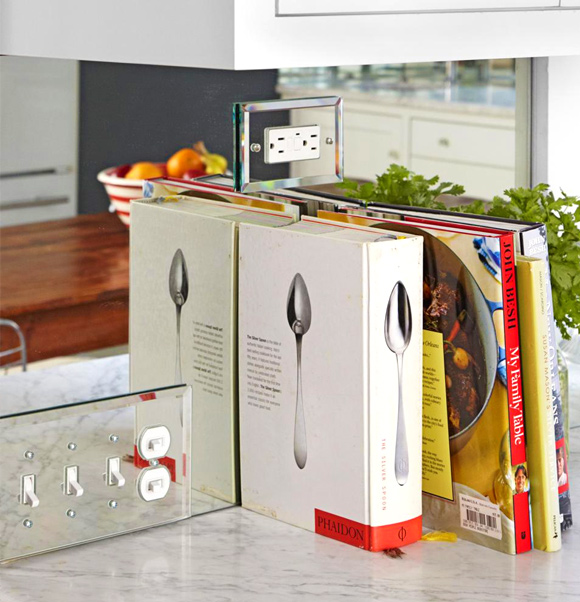
20. Mirror: This is a unique and different approach to a backsplash. It adds depth and makes the space feel larger – HGTV.

*

21 Kitchen Backsplash Ideas and Design Tips || The Ultimate Creative Guide: #21 Wooden kitchen backsplash

21 Kitchen Backsplash Ideas and Design Tips || The Ultimate Creative Guide: #21 Wooden kitchen backsplash

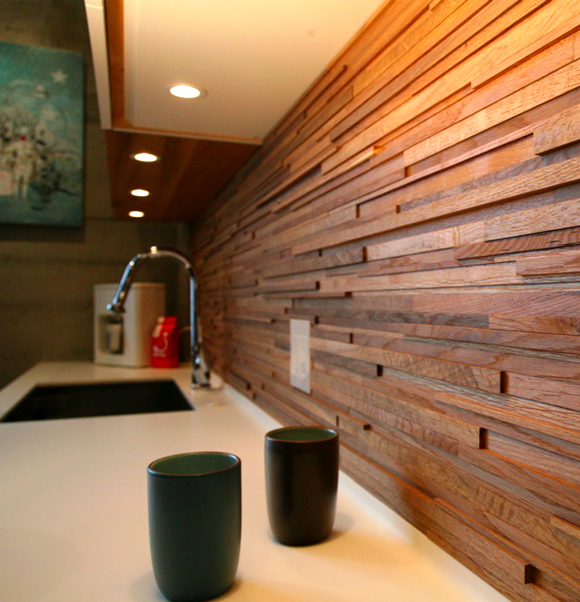
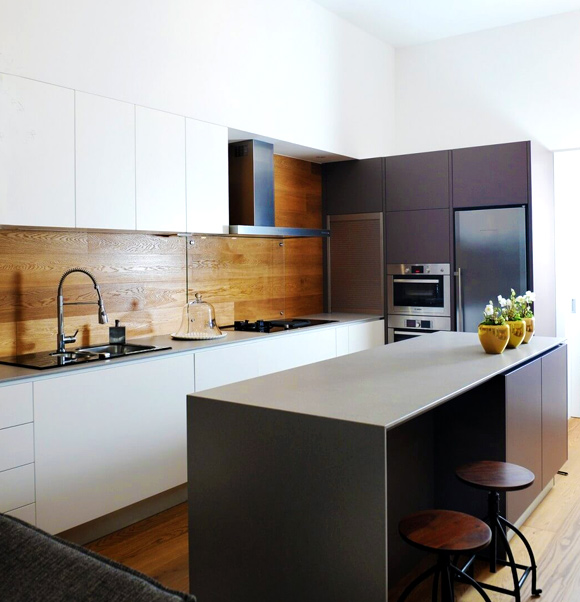
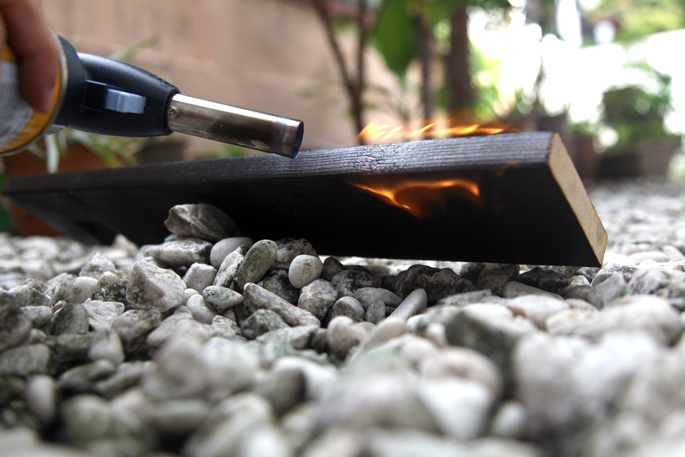
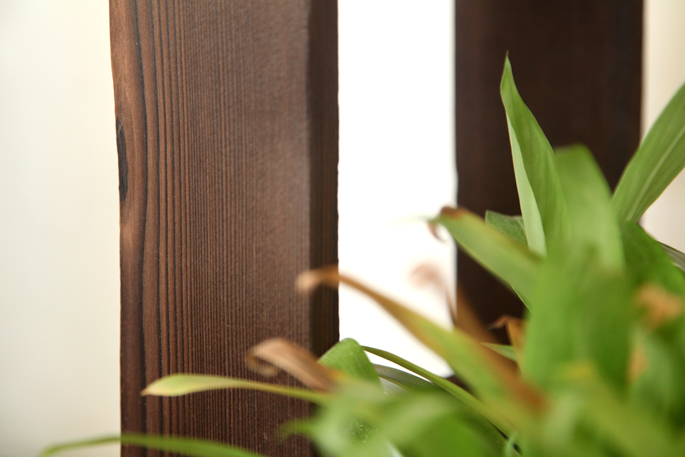
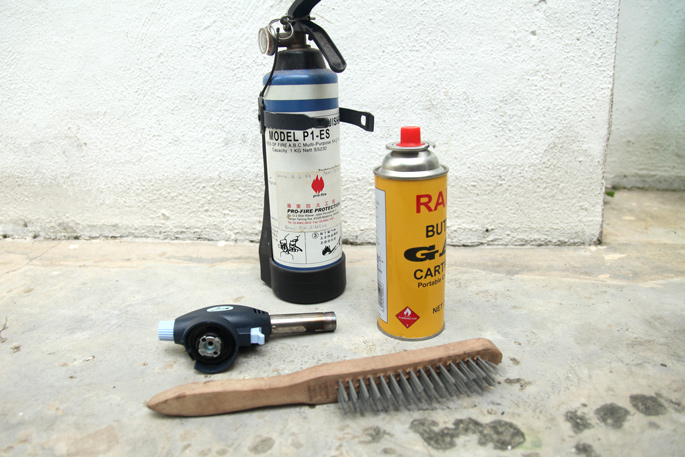
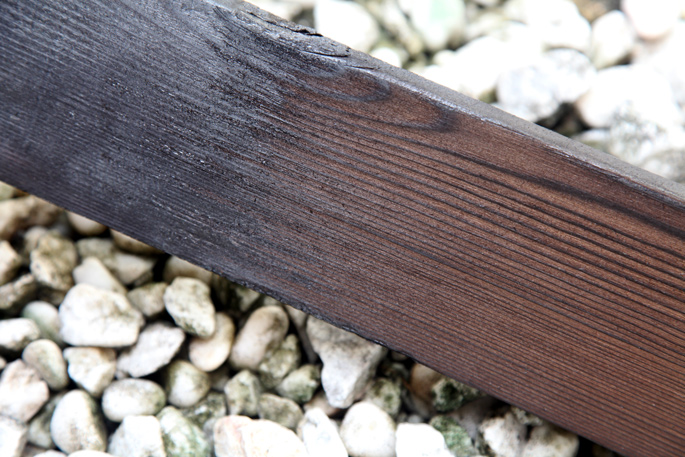
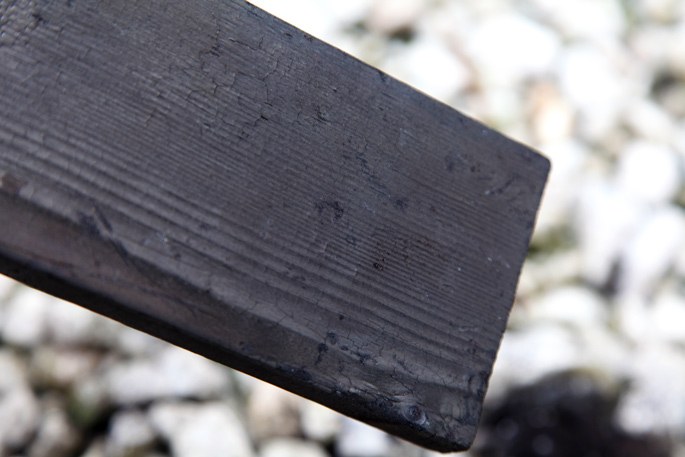
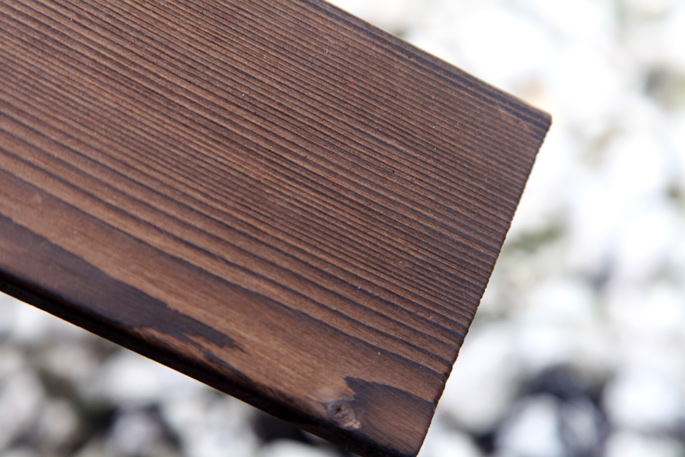
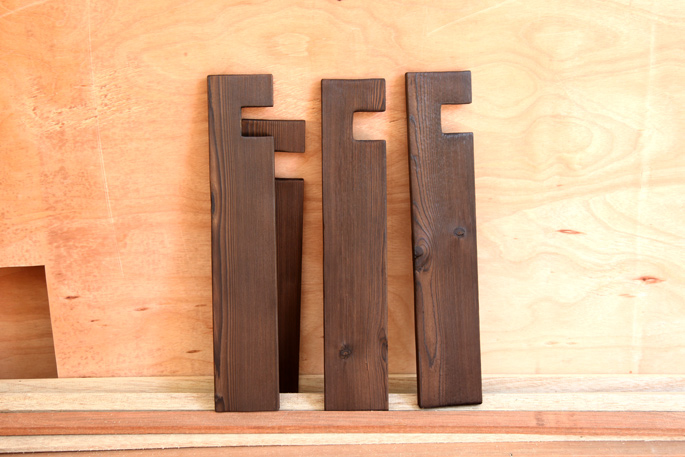
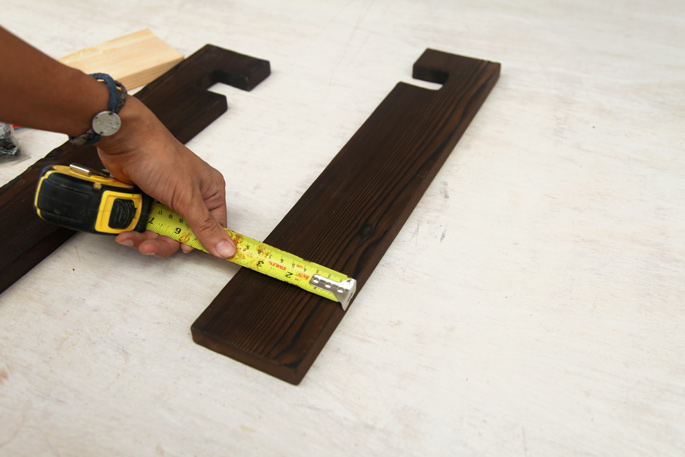
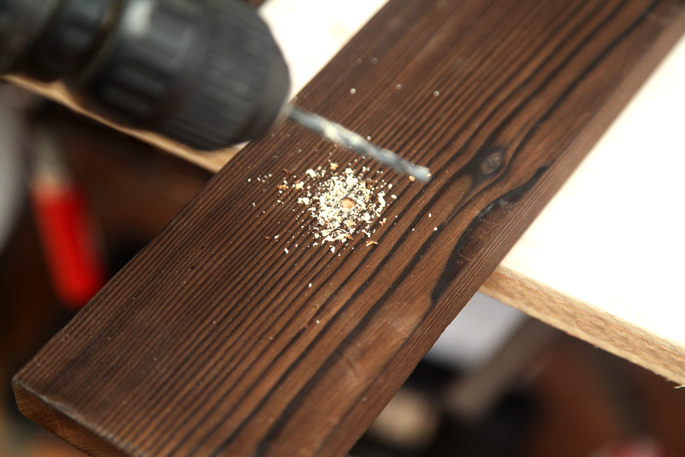
21. Using Wood: When thinking of a wooden backsplash, it would usually be for more a rustic looking kitchen. But it can be used to create a modern style, depending on the way it is installed. The tones of the wood will also bring some warmth to a sleek and modern kitchen – GAO.

More kitchen design and ideas posts:

February 16, 2016 in Kitchen

21 Insanely Cool DIY LEGO Furniture and Home Decor Creations

21 Insanely Cool DIY LEGO Furniture and Home Decor Creations

Before we get to the more ‘realistic’ LEGO DIY projects and LEGO furniture ideas, let’s first take a look at James May, from Top Gear, who spends the night in his own 100% LEGO house that he built.

1. A DIY LEGO wall – here is another crazy LEGO home project, an entire arched wall

21 Insanely Cool DIY LEGO Furniture and Home Decor Creations: #1 A LEGO wall

Constructed by NPIRE

2. Tables are a popular piece of furniture to make out of LEGO. You have this simple design that combines LEGO and an IKEA table

21 Insanely Cool DIY LEGO Furniture and Home Decor Creations: #2 The simple LEGO table

Found on IKEA Hackers

3. Or there is this homemade table made completely out of LEGO

21 Insanely Cool DIY LEGO Furniture and Home Decor Creations: #3 100% LEGO table

Built by Adam Ward

4. This one here shows how to build a LEGO table with a pattern for a more streamlined DIY look

21 Insanely Cool DIY LEGO Furniture and Home Decor Creations: #4 Patterned LEGO table

Another one from IKEA hackers

5. A LEGO conference table with LEGO lettering

21 Insanely Cool DIY LEGO Furniture and Home Decor Creations: #5 LEGO conference table with LEGO lettering

In the offices of Boys and Girls Advertising Agency

6. Liking the LEGO coffee table with a bottom shelf

21 Insanely Cool DIY LEGO Furniture and Home Decor Creations: #6 Coffee table

7. Into the Kitchen to see this IKEA and LEGO kitchen island creation

21 Insanely Cool DIY LEGO Furniture and Home Decor Creations: #7 LEGO kitchen island build

Shown on The Cool Hunter

8. Getting smaller now, with a LEGO kitchen utensil holder

21 Insanely Cool DIY LEGO Furniture and Home Decor Creations: #8 Kitchen Utensil Holder

In the house of Anna and Richard Wright

9. The DIY LEGO fruit tray

21 Insanely Cool DIY LEGO Furniture and Home Decor Creations: #9 The LEGO fruit tray

By Evil Mad Scientist

10. Getting artistic with the Brooklyn Bridge napkin holder

21 Insanely Cool DIY LEGO Furniture and Home Decor Creations: #10 Brooklyn Bridge napkin holder

Another creation by the Evil Mad Scientist

11. Keep those notices up on the fridge with LEGOS fitted with magnets

21 Insanely Cool DIY LEGO Furniture and Home Decor Creations: #11 DIY LEGO fridge magnets

DIY by Shes Called Claire

12. Your very own LEGO coaster set

21 Insanely Cool DIY LEGO Furniture and Home Decor Creations: #12 LEGO drink coasters

Made by Adam Ward

13. Add some green (and red, yellow, blue, and orange) to a room with a homemade LEGO planter

21 Insanely Cool DIY LEGO Furniture and Home Decor Creations: #13 LEGO planter

Made by Futuna

14. Stay organized during work time with a LEGO desk organiser

21 Insanely Cool DIY LEGO Furniture and Home Decor Creations: #14 LEGO DIY desk organizer

DIY by A Typical English Home

15. Getting Digital: The LEGO calendar, which can be synchronised to an online calendar

21 Insanely Cool DIY LEGO Furniture and Home Decor Creations: #15 A real life and digital calendar

The Bit Planner

16. Keep those cables closeby with some little helpers

21 Insanely Cool DIY LEGO Furniture and Home Decor Creations: #16 LEGO cable organizers

Found on Modernistic Design

17. A simple way to hang up the house keys

21 Insanely Cool DIY LEGO Furniture and Home Decor Creations: #17 LEGO key holder

Simple DIY by Minieco

18. All you need is a clock kit and some legos to DIY a LEGO clock

21 Insanely Cool DIY LEGO Furniture and Home Decor Creations: #18 LEGO clock

This clock was being sold on Etsy

19. LEGO sculpted chair legs – looks like a designer piece

21 Insanely Cool DIY LEGO Furniture and Home Decor Creations: #19 LEGO chair legs

Found on The Cool Hunter

20. Frame your shelves with some LEGO blocks

21 Insanely Cool DIY LEGO Furniture and Home Decor Creations: #20 LEGO shelf frame

Showcase on Home and Decor Singapore

21. Need any home fixes?

21 Insanely Cool DIY LEGO Furniture and Home Decor Creations: #21 Home fixes?

A global mission by Janvor Mann

BONUS – Keep the LEGO love flowing

DIY LEGO Mason jar heads – for storing your LEGOS

21 Insanely Cool DIY LEGO Furniture and Home Decor Creations: BONUS DIY Mason jar LEGO storage heads

DIY by Beau Coup

Lastly, concrete nesting tables made using LEGOS

21 Insanely Cool DIY LEGO Furniture and Home Decor Creations: BONUS DIY concrete nesting tables made using LEGOs

DIY by Homemade Modern

Check out these posts for more creative DIY ideas:

February 15, 2016 in Decor, DIY

15 Ideas and Secrets For Making DIY Wooden Headboards Look Expensive

15 Ideas and Secrets For Making DIY Wooden Headboards Look Expensive

Using wood is one of the simplest ways of building a DIY headboard. Below I go over all of the different techniques and creative ways to create a stylish, store bought looking DIY wooden headboard.

Avoid The Biggest Mistake – Finish With Style

A lot of people build a very flat rectangle wooden headboard, which tends to end up looking a little bit unfinished.

1. Finish With Style #1: Creating a border

15 Ideas and Secrets For Making DIY Wooden Headboards Look Expensive #1: Finish With Style - Creating a border

One way to avoid the ‘flat look’ is to add a border around the headboard. Ana White built a rustic reclaimed wooden headboard and finishes it off with a simple border – her tutorial includes plans on how to make it.

2. Finish With Style #2: Trim pieces

15 Ideas and Secrets For Making DIY Wooden Headboards Look Expensive #2: Finish With Style - Trim Pieces

Or how about adding some trim pieces to create different decorative shapes within the headboard – by Shanty 2 Chic

3. Finish With Style #3: Decorative painting

15 Ideas and Secrets For Making DIY Wooden Headboards Look Expensive #3: Finish With Style - Decorative Painting

Another way to break up a flat rectangle headboard is to add some shapes to it with paint – the tutorial for the vintage looking headboard above can be found here.

4. Finish With Style #4: Creating gaps

15 Ideas and Secrets For Making DIY Wooden Headboards Look Expensive #4: Finish With Style - Creating Gaps

Even separating boards can create some depth and make the headboard look more like a store bought one – by Brian Haazard

Shaping Your Headboard

Another way to avoid the flat look is to create a shape

5. Shaping Your Headboard #1: Wooden planks and a jigsaw

15 Ideas and Secrets For Making DIY Wooden Headboards Look Expensive #5: Shapes

DIY using wooden slats and a jigsaw by Remodelaholic

6. Shaping Your Headboard #2: Create a faux live edge headboard

15 Ideas and Secrets For Making DIY Wooden Headboards Look Expensive #6: Faux live edge headboard

Or how about using plywood / pine board to create a faux live edge headboard – made by Hunted Interior

7. Getting Crafty – Seeing a Headboard in Other Objects

15 Ideas and Secrets For Making DIY Wooden Headboards Look Expensive #7: Getting crafty

Wall art frames combined with fabric are used to create a headboard – Happiness is Homemade

8. Upgrading an IKEA Bed

15 Ideas and Secrets For Making DIY Wooden Headboards Look Expensive #8: Upgrading a bed

This IKEA bed and headboard gets an upgrade with stick on wooden strips – by Sugar and Cloth

9. Upcycling and Refinishing an Old Headboard

15 Ideas and Secrets For Making DIY Wooden Headboards Look Expensive #9: Upcycling and Refinishing

A very easy way to DIY a wooden headboard is to use an old one, and give it new life. Your old one or a thrifted headboard can be painted for a new style – Doss Decor

10. The Headboard Conversion

15 Ideas and Secrets For Making DIY Wooden Headboards Look Expensive #10: The conversion

An old door can be transformed into a stylish headboard – Infarrantly Creative

Inspiration Corner

Here are a few very stylish wooden headboard ideas that don’t have any DIY instructions – but are pretty straight forward to make.

11. Creating a Pattern

15 Ideas and Secrets For Making DIY Wooden Headboards Look Expensive #11: Creating a pattern

Reclaimed wood, barn wood, or stained pallets, can be arranged into a a designer pattern to form a stylish headboard – Design Sponge

12. Using an Old Window

15 Ideas and Secrets For Making DIY Wooden Headboards Look Expensive #12: Using an old window

An old window gets transformed into a large vintage headboard – Kara Rosenlund

13. Canvas Art

15 Ideas and Secrets For Making DIY Wooden Headboards Look Expensive #13: Canvas art

Canvas art can be mounted onto plywood, and fitted behind the bed to create an artistic headboard – Soldier Sailor

14. Decorative Wooden Blocks

15 Ideas and Secrets For Making DIY Wooden Headboards Look Expensive #14: Wooden blocks

This is the one DIY project I’m eyeing up to do

15. A Wooden Carving Headboard

15 Ideas and Secrets For Making DIY Wooden Headboards Look Expensive #15: Wood carving

A wooden carving makes for a decorative headboard design – which can be painted to match the color palette of your bedroom. This would be an interesting DIY to watch, but until then it can be bought over at Urban Outfitters.

More Furniture DIY Posts:

February 15, 2016 in Bedroom

Batman Plywood DIY Bench Seat With Fire Burning

Batman Plywood DIY Bench Seat With Fire Burning

Batman Plywood DIY Bench Seat With Fire Burning

Batman Plywood DIY Bench Seat With Fire Burning

Batman Plywood DIY Bench Seat With Fire Burning - Step #9 Burning the wood

Batman Plywood DIY Bench Seat With Fire Burning

You can go with any symbol or shape when creating this DIY plywood bench. I went with Batman’s symbol from the Dark Knight.

The legs were burned. It’s what the Japanese call Shou Sugi Ban – where you burn the top layer of the wood which forms a protective layer. I did it, mostly to try it out and to get the dark brown/black stained look. It also raises the grain, so you can feel all of the grooves in the wood.

Batman Plywood DIY Bench Seat With Fire Burning - Materials

Home Tree Atlas DIY Projects

TOOLS

  • Jigsaw

Used to cut the shape out of the plywood

  • Drill

This will be used to drill holes so that the jigsaw’s blade can fit into the plywood

MATERIALS AND SUPPLIES

  • Plywood

I used 3/4 inch

  • Polyurethane

This is what I used to give the plywood a little gloss and to protect it

  • Wood Glue

For the legs, you can save yourself a lot of time by using hairpin legs that can be screwed into the base of the bench.

  • Pine Boards

For the legs I went with 4 pieces of 19 inch by 3.5 inch pine boards. These were 3.5 inches thick. Cedar is what is normally used for Shou Sugi Ban – but I had pine, and it still worked.

  • Torch

My hardware store had Butane canisters and a trigger starter. You can also use this Propane canister with a trigger starter.

  • Wire Brush

This will be used to brush off the soot after burning the legs. Wire Scratch Brush

OPTIONAL

  • Linseed/Tung Oil

This can be used to coat the legs after they have been burned. I left mine as is.

INSTRUCTIONS

Step 1: The template

You can use any symbol (country outline, illustration, etc.) that you want. I went with the Dark Knight symbol. I knew I wanted my bench to be 43 inches long and 12 inches wide, so I printed out my template to fit into that size.

Batman Plywood DIY Bench Seat With Fire Burning - Step #1 The Template

Step 2: Plywood strips

To create the Bat symbol out of plywood i needed to cut 6 pieces of plywood 13 inches by 1 inch.

These strips were then glued together, and clamped.

Batman Plywood DIY Bench Seat With Fire Burning - Step #2 Cutting the plywood strips

Batman Plywood DIY Bench Seat With Fire Burning - Step #2 Glueing the plywood strips

Batman Plywood DIY Bench Seat With Fire Burning - Step #2 Glueing the plywood strips

Step 3: Tracing and cutting the plywood

Once the glue dried, the template was traced onto the plywood block. It was then cut using the jigsaw. You can use the drill to create holes to fit the blade of the jigsaw into, if you have hard to cut areas.

Batman Plywood DIY Bench Seat With Fire Burning - Step #3 Tracing the symbol

Batman Plywood DIY Bench Seat With Fire Burning - Step #3 Cutting the symbol

Batman Plywood DIY Bench Seat With Fire Burning - Step #3 Cutting the symbol

Batman Plywood DIY Bench Seat With Fire Burning - Step #3 Cutting the symbol

Step 4: Cutting the bench

The next step was cutting the boards for the bench. Two plywood sheets – 43 inches by 12 inches.

Batman Plywood DIY Bench Seat With Fire Burning - Step #4 Cutting the bench

Step 5: Cutting the hole

The first step was figuring out the center of the bench, and then tracing the template over it.

Then holes were drilled around the template so that the blade of the jigsaw could fit in and start cutting.

Batman Plywood DIY Bench Seat With Fire Burning - Step #5 Cutting the hole

Batman Plywood DIY Bench Seat With Fire Burning - Step #5 Cutting the hole

Batman Plywood DIY Bench Seat With Fire Burning - Step #5 Cutting the hole

Batman Plywood DIY Bench Seat With Fire Burning - Step #5 Cutting the hole

Step 6: Fitting in the plywood bat symbol

Some sanding was needed to fit the bat into the bench.

Batman Plywood DIY Bench Seat With Fire Burning - Step #6 Fitting in the Bat symbol

Step 7: Gluing the bench together

Once the bat was inside of the top bench sheet, the two plywood sheets that made up the bench were then glued and clamped together.

Batman Plywood DIY Bench Seat With Fire Burning - Step #7 Glueing the bench together

Batman Plywood DIY Bench Seat With Fire Burning - Step #7 Glueing the bench together

Step 8: Making the legs

The legs are 19 inches high. And a slot was cut out of them so they could fit onto the bench. The slot was 1.5 inches wide (to fit two layers of 3/4 inch plywood into it) and 3/4 inch deep. The slots were cut 16 and 1/4 inches from the bottom.

Batman Plywood DIY Bench Seat With Fire Burning - Step #8 Making the legs

Batman Plywood DIY Bench Seat With Fire Burning - Step #8 Making the legs

Batman Plywood DIY Bench Seat With Fire Burning - Step #8 Making the legs

Step 9: Burning the wood

I had a fire extinguisher nearby just in case. But at no time did I ever feel as if I needed it. Just do it in an open space. STAY AWAY FROM SAWDUST. Don’t be burning near any work areas that have saw dust.

I set my torch to the lowest setting. You are just burning the top layer, so it is completely black. Sometimes the wood does catch on fire, and you just need to blow it out.

After you have covered all sides, hose it down.

Batman Plywood DIY Bench Seat With Fire Burning - Step #9 Burning the wood

Batman Plywood DIY Bench Seat With Fire Burning - Step #9 Burning the wood

Batman Plywood DIY Bench Seat With Fire Burning - Step #9 Burning the wood

Batman Plywood DIY Bench Seat With Fire Burning - Step #9 Burning the wood

Batman Plywood DIY Bench Seat With Fire Burning - Step #9 Burning the wood

Step 10: Brushing off the soot

Once the wood has dried, grab the metal brush and softly brush away the top layer of soot. You’ll be left with a beautiful texture and color.

Batman Plywood DIY Bench Seat With Fire Burning - Step #10 Brushing off the soot

Batman Plywood DIY Bench Seat With Fire Burning - Step #10 Brushing off the soot

Batman Plywood DIY Bench Seat With Fire Burning - Step #10 Brushing off the soot

Batman Plywood DIY Bench Seat With Fire Burning - Step #10 The Shou Sugi Ban bench legs

Step 11: Cutting the bench

The bench can be cut after the glue has dried. These slots are for the legs to fit into. These slots were 3/4 inch wide (the same as the thickness of the legs) and 1 inch deep.

Batman Plywood DIY Bench Seat With Fire Burning - Step #11 Cutting the bench

Step 12: Adding the gloss

I added 3 coats of polyurethane. Waiting 2-3 hours in-between each coat and sanding it down after each coat.

Batman Plywood DIY Bench Seat With Fire Burning - Step #12 Adding the gloss

Step 13: Cross bracing

To add some stability to the legs, I added a cross piece that connects the two legs together. These pieces were burned too, and screwed into the legs.

Batman Plywood DIY Bench Seat With Fire Burning - Step #13 Adding the cross bracing

Batman Plywood DIY Bench Seat With Fire Burning - Step #13 Adding the cross bracing

Batman Plywood DIY Bench Seat With Fire Burning

Batman Plywood DIY Bench Seat With Fire Burning

Batman Plywood DIY Bench Seat With Fire Burning

Batman Plywood DIY Bench Seat With Fire Burning

Email me at jacob@hometreeatlas.com with photos if you make your own, or if you have any questions.

Home Tree Atlas DIY Projects

Related Posts Plugin for WordPress, Blogger...
February 12, 2016 in Made By HtA